How To Paint Pumpkins And Turn Them Into Lovely Fall Decorations
It’s pumpkin season and that means we get to have fun decorating our homes with this fruit, not just on Halloween but also throughout the season. Pumpkin carving can sure be fun but if you don’t want to deal with all that mess or you want to avoid using sharp utensils, there’s a great alternative to that: pumpkin painting. Check out the projects below an see for yourself all the cool and creative ways in which you can approach this challenge.
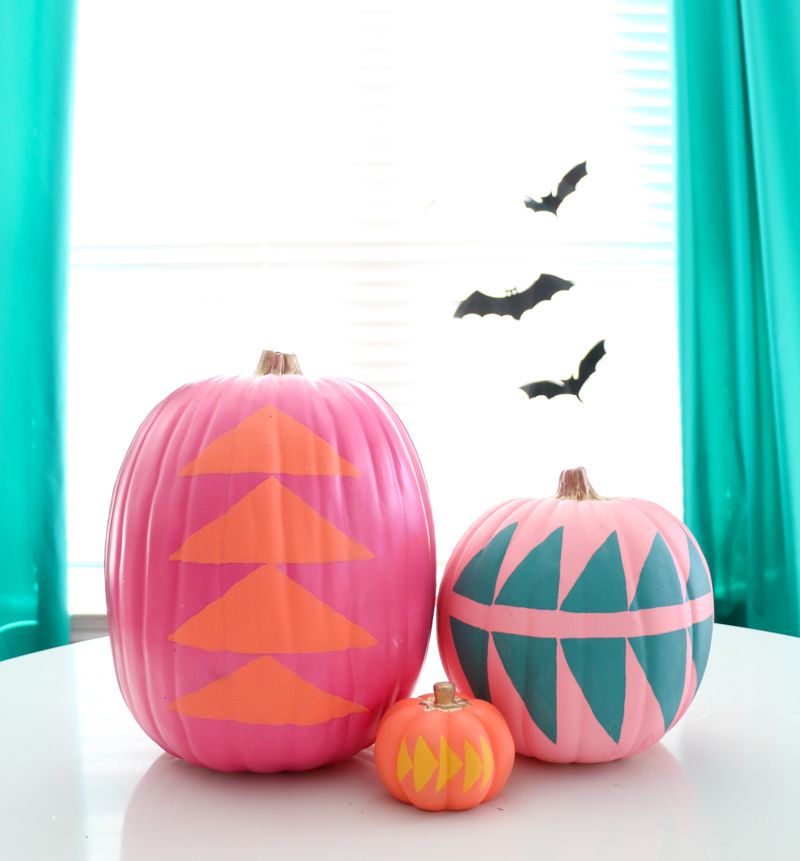
Geometric designs are super easy to pull off and that also works when painting pumpkins. If you want to get clean lines you can use painter’s tape. Play around with different patterns and sketch something on paper first to get an idea of how it might look like. Check out akailochiclife for more details.
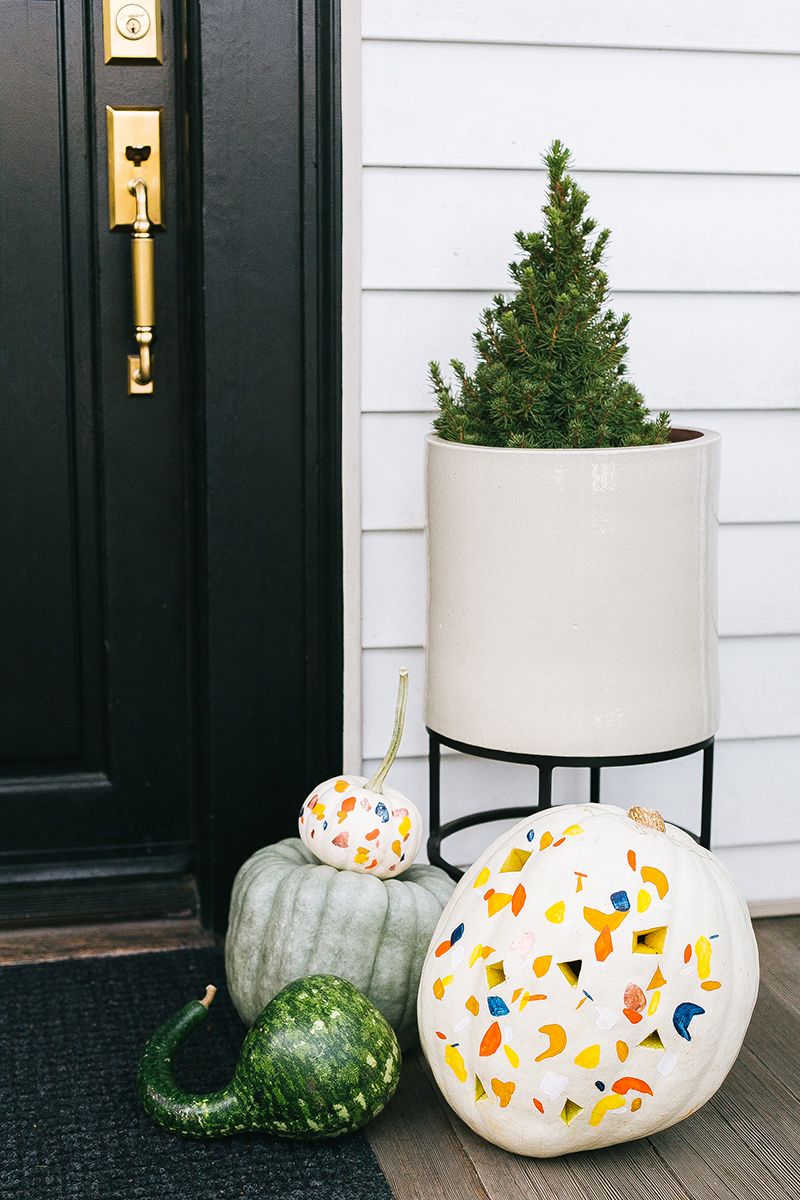
Also, you can also carve the pumpkin to give it that glowing effect that’s not necessarily a must. It can still look great with paint on only Give it that terrazzo effect by painting small geometric in random spots and using different colors for them. For added charm you can also paint the stem. Find out more from jojotastic.
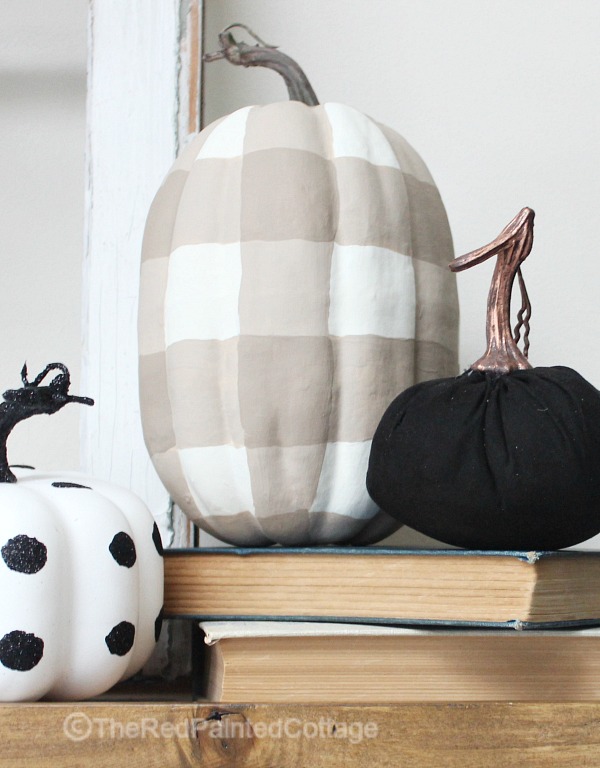
This buffalo plaid pumpkin featured on theredpaintedcottage looks really nice and is also pretty easy to do as well. You start by painting the stripes and then you fill in the gaps to get that checker pattern. Use your favorite colors or stick with black and white for a classic and timeless look.
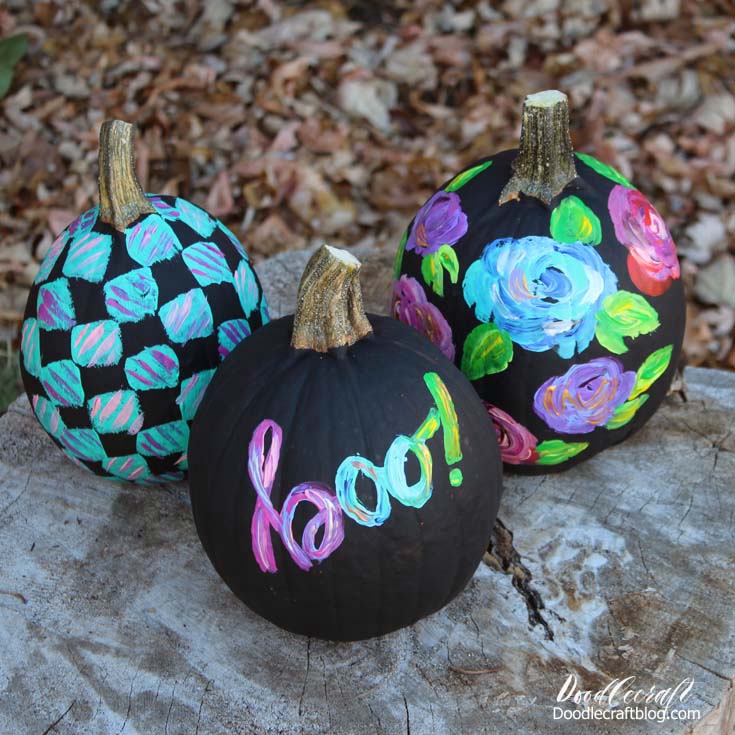
Use acrylic paints to get rich and vibrant colors on your pumpkins. To get even stronger contrasts you can first apply a coat of black spray paint on the pumpkins. A matte finish would suit this project best. The floral pattern featured on doodlecraftblog is a cool example of how you can approach the rest of this project.
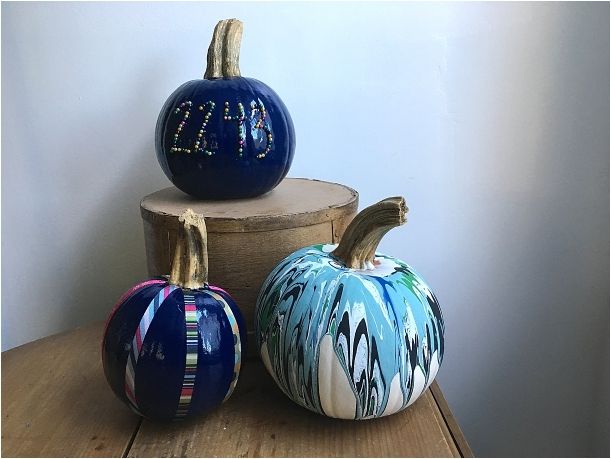
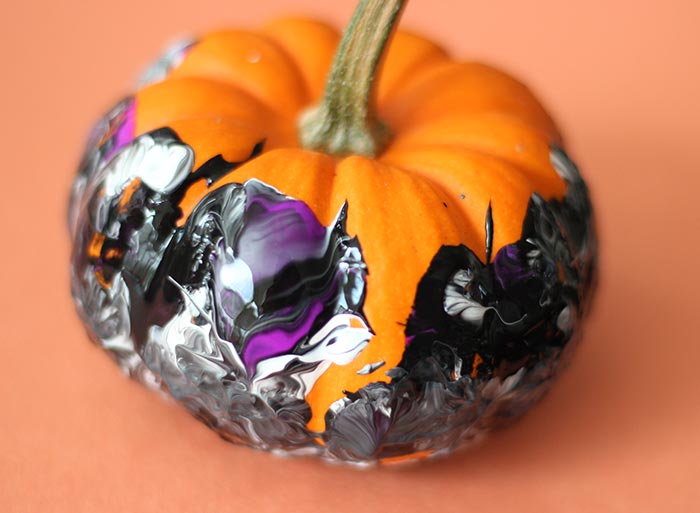
There are several ways in which you can decorate your pumpkins without actually carving them. You can use decorative tape, push pins and of course paint to make them look pretty and stand out. If you choose paint, a cool option can be to create this abstract melting effect by pouring the paint on the pumpkin and letting the colors blend together. You can find more details on hillcitybride.
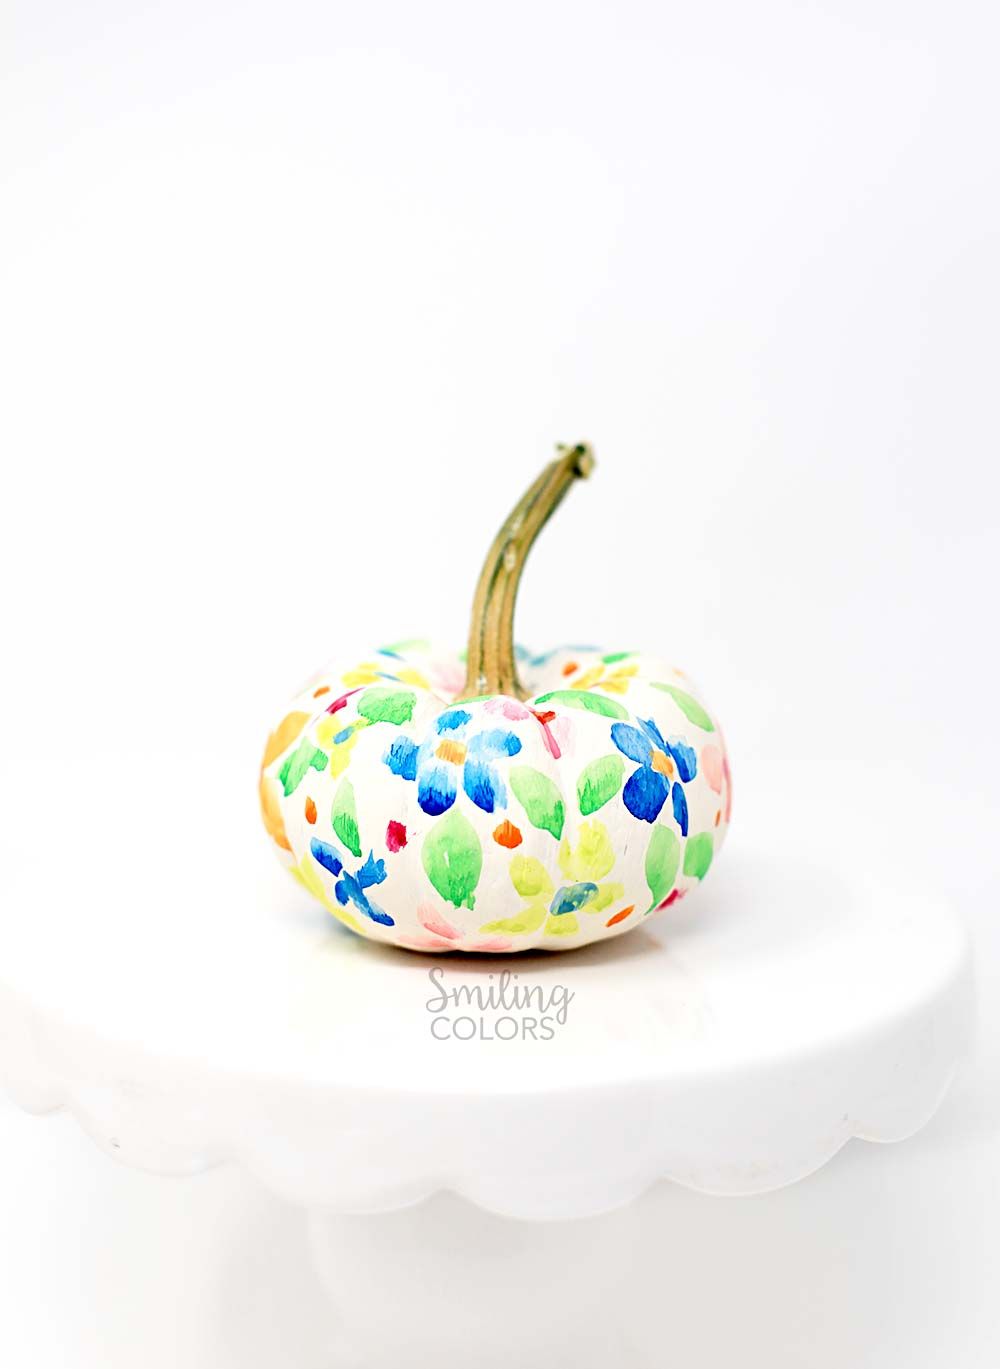
Watercolors can give you that soft and whimsical look that you want, as opposed to acrylic which are best is you want deep and rich colors. To make the watercolors more visible you should first paint the pumpkin white so you have a clean base to start from. The floral design featured on smilingcolors seems like a nice choice in this case.
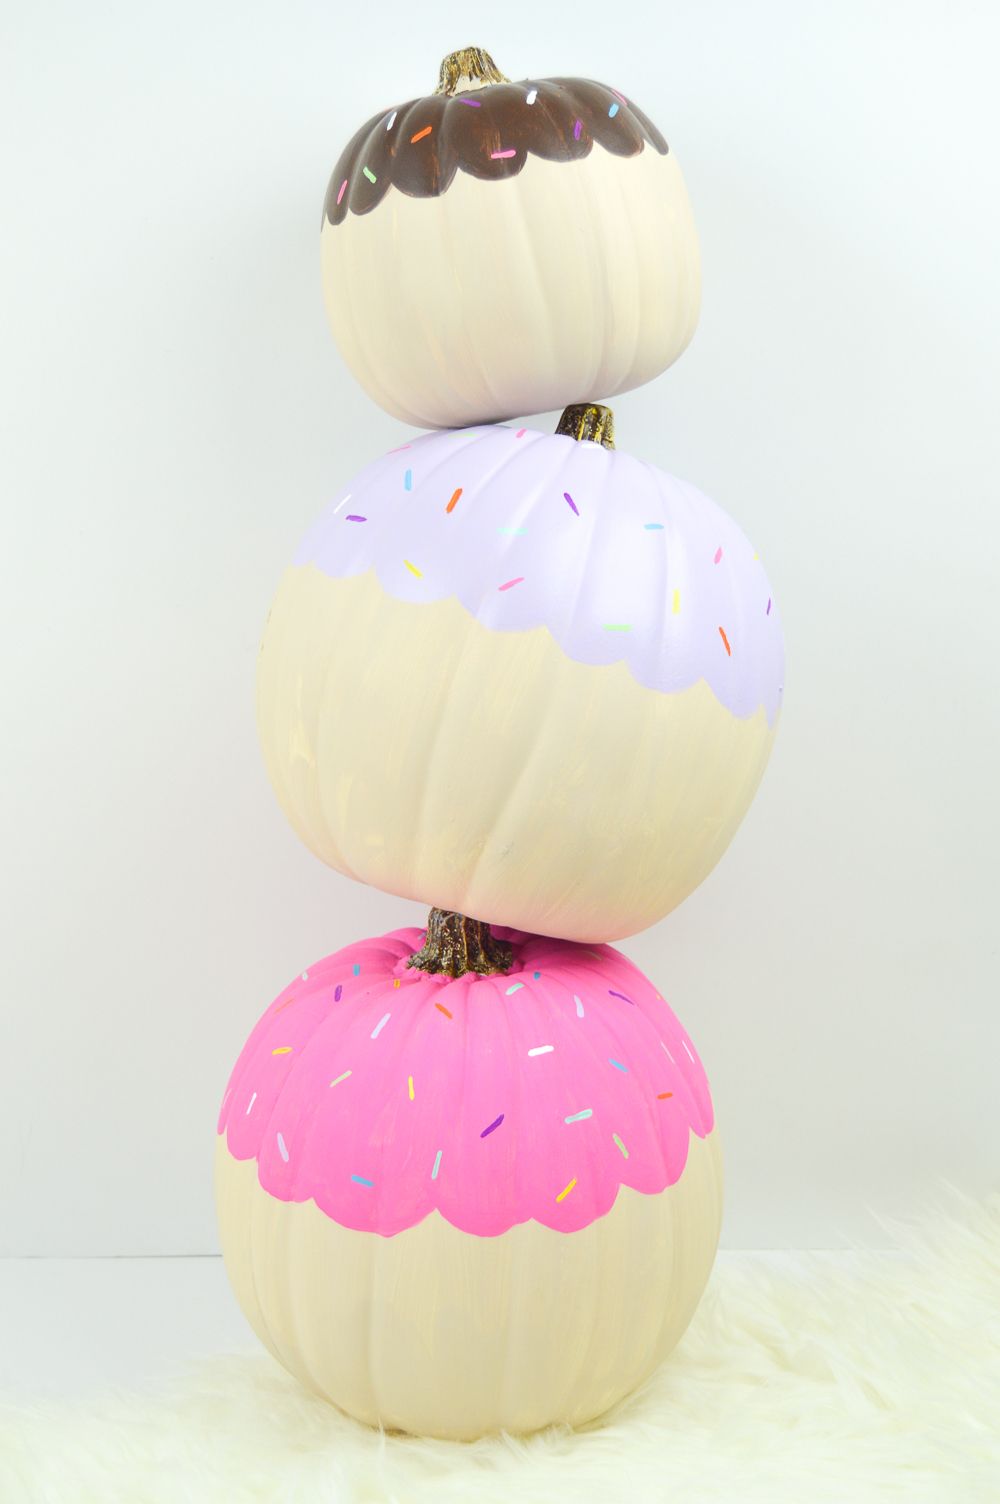
Want a design that’s easy to pull off and that also looks adorable? How about these cute cupcake pumpkins from clubcrafted? All you need for this is some white pumpkins, cream colored paint, additional paint in several bright colors and paint brushes. Don;t forget the sprinkles. We suggest using acrylic paints.
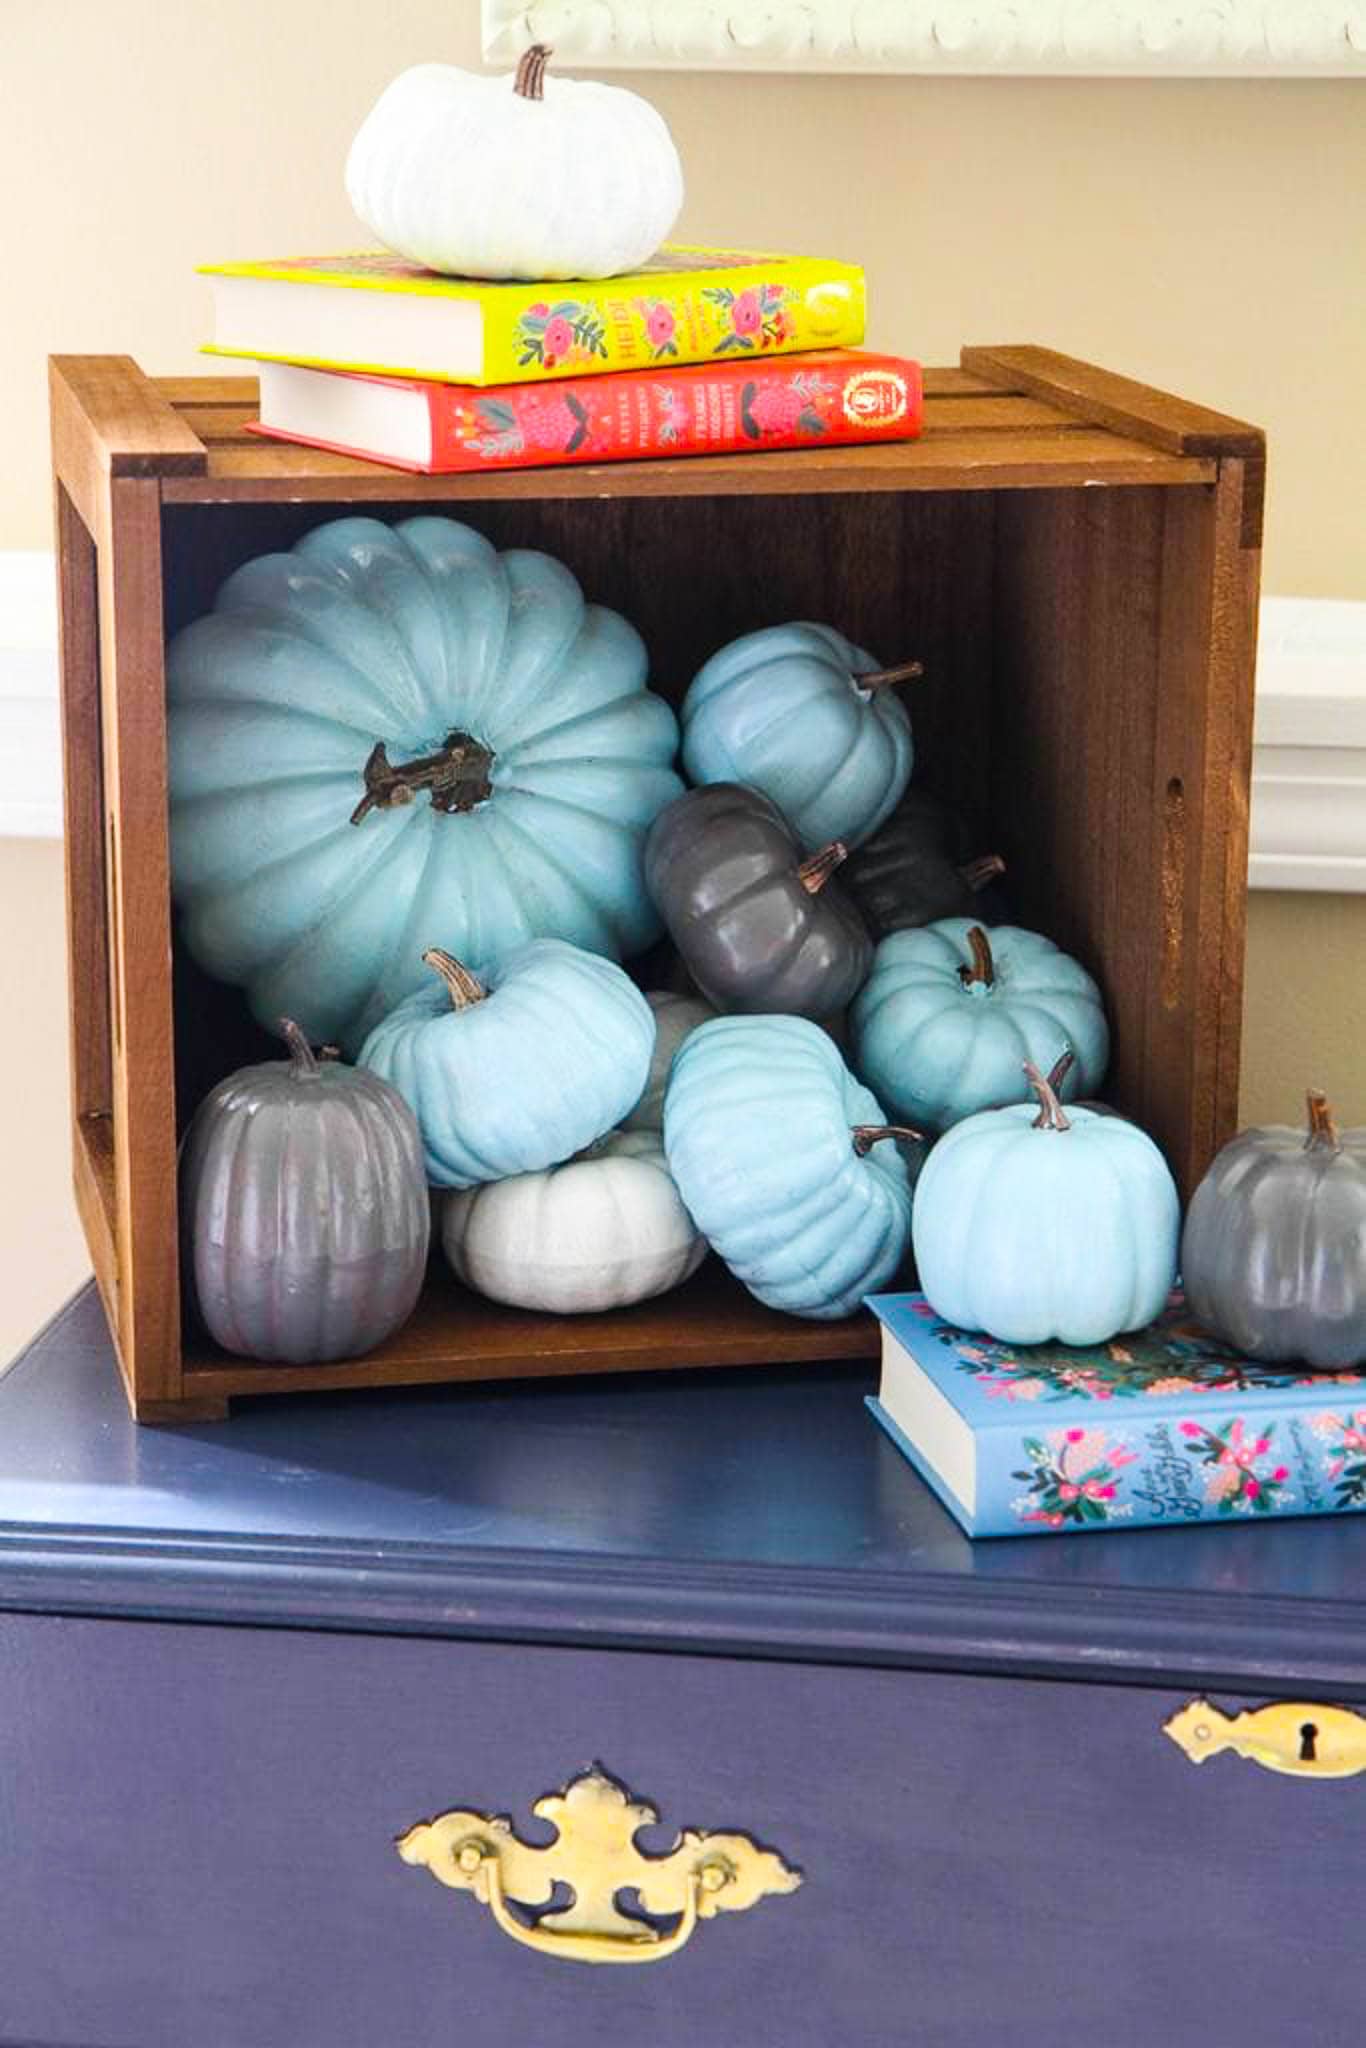
You can also just simply paint pumpkins in a single color, no pattern or crazy design needed. The idea is to have several pumpkins painted using different colors or different shades of the same color and then to display them together in a box, basket or just casually on the mantel or the floor. This is an idea that comes from momadvice.
Can you believe you can get this crazy pattern on a pumpkin without making a mess in the process? The secret is to use a container big enough for the pumpkin to freely move around inside. Pour some paint into the container, two or three colors should do, then place the pumpkin inside, close and lid and shake it up. The kids will love this project. Check out sunnydayfamily for more details.
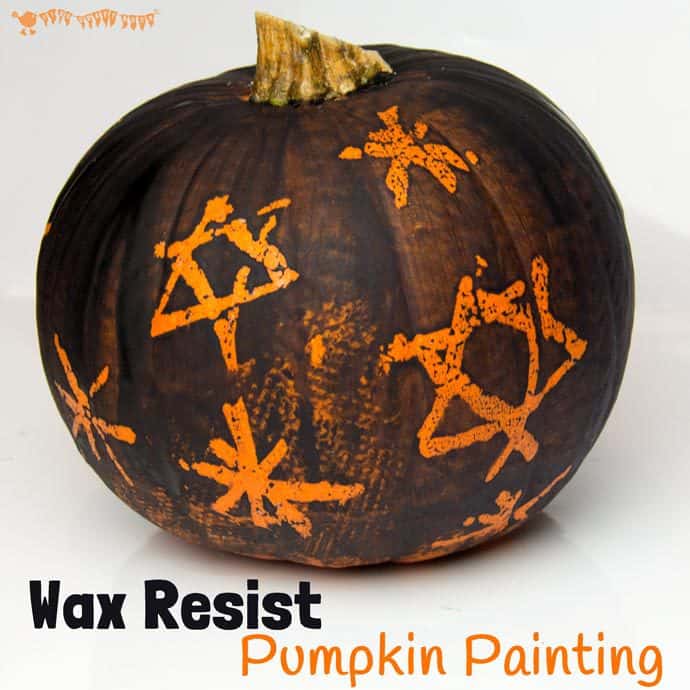
Another cool trick is to use a candle to paint or draw onto the surface of a pumpkin and then to paint it. The paint won’t stick to the drawing because of the wax, revealing the design that you created. You can make some pretty unique decorations using this technique. Check out kidscraftroom to find out more about the project.
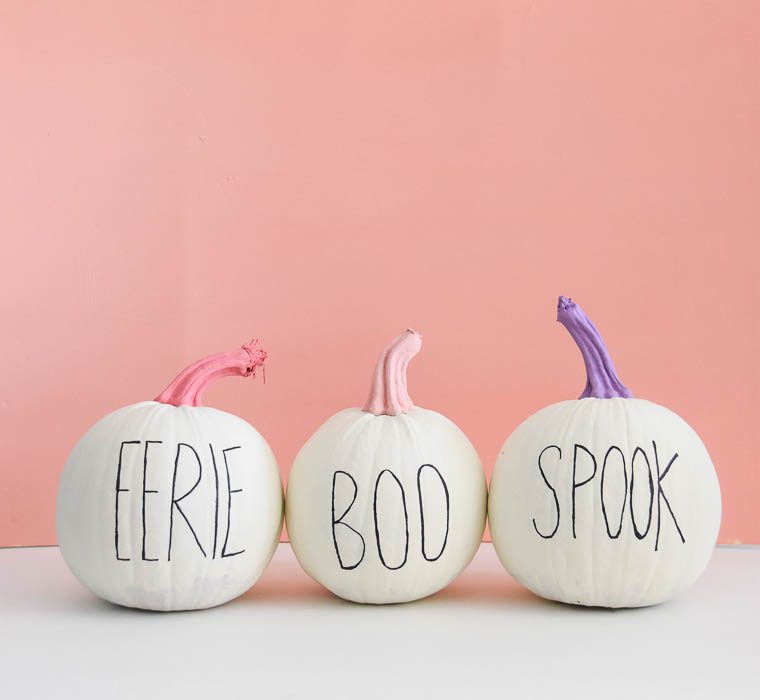
Minimalism can also be a strategy. A lovely example in this sense comes from thesweetestdigs. To get painted pumpkins as sweet and beautiful as these ones you’re going to need plenty of white paint (cream would look nice too), pastel paints for the stems and a black sharpie marker (optional).
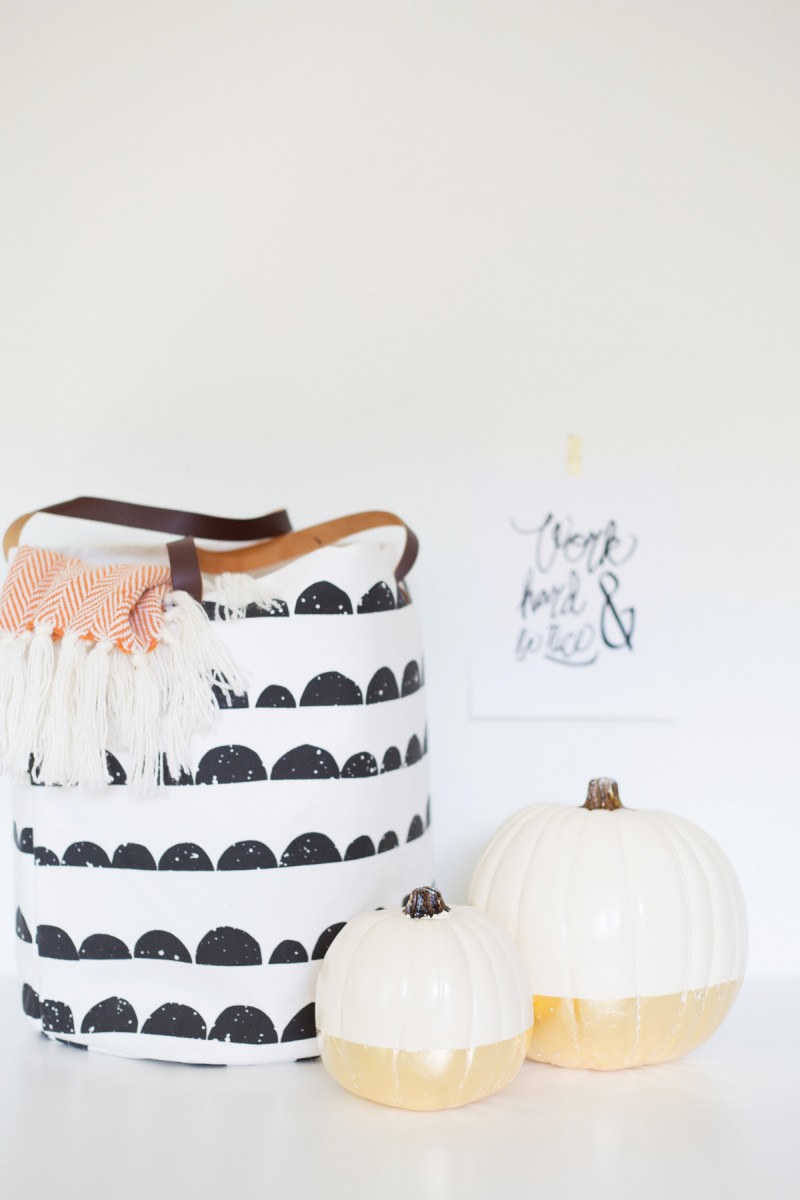
Want to give your pumpkins a glamorous touch? You can use gold leaf. If you’re using white pumpkins or the faux kind you don’t even have to paint them first because they’ll already have a clean and uniform surface so you can just go ahead and apply the gold leaf to their bottom sections using special adhesive. For details, check out lovelyindeed.
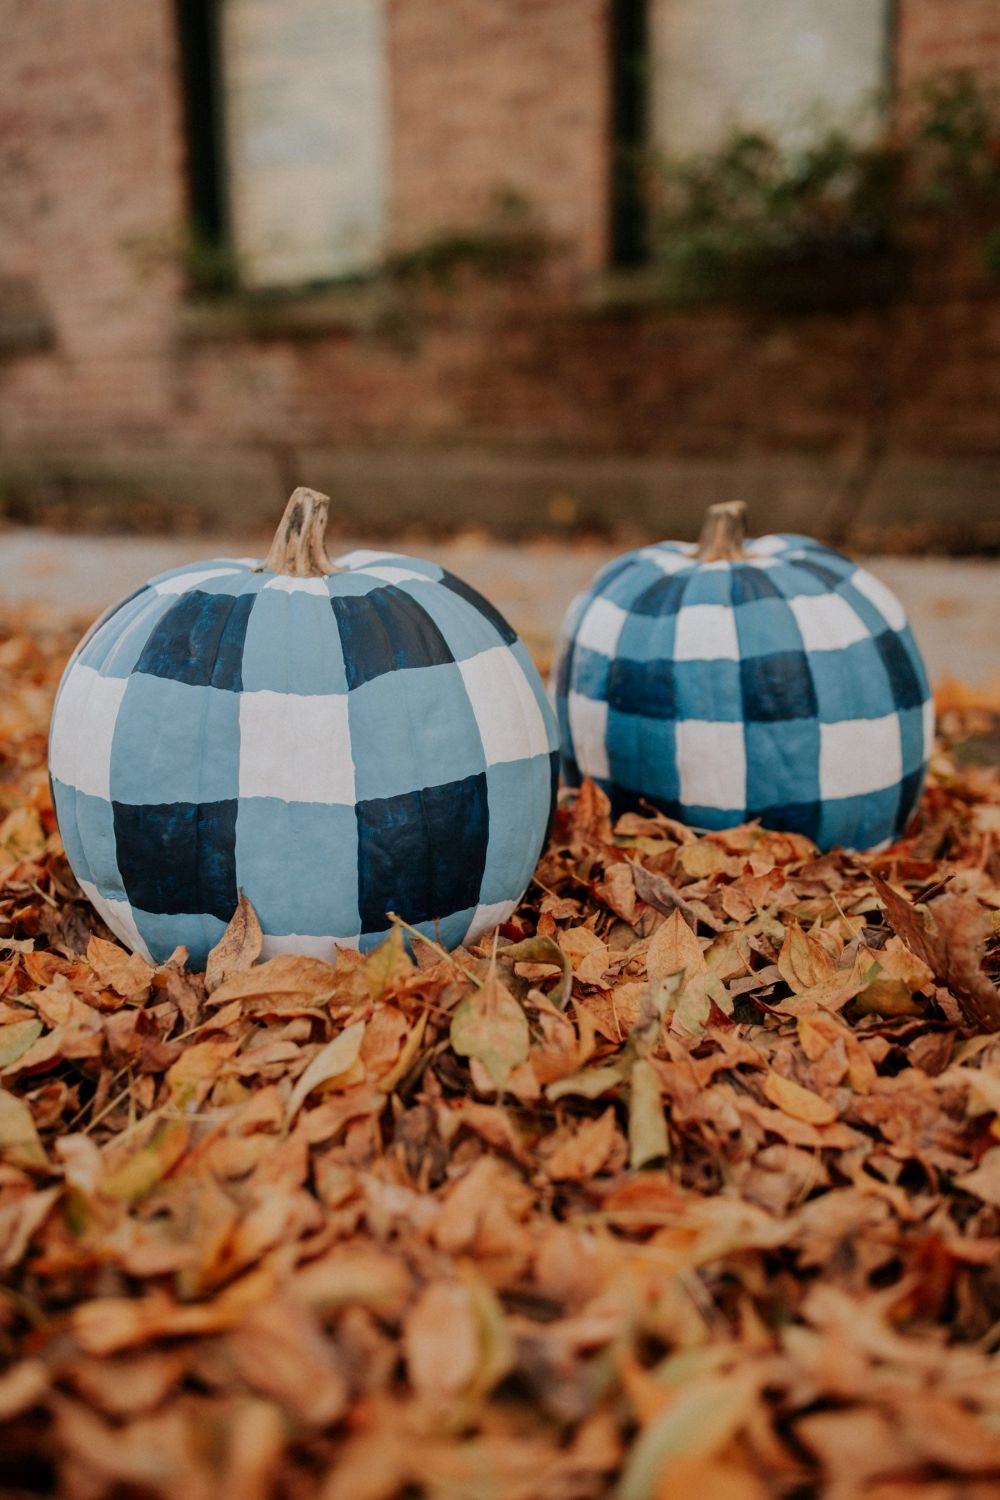
On kellyinthecity you can find out all the details and instructions you need in order to create gingham pumpkins. Believe it or not, it’s actually very easy. Start with a white pumpkin (you may need white paint for this) and then paint vertical stripes of a different color following the natural lines of the pumpkin. Paint vertical stripes by filling in the gaps and at the end use darker paint on the areas where the vertical and horizontal lines intersect.
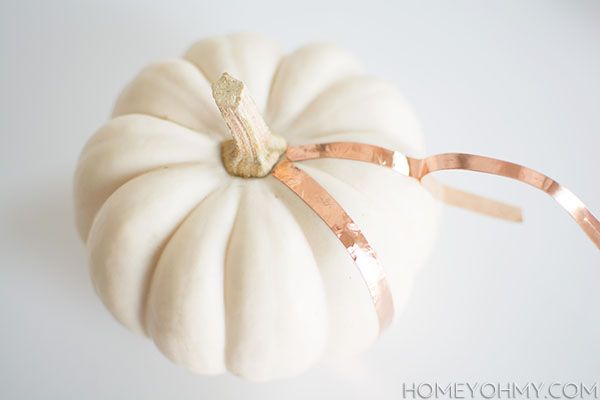
Technically there’s no paint involved in this project from homeyohmy but you could use metallic paint instead of copper tape if you wanted to plus you could also paint the pumpkins in case they’re not already white. Either way, this looks very stylish.
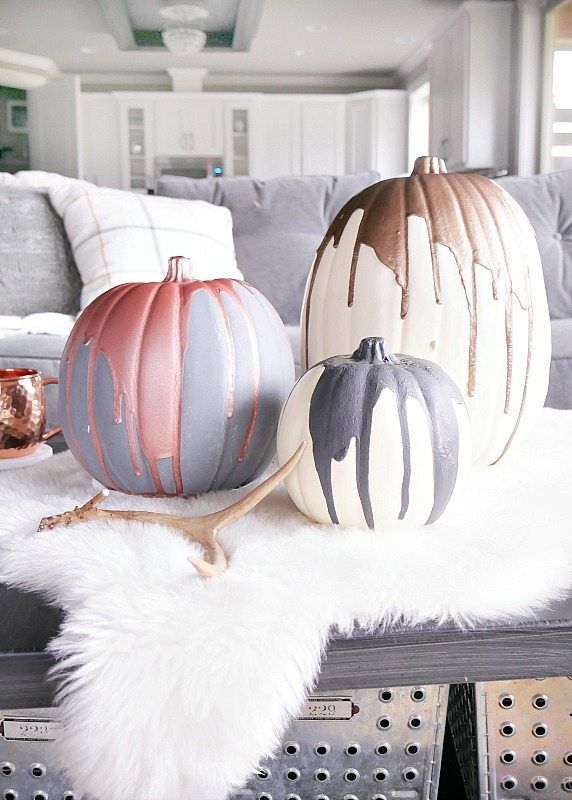
To get cool-looking pumpkins like these ones all you have to do is pour some paint on them and letting it drip to the sides and dry. You might need to paint the whole pumpkin first in case you want to change its base color. You can find the details on tarynwhiteaker.
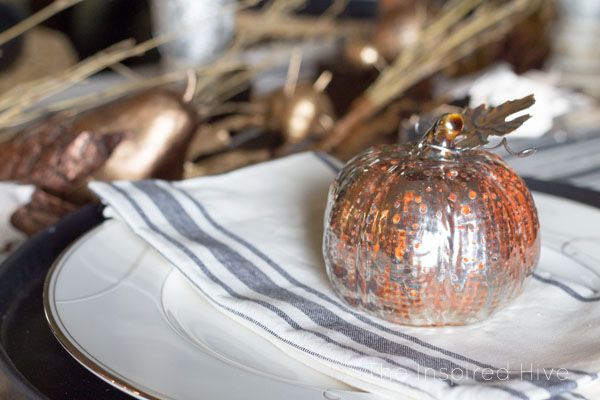
These painted pumpkins sure look unusual. First of all they’re ceramic pumpkins which partially explains their appearance but there’s also that odd pattern on them. You can create something similar using water, vinegar, glass spray paint, a spray bottle and a paper towel. All the details can be found on theinspiredhive.
The post How To Paint Pumpkins And Turn Them Into Lovely Fall Decorations appeared first on Home Decorating Trends – Homedit.