Glass Bottle Cutter: Basic Tutorial and Product Reviews
You may have seen a bunch of DIY projects popping up online lately involving glass bottle cutting. I will be the first to admit that I was hesitant to try this DIY method because cutting glass just seems so, I don’t know, messy and risky. The reviews I’ve read have been all over the place, from people claiming the process couldn’t be easier to others illustrating how bottle cutting just can’t be done well.
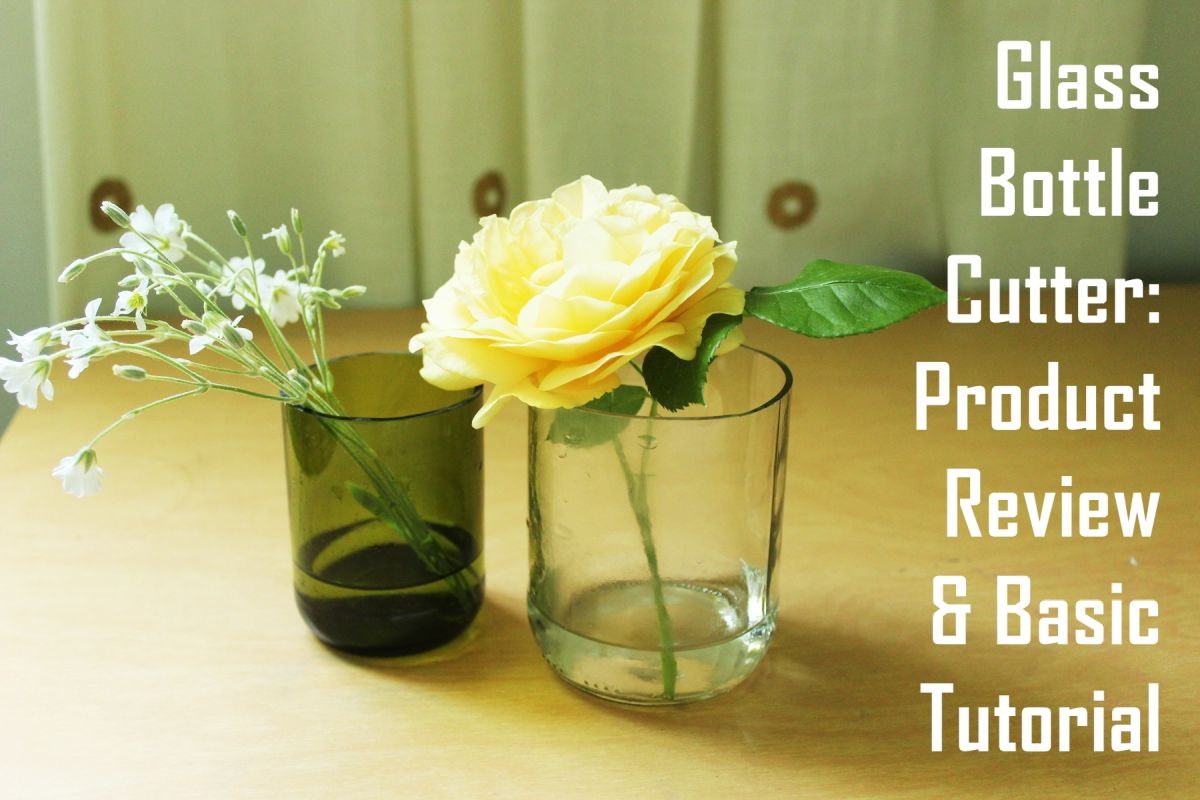
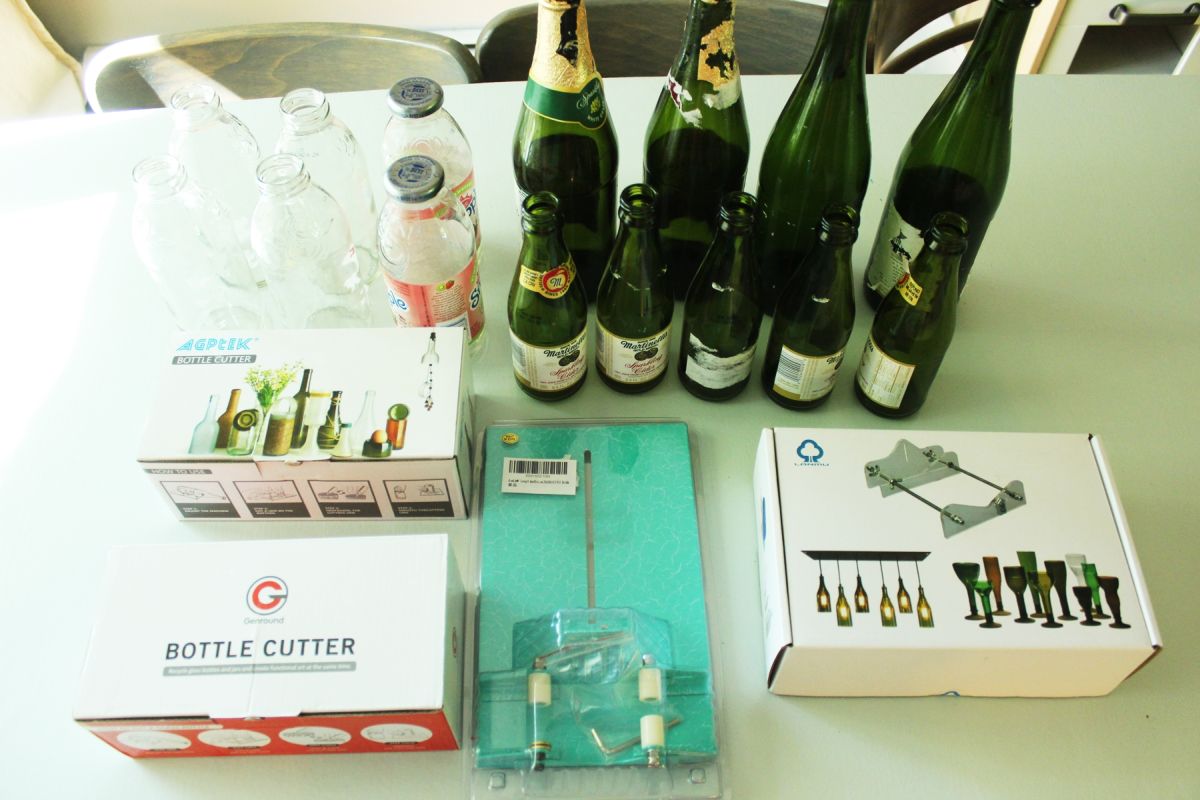
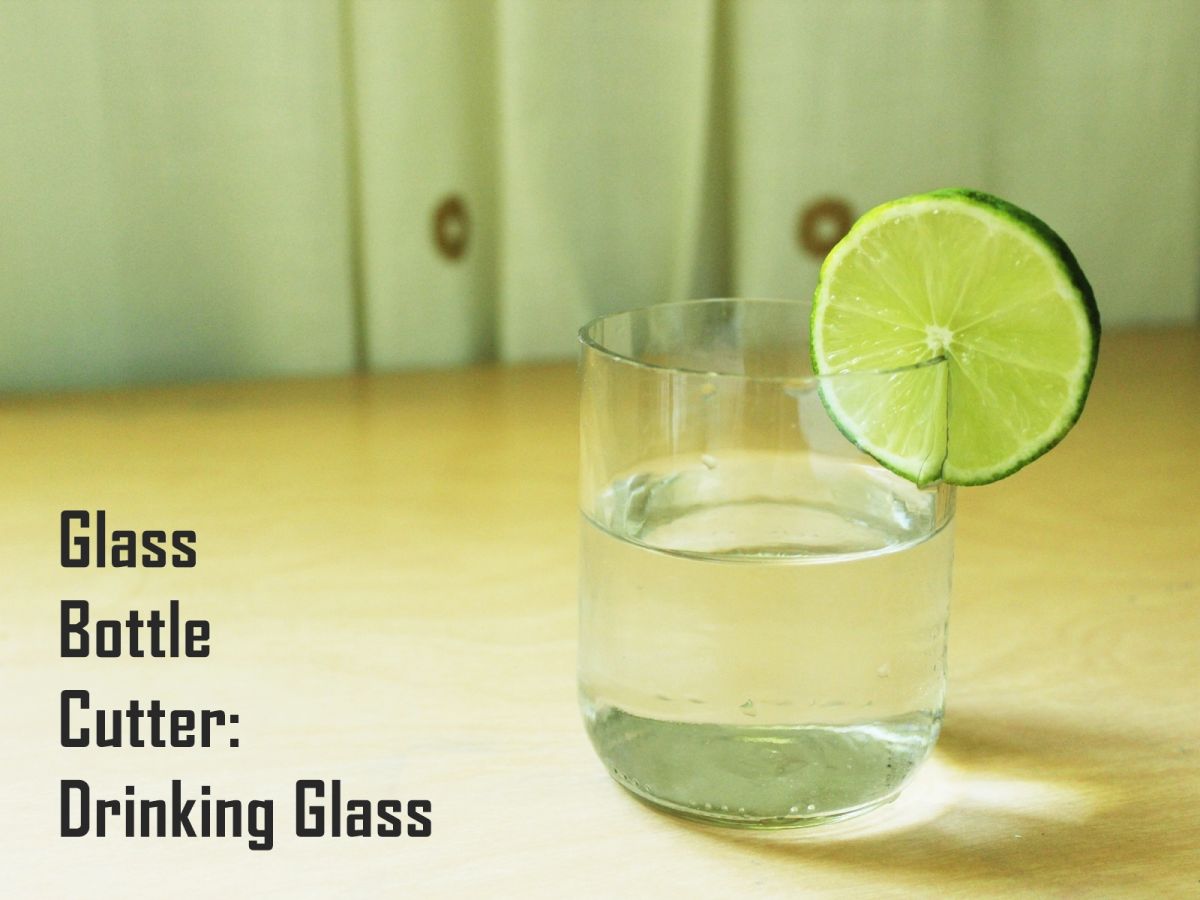
To see for myself, I ordered four glass bottle cutter kits online and will review the process of using them for you in this tutorial. I’ll show you how to make a drinking glass, a flower vase, a parfait bowl, and a candle cover.
Materials Needed:
- Glass bottles (lots and lots)
- Emery sanding paper
- Boiling water (recommended in tea kettle or easy-to-pour bottle)
- Ice water bath
- Silicone oven mitt/glove (optional, but highly recommended)
- Goof off (optional, but highly recommended)
*Warnings: This project involves cut glass, very hot water and tiny glass pieces.
Glass Bottle Cleaning Process
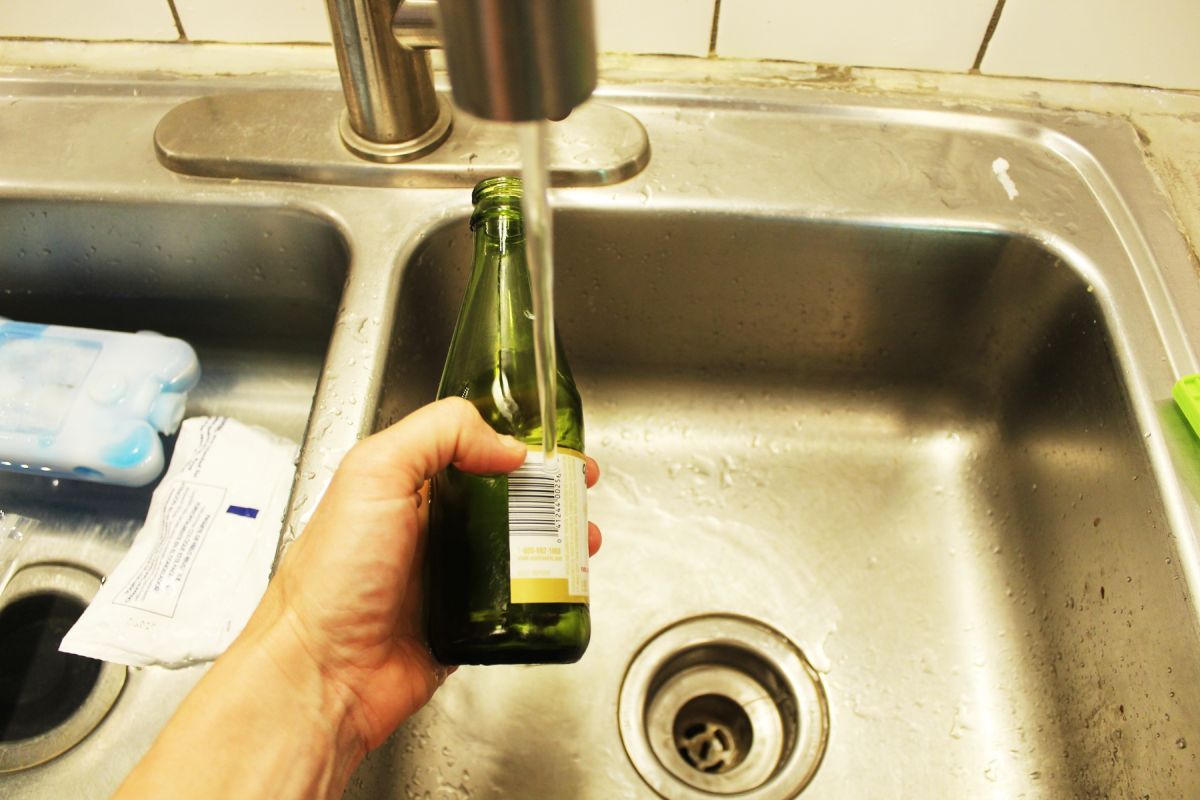
Begin by removing all paper and glue from your bottles. (I didn’t necessarily do this, as you’ll see in some of the tutorial photos, and I discovered it’s much easier to do initially.) Soak the paper labels under hot water.
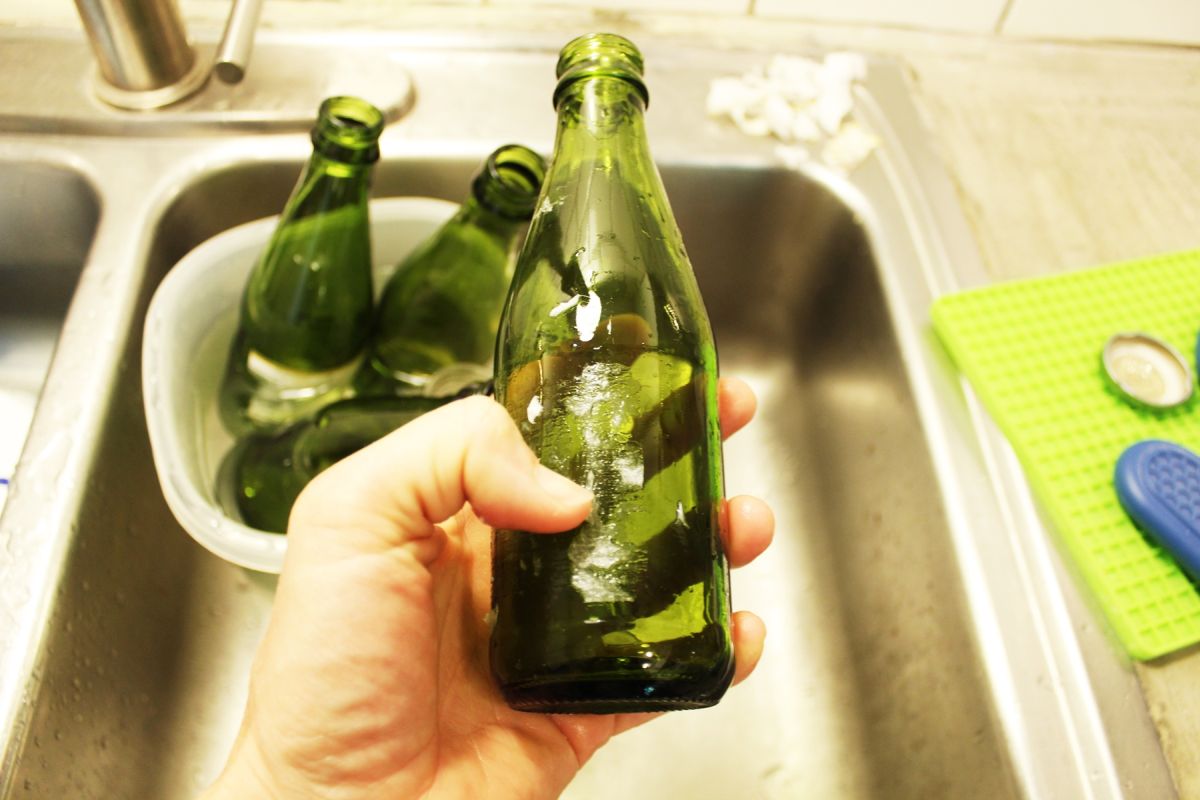
Remove as much of the paper and glue as you can with your fingernail or a scraper of some sort.
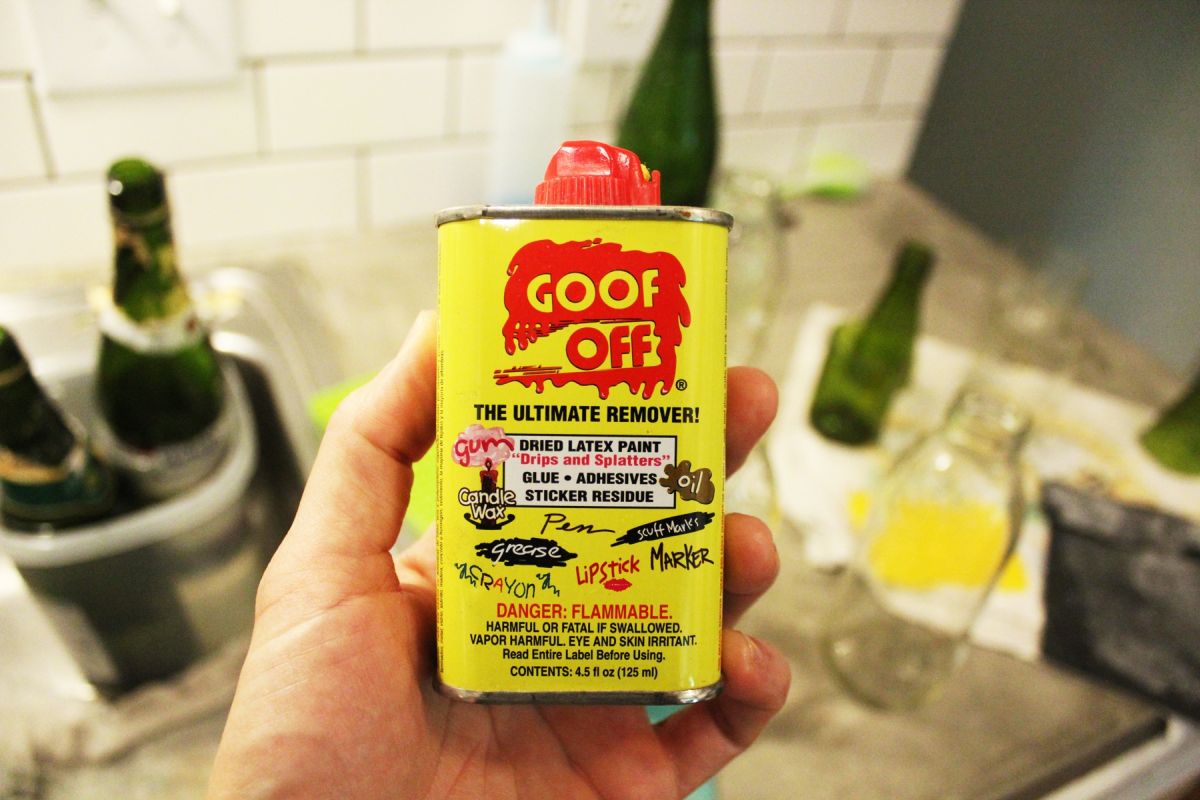
For particularly sticky glue bits, I highly recommend using an adhesive remover such as Goof Off.
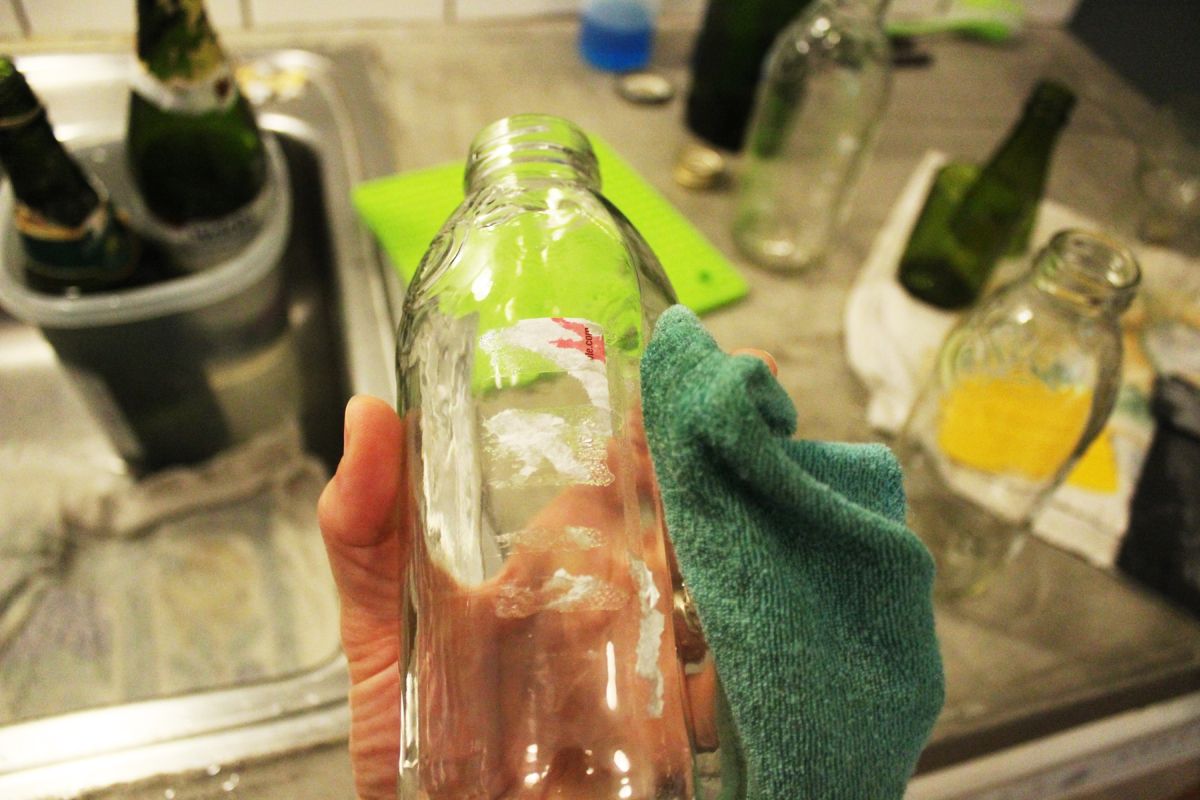
Pour a little bit on a disposable rag, and rub at the glue until it’s gone.
You can see here the glass is clear after just a few seconds of rubbing. If you use Goof Off, it’s best to remove all paper first with a scraper before applying Goof Off.
Our Top 4 Bottle Cutters Picks
1. AceList Long Glass Bottle Cutter Machine
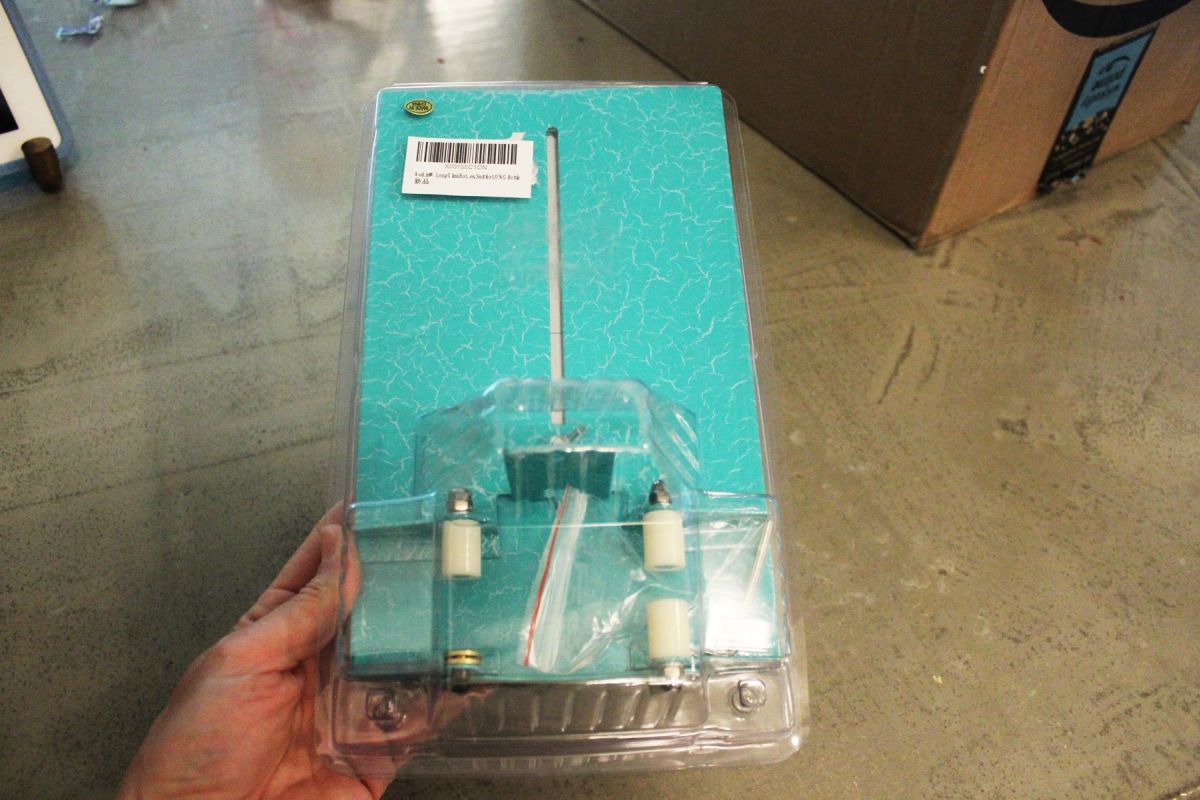
Bottle Cutter 4: AceList – available here.
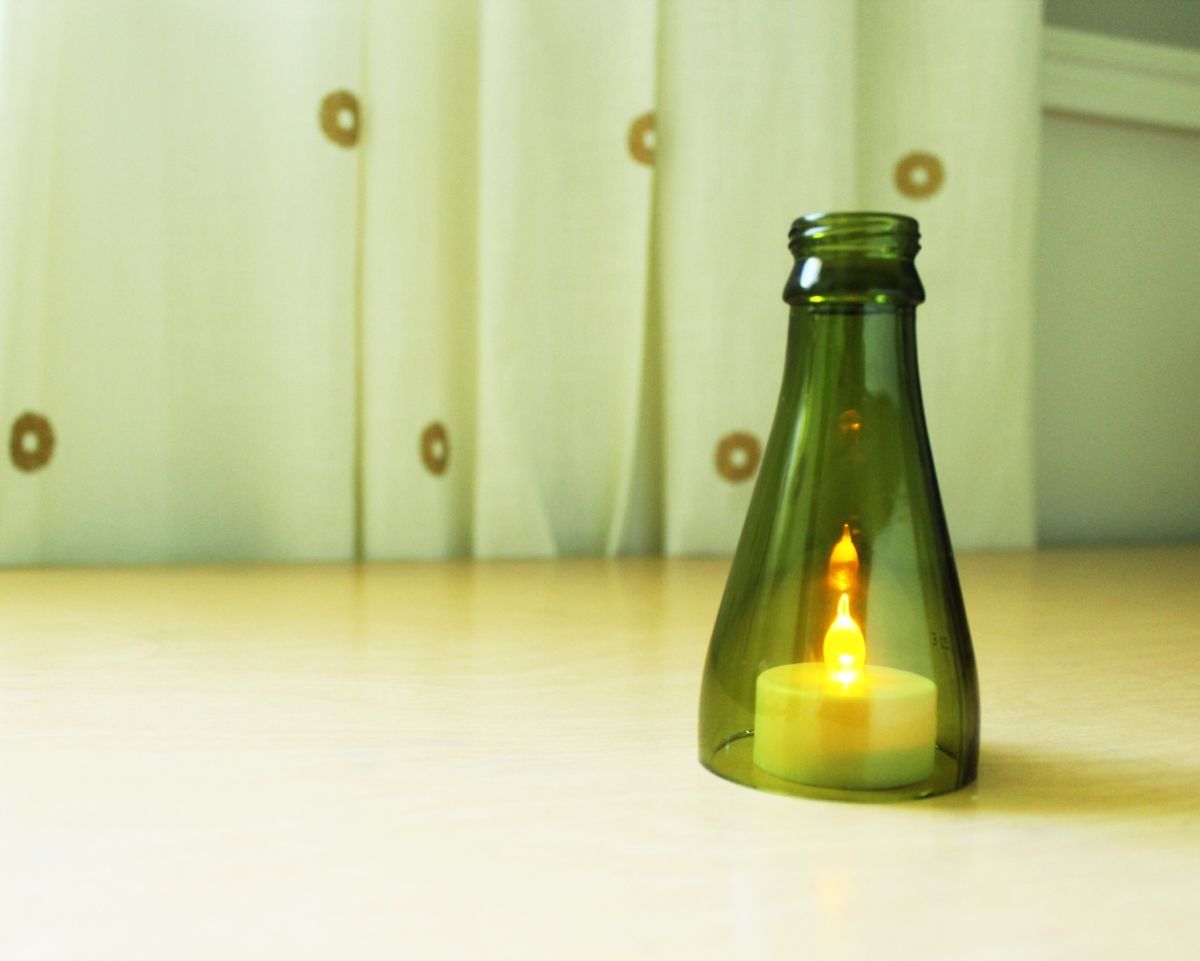
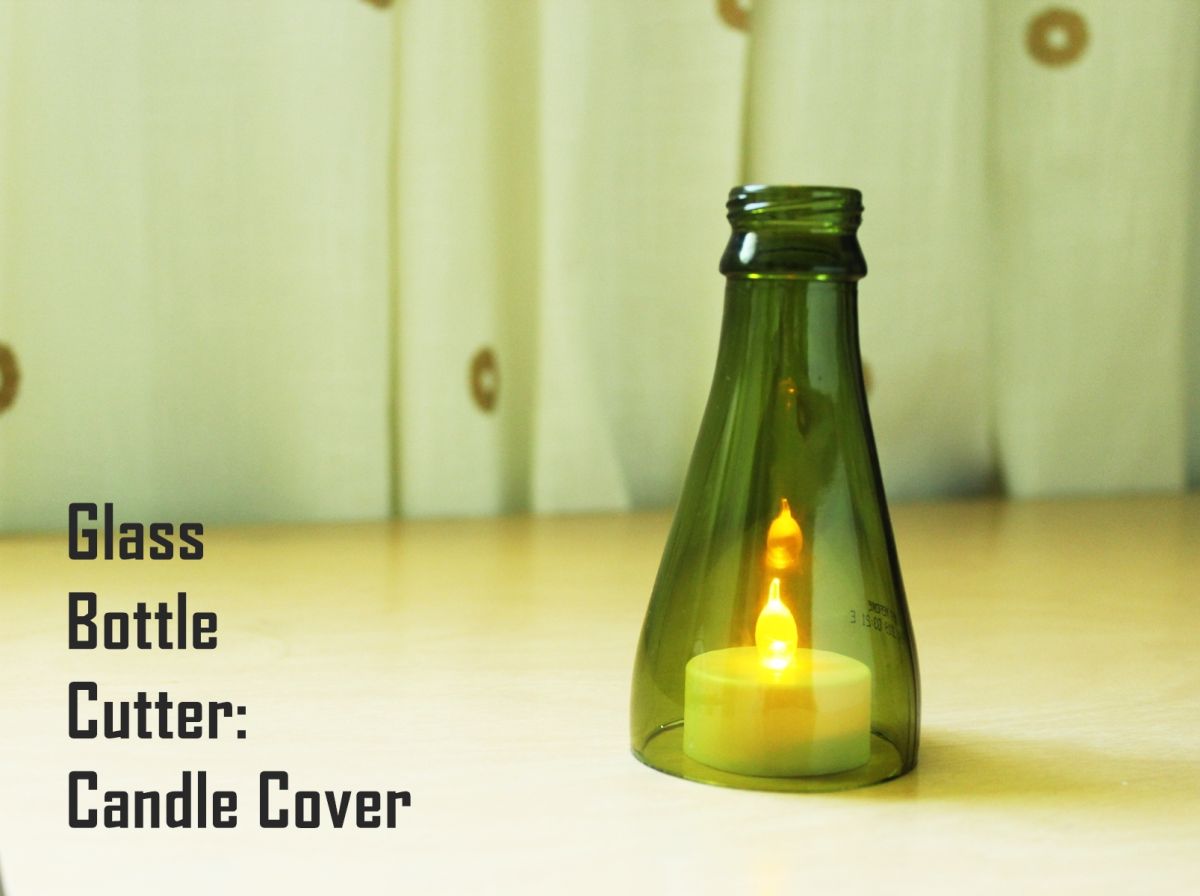
With this bottle cutter, I made a candle cover. These would be perfect for wedding centerpieces or front porch or patio décor in the summer evenings.
I had high hopes for the Ace List bottle cutter. What a cute aqua color for the base! It’s very similar in layout to the Genround and AceList, with a wing nut adjustment for the length of the bottle cut.
After the length and scoring blade have been adjusted to your liking, score the bottle pressing firmly but gently down and keeping the bottle secure against the base while you rotate it with two hands.
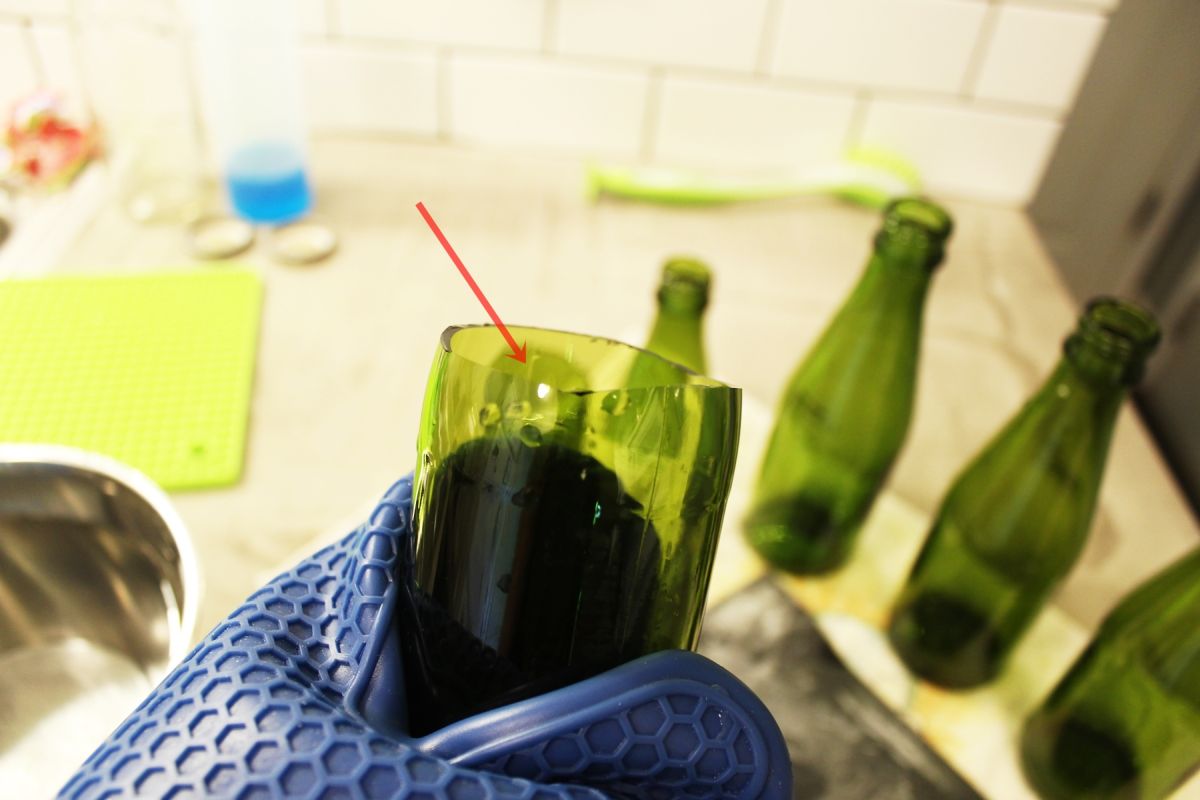
This score line looks a little deep, but we’ll give it a try.
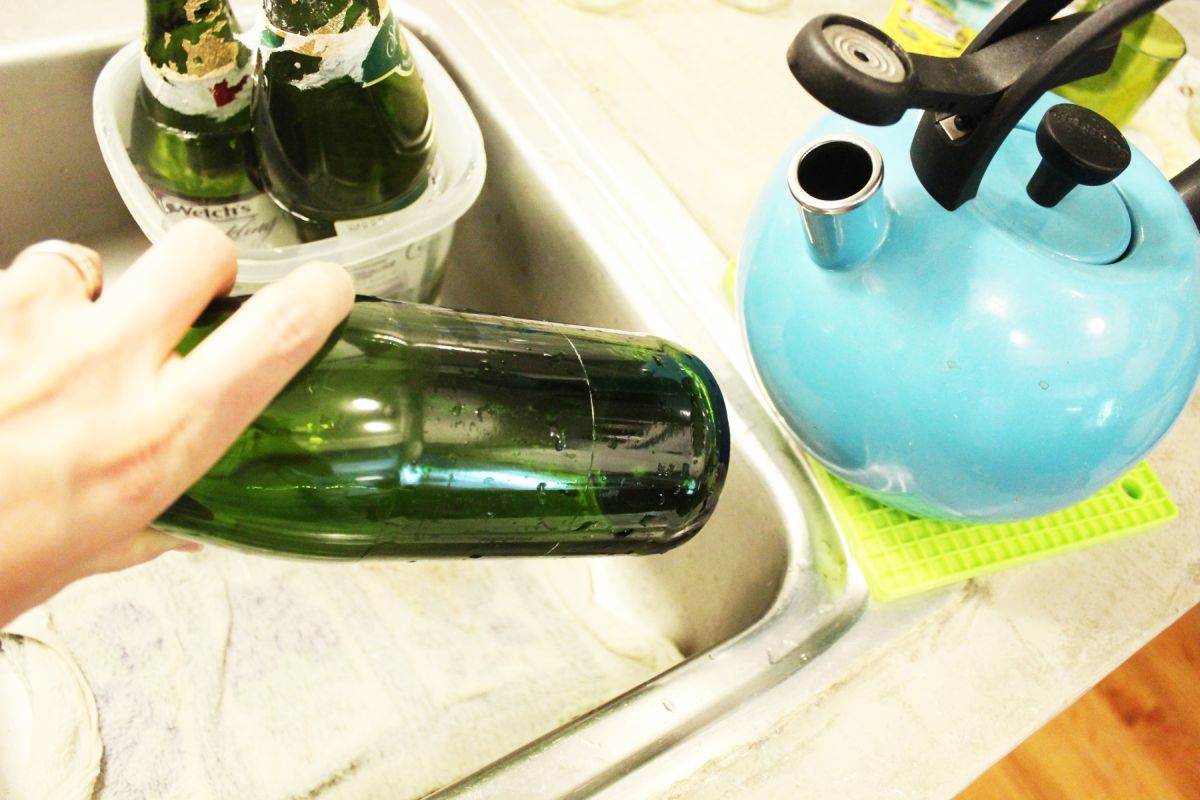
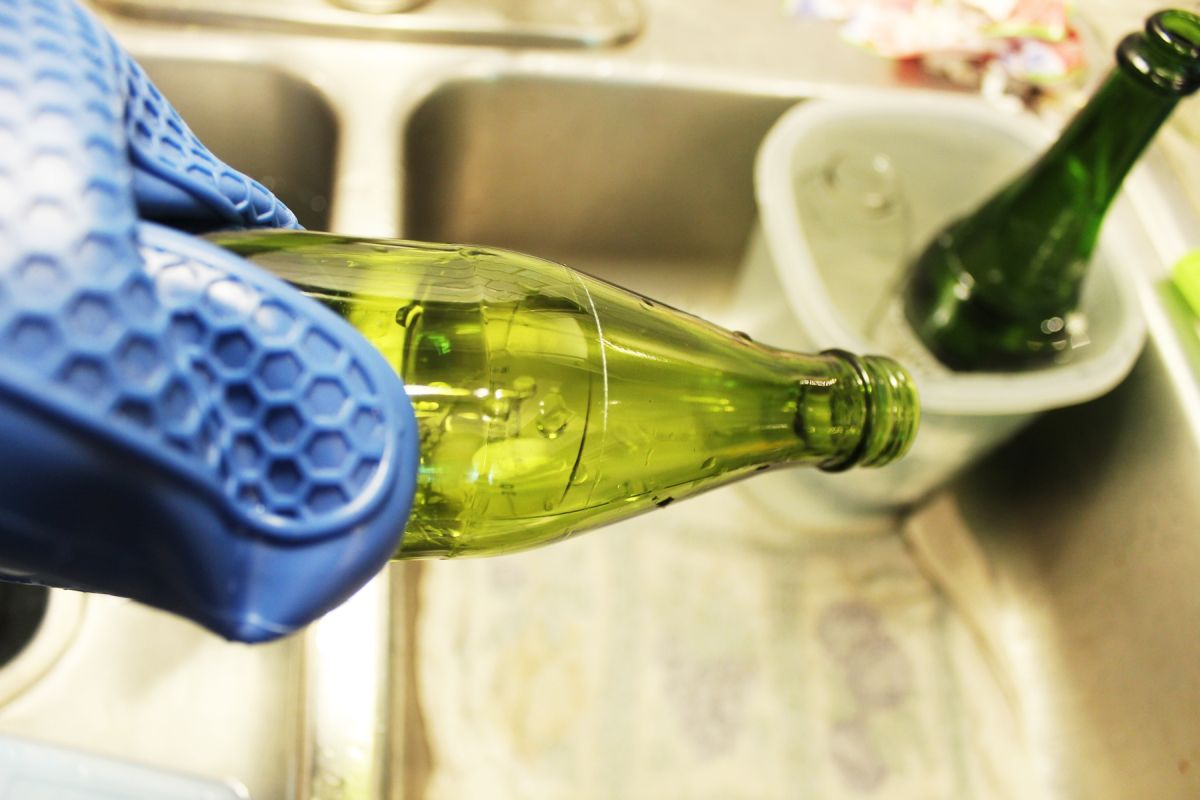
Grip the part of the bottle that you’re least likely to keep as you rotate it under the nearly boiling water and then the icy cold water.
Yep, this particular bottle’s score line was too deep. You don’t need it that intense; I was pressing too hard on this one. Lighten up a bit to guide the break, but don’t try to force the break with the scoring blade. That’s the hot/cold water’s job.
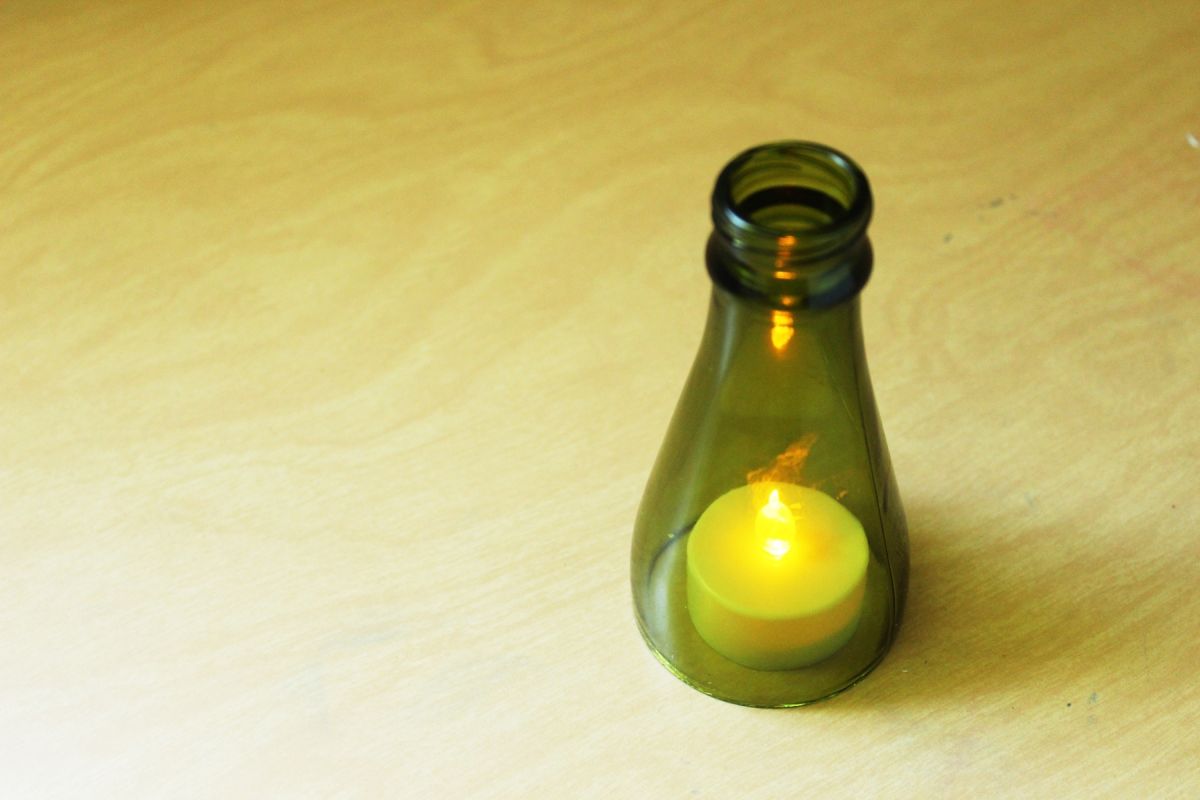
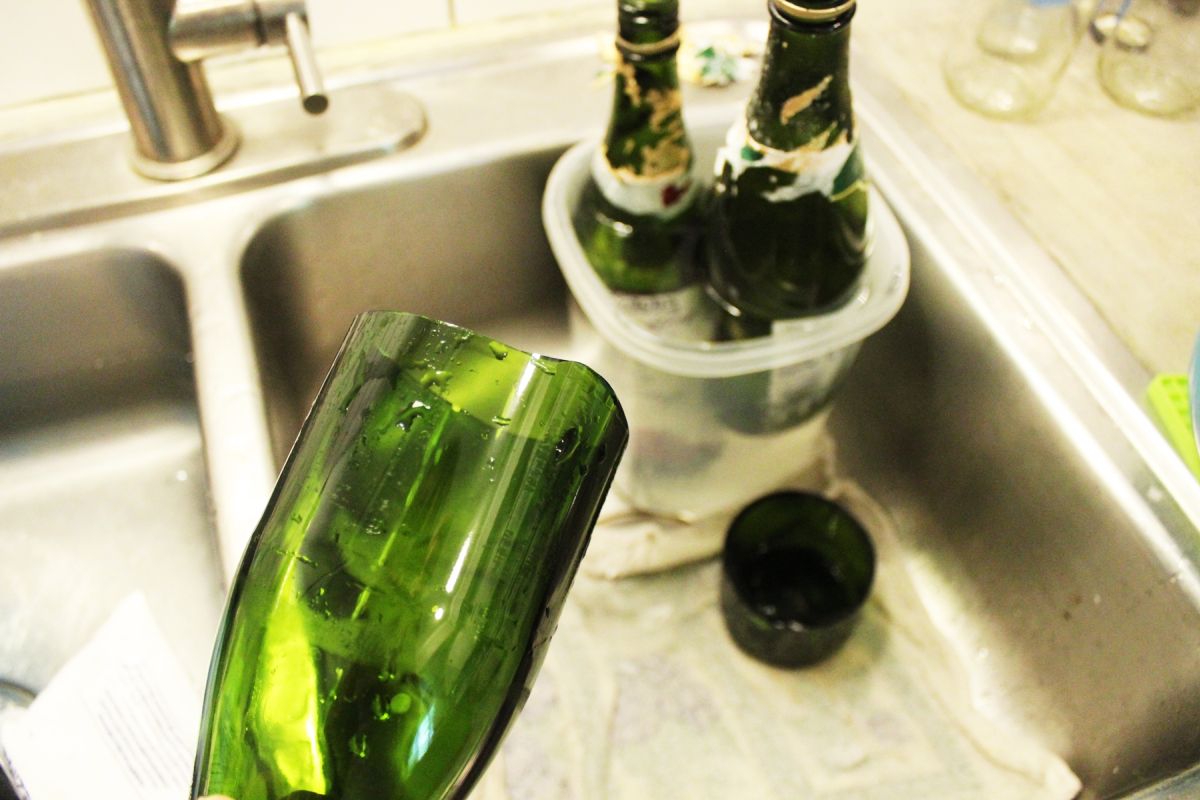
At least we got a cute candle cover out of it. Of course, this shows an LED tea light candle, but the beauty of using a bottle top for the candle cover is to let air in and out for a real burning candle. There is so much potential for this decoration.
Bottle Cutter 4: AceList – available here.
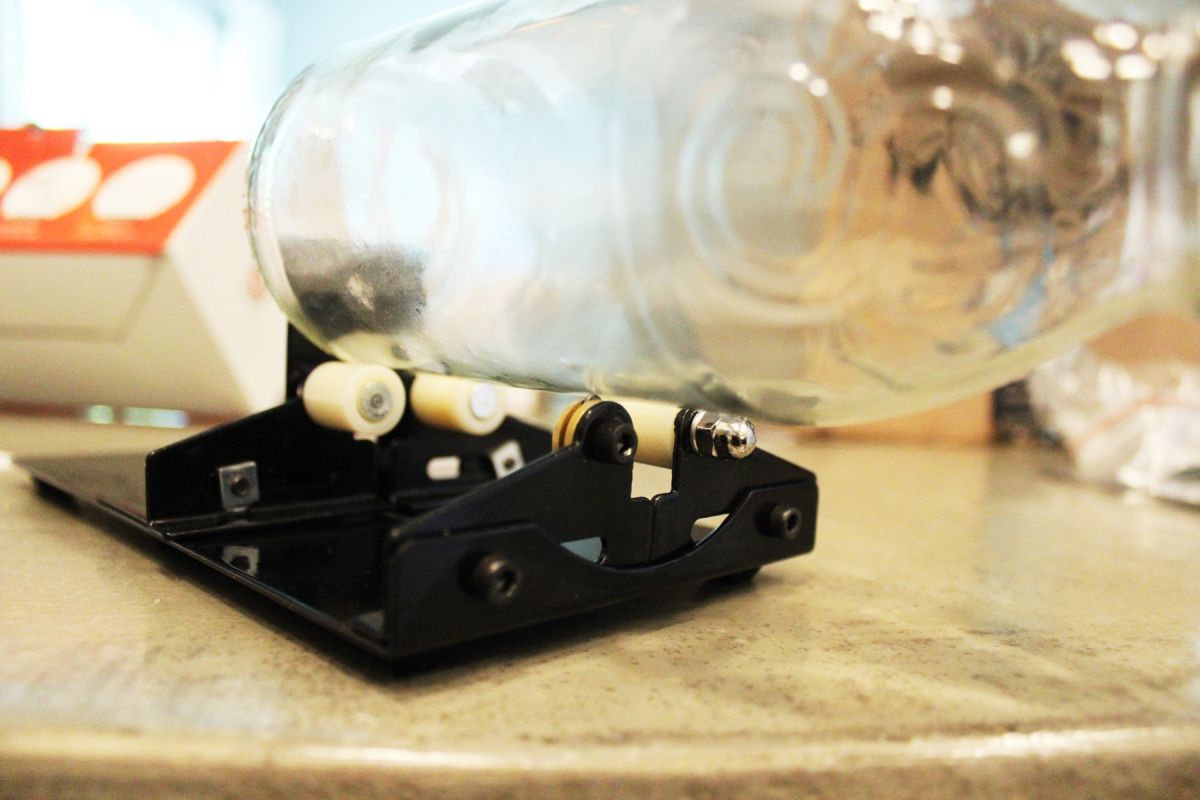
2. Genround Glass Bottle Cutter
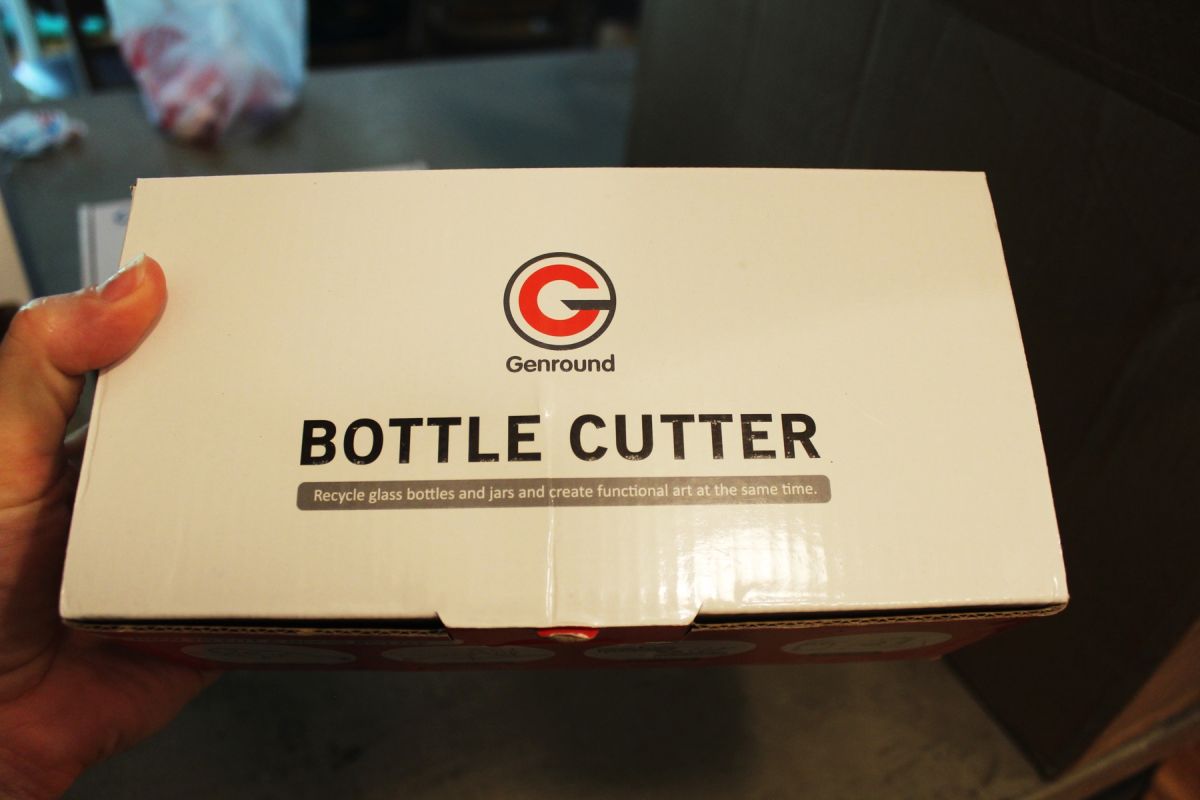
Bottle Cutter 2: Genround – available here.
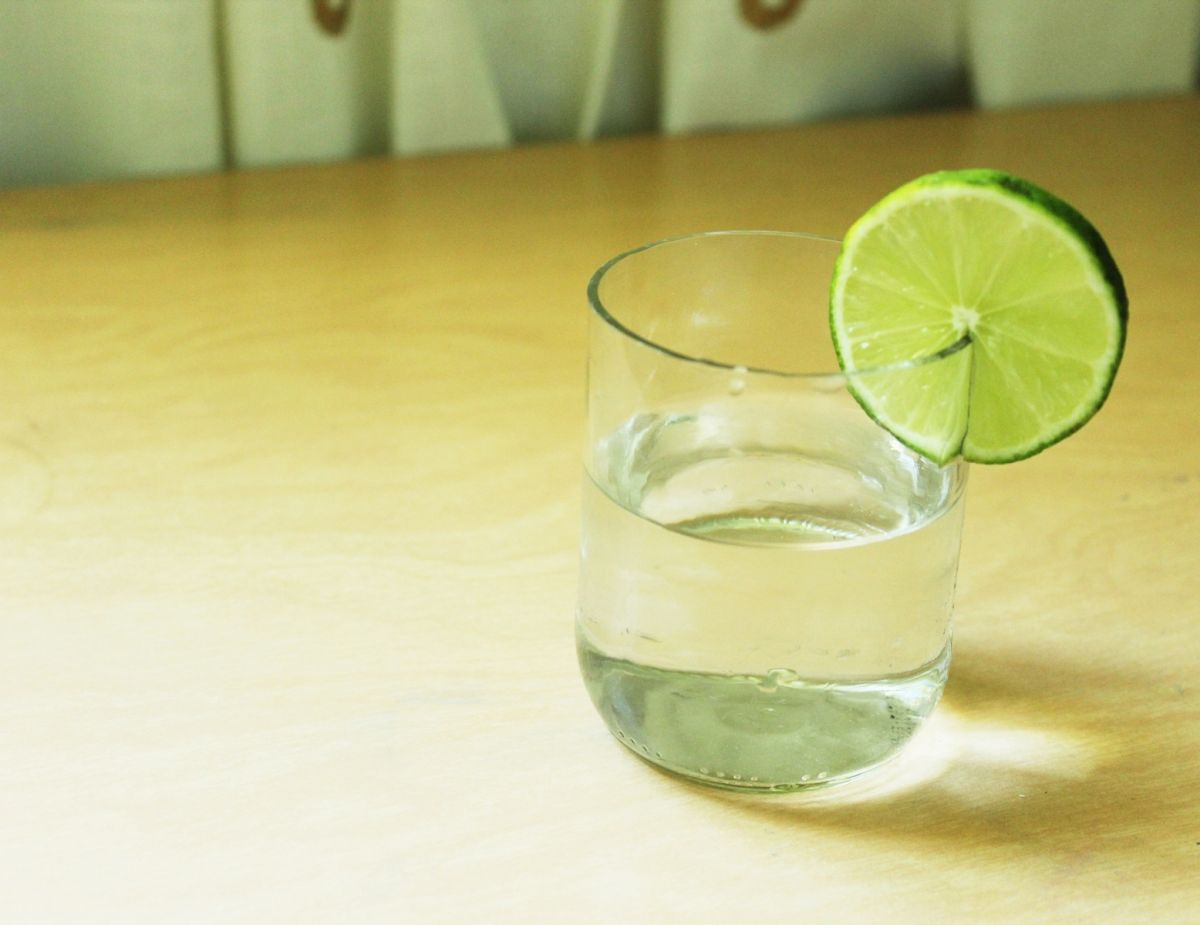
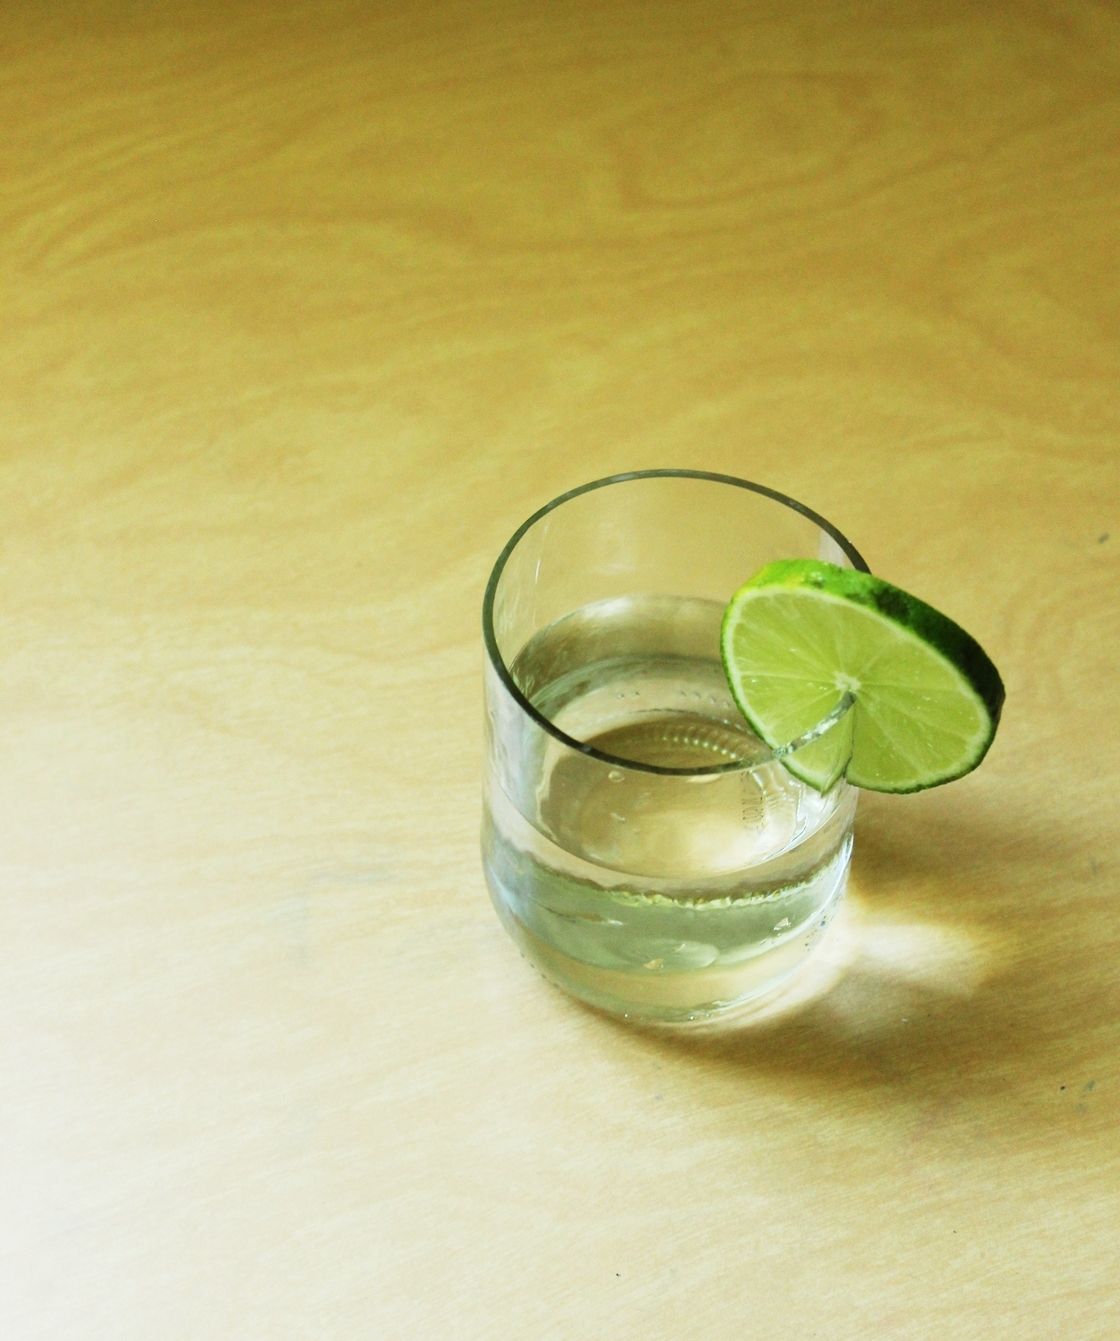
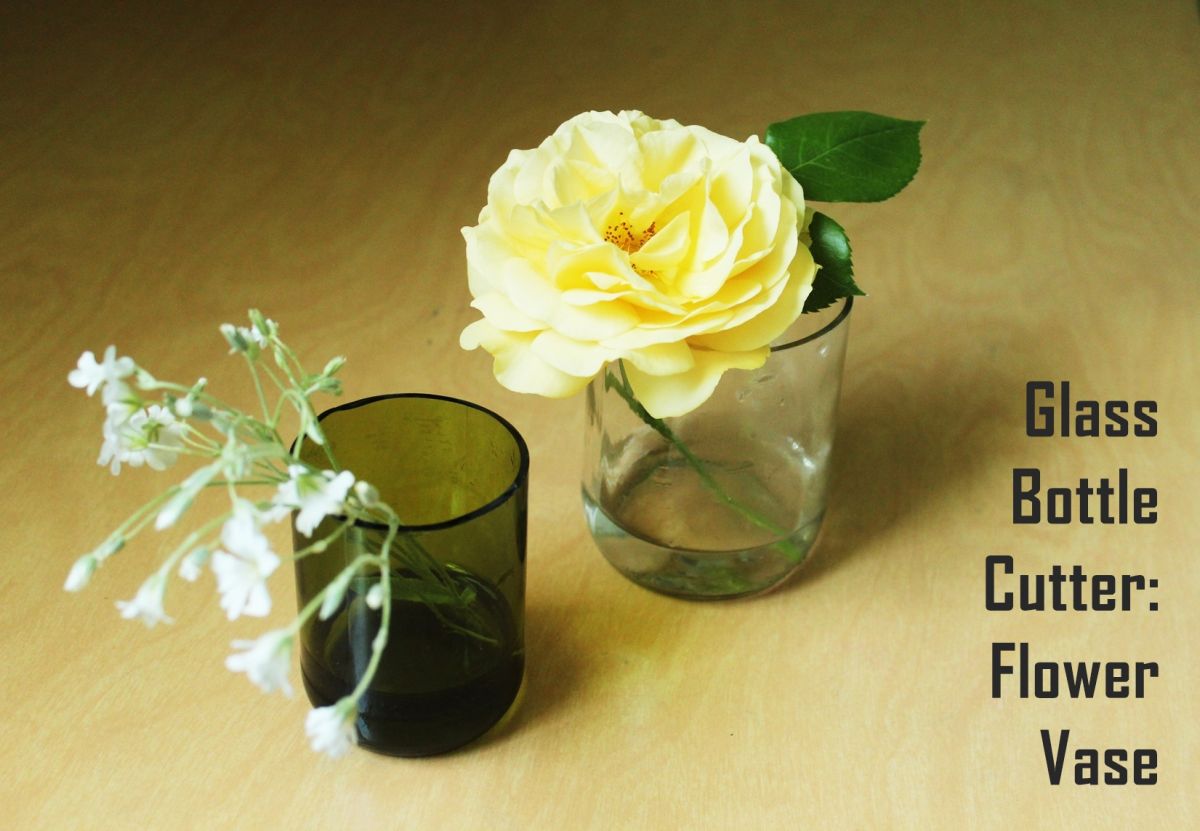
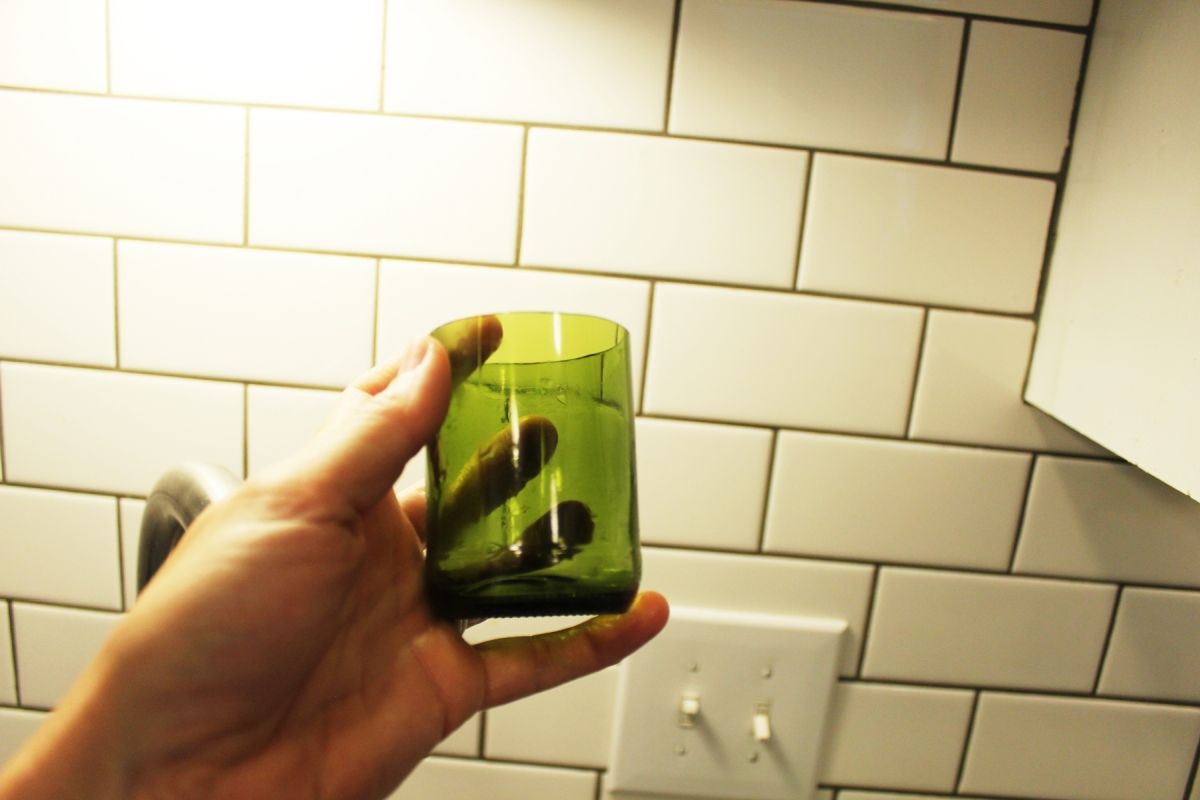
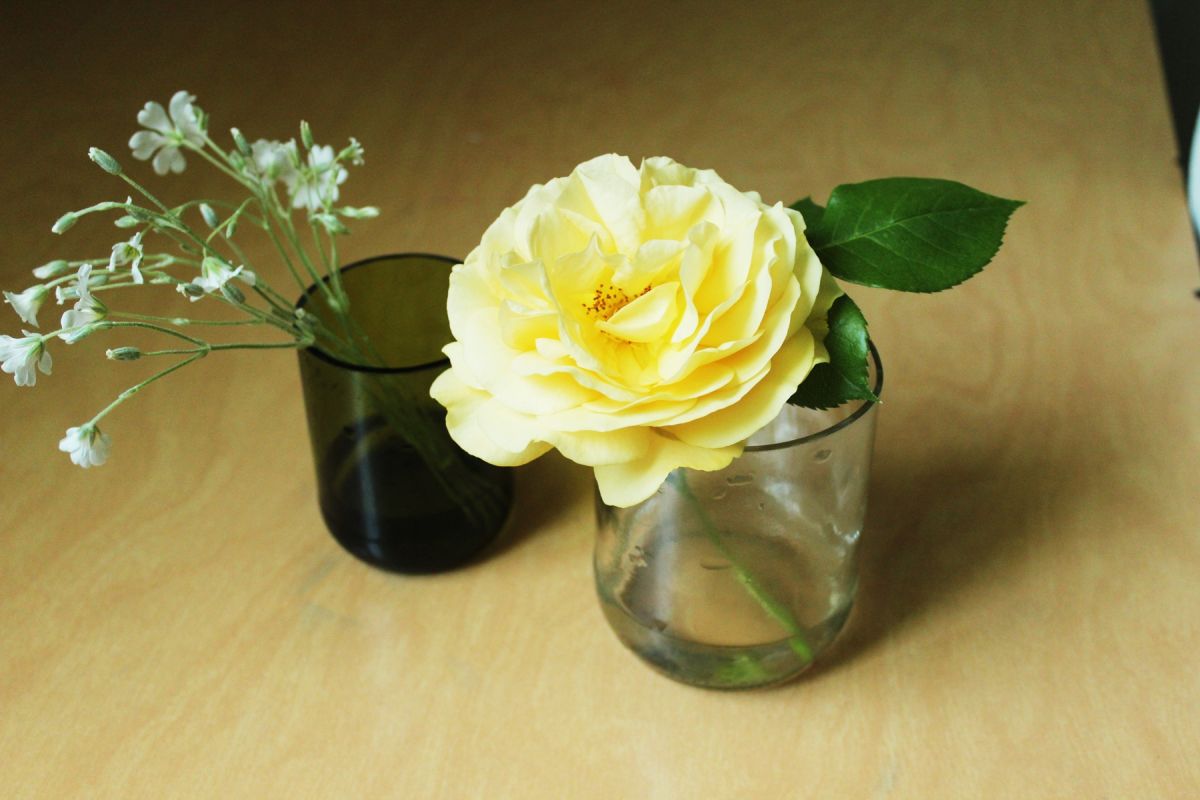
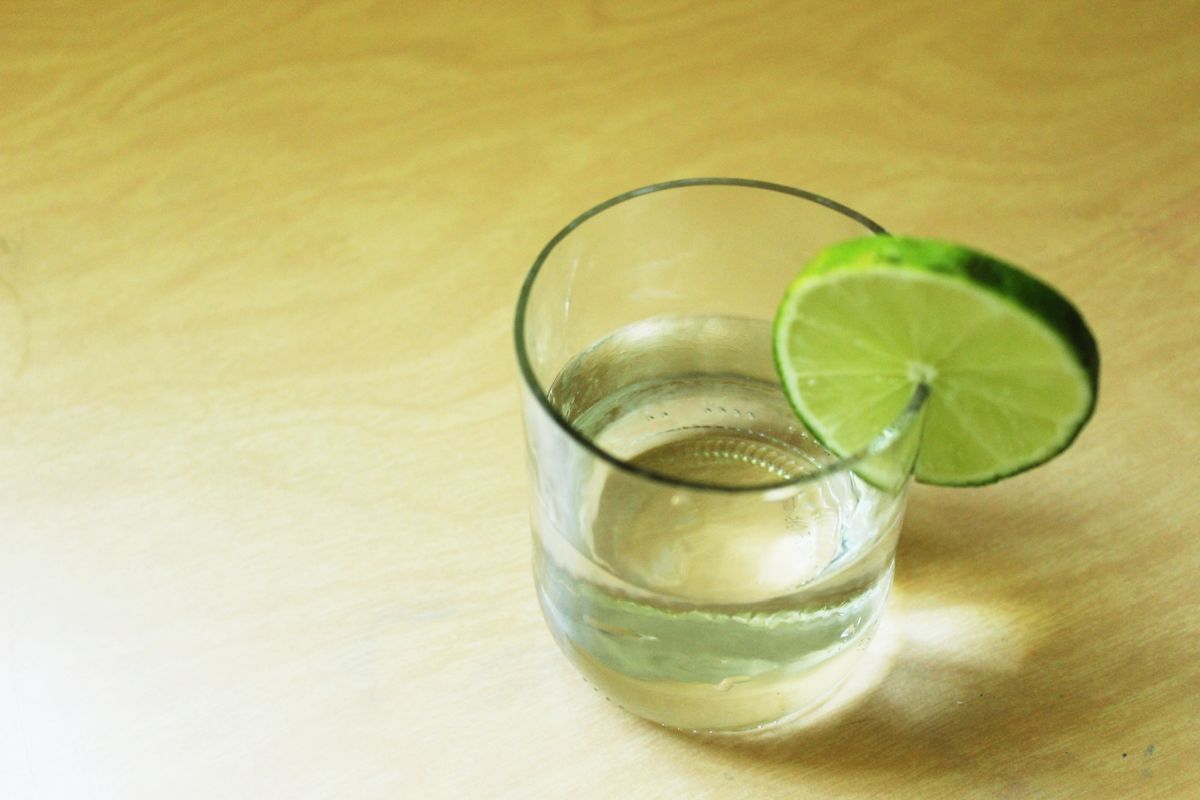
With this bottle cutter, I made the clear flower vase shown earlier and a drinking glass. I love the proportion of this drinking glass (made from a Snapple bottle).

The Genround bottle cutter has three rollers and a scoring blade on a metal plate. Also straightforward.
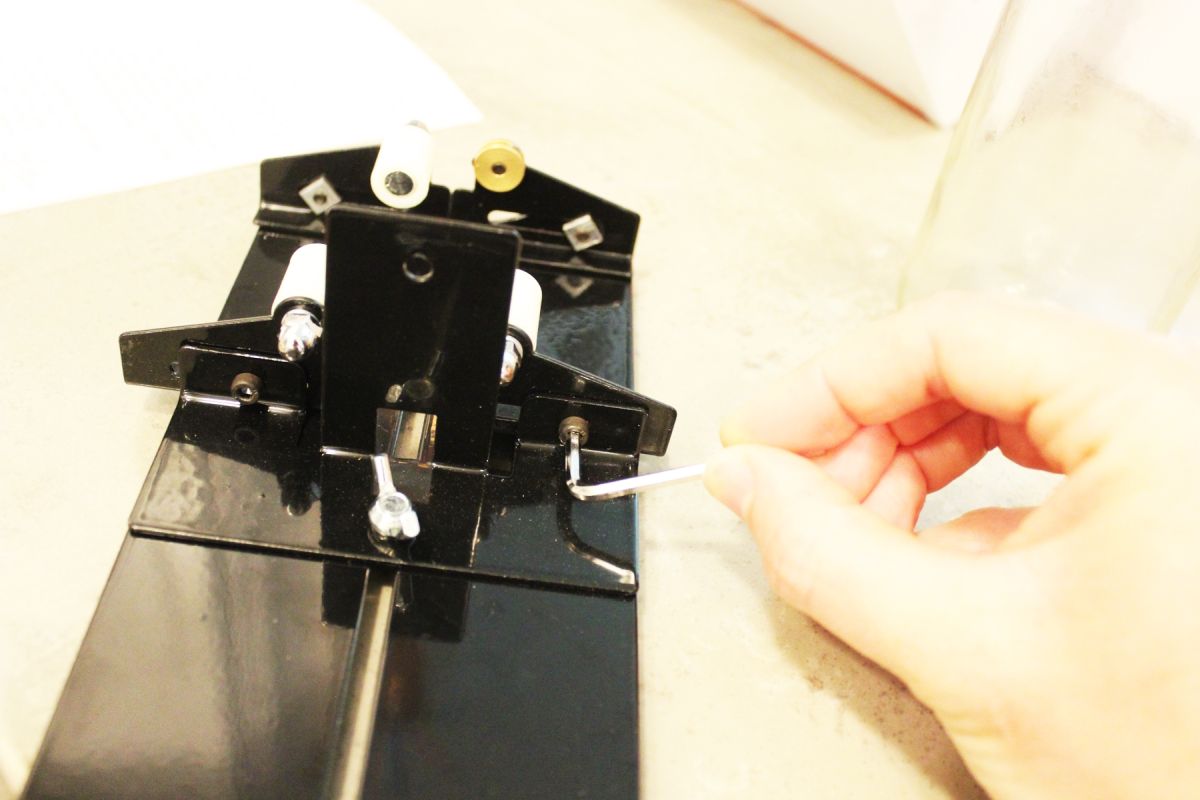
You can adjust two of the rollers to accommodate various bottle diameters by loosening with the hex wrench (provided in the kid), sliding in place, then tightening again.
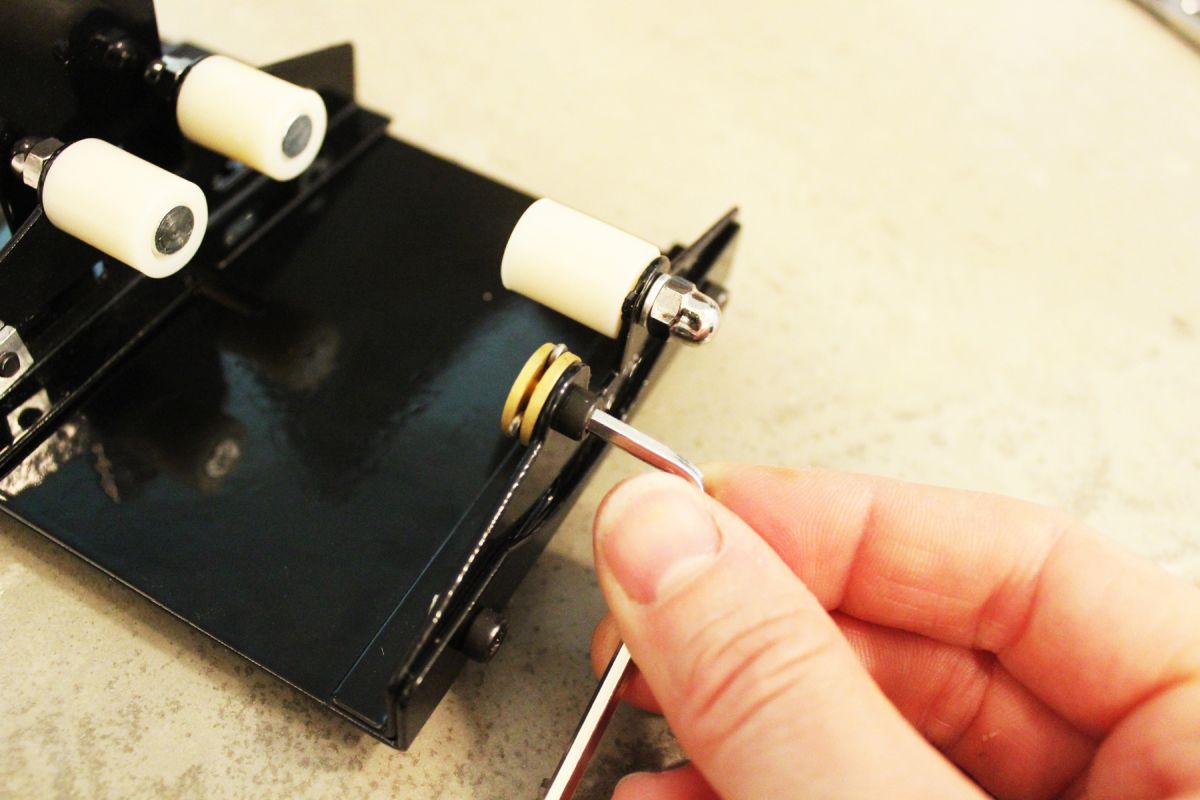
The hex wrench can also be used to place the scoring blade precisely where you want it.
After adjusting, you can see here that the scoring blade just touches the glass. That’s all you need.
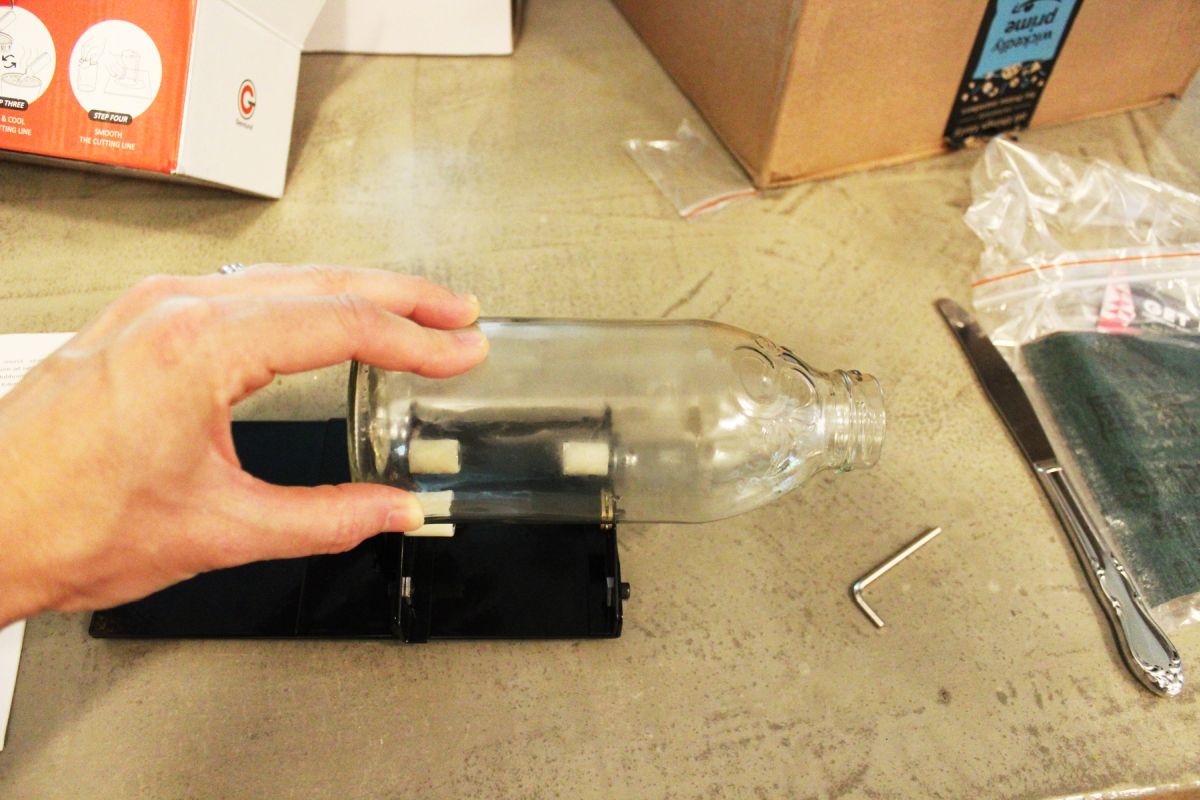
Rotate the glass evenly and smoothly, with even pressure and speed.

Here you can see the score line on the Snapple bottle.
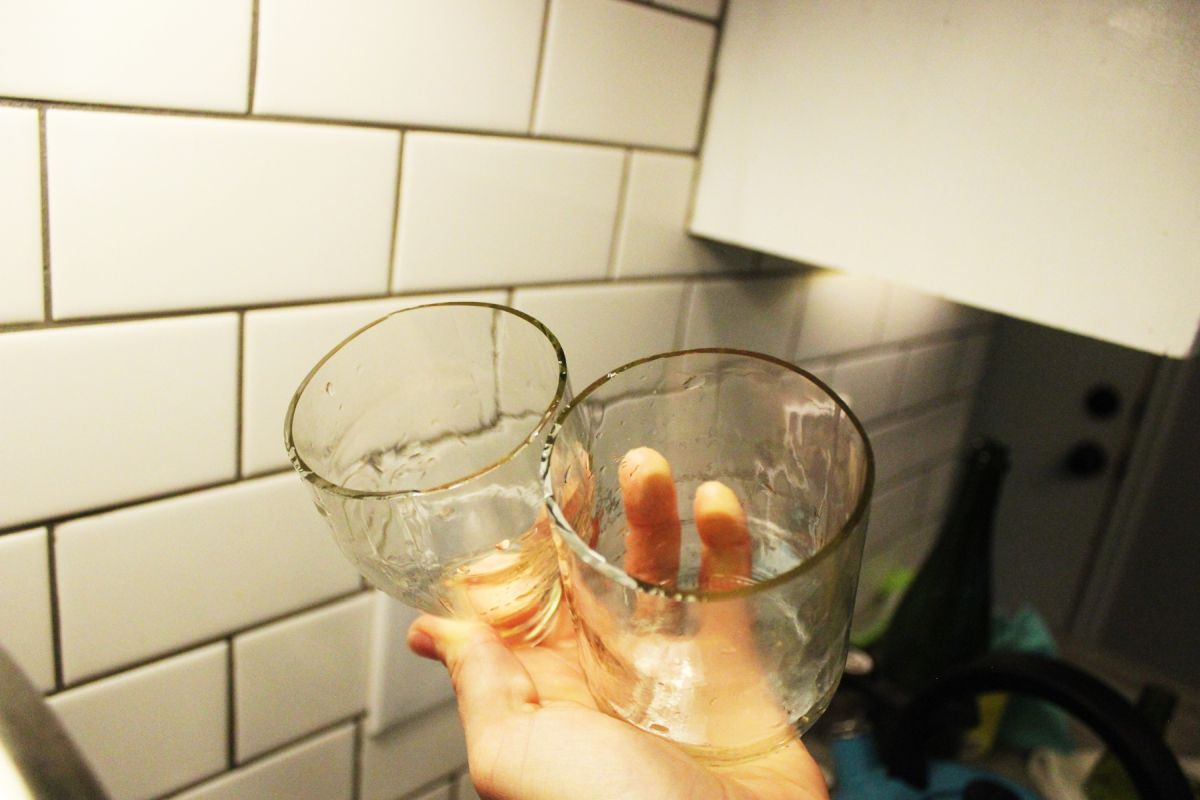
Alternating nearly boiling water with nearly ice water, poured directly onto the rotating bottle’s score line, this bottle split beautifully.

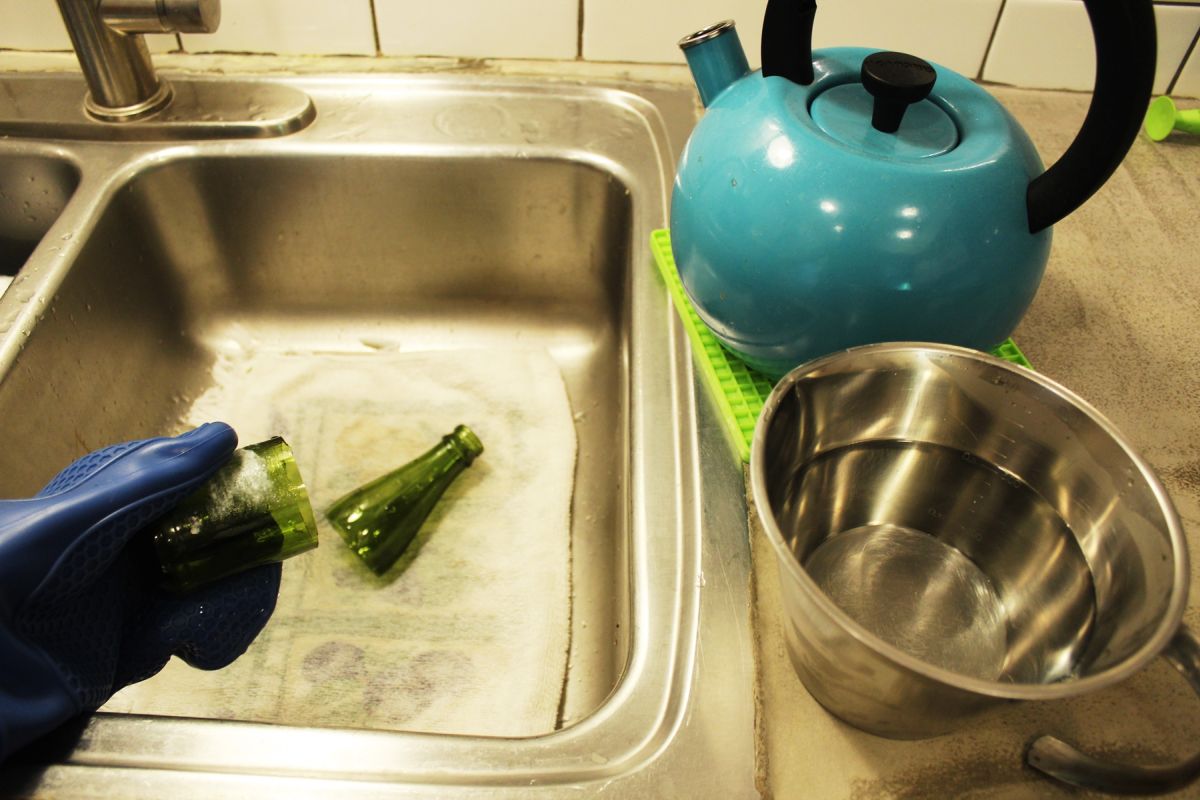
This bottom section just needs a little sanding to become a decent drinking glass.
And here it is. Lovely!
Bottle Cutter 2: Genround – available here.
3. LANMU Bottle Cutter

Bottle Cutter 1: Lanmu – available here.

With the Lanmu bottle cutter, I made a glass flower vase. Pretty simple, and the green glass is quite lovely next to flora and foliage, don’t you think?
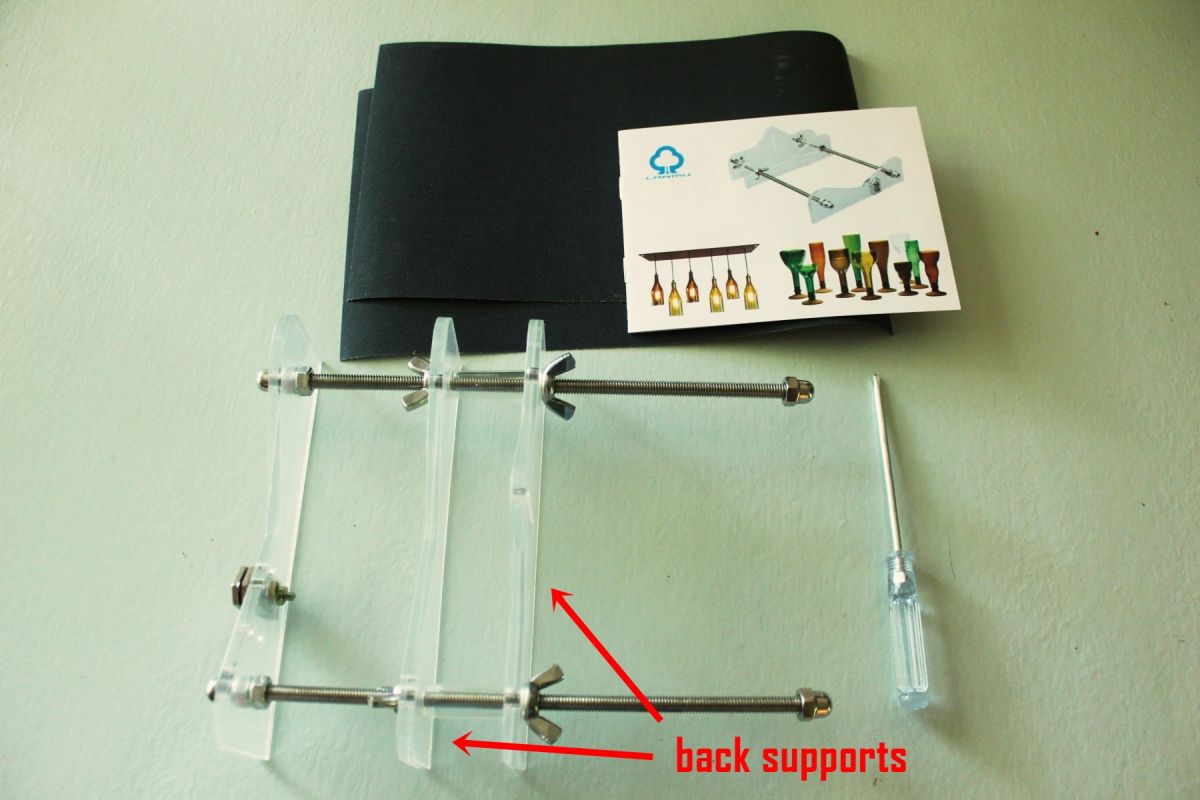
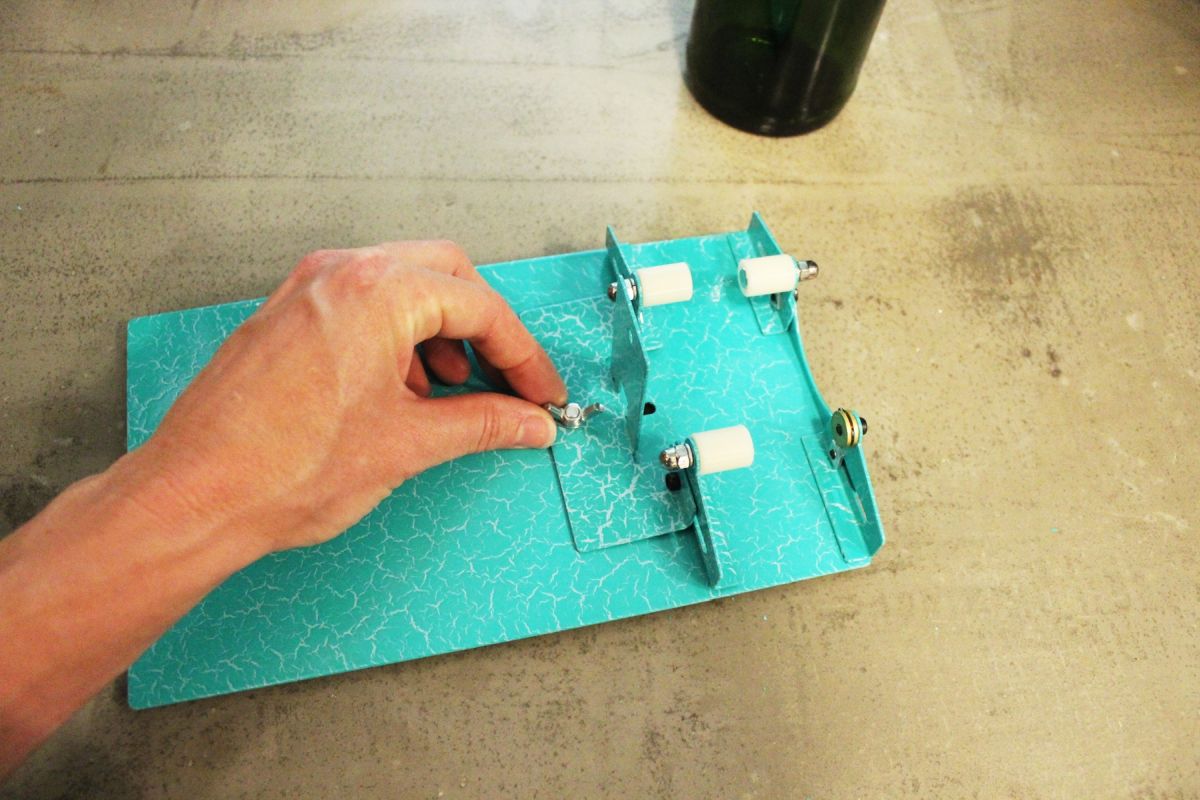
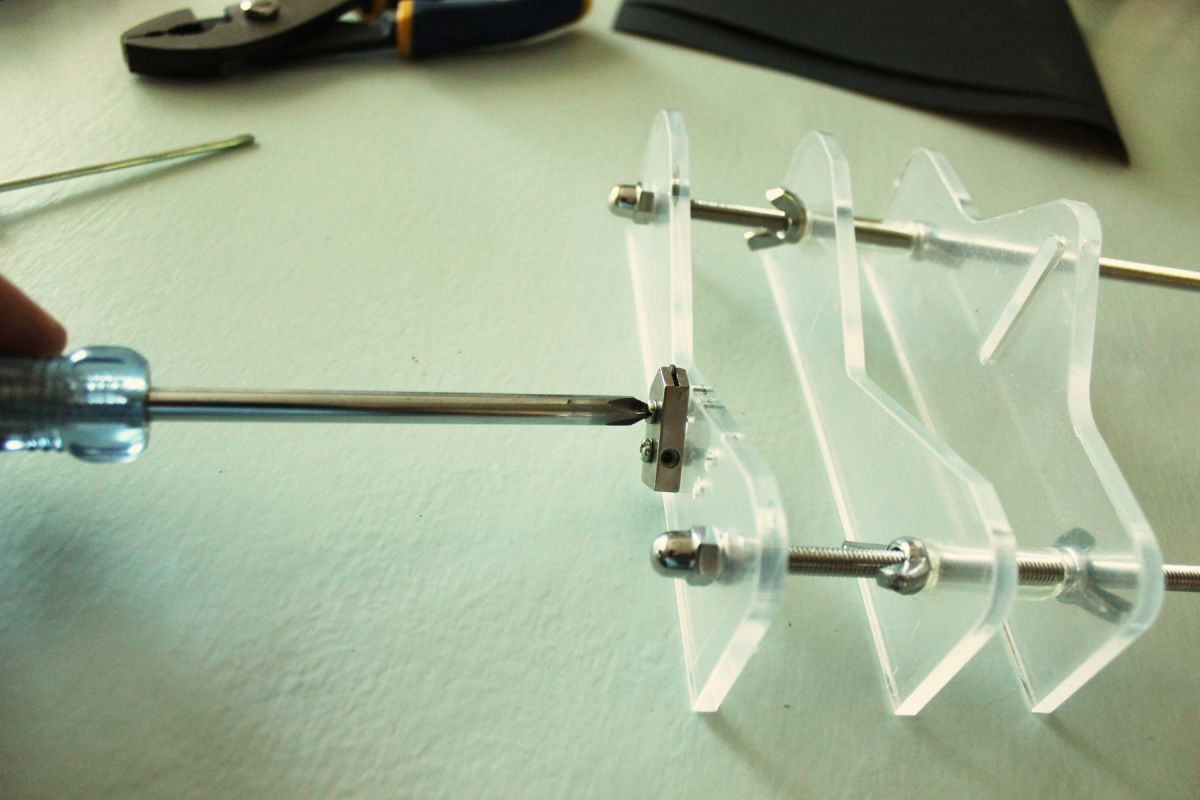
When you open the Lanmu bottle cutter, this is what you’ll find. The acrylic cutter has curves that support and accommodate the curves of a glass bottle. You will probably need to adjust the back supports by spinning the wing nuts (take care to keep the supports precisely level) depending on the length of your bottle.
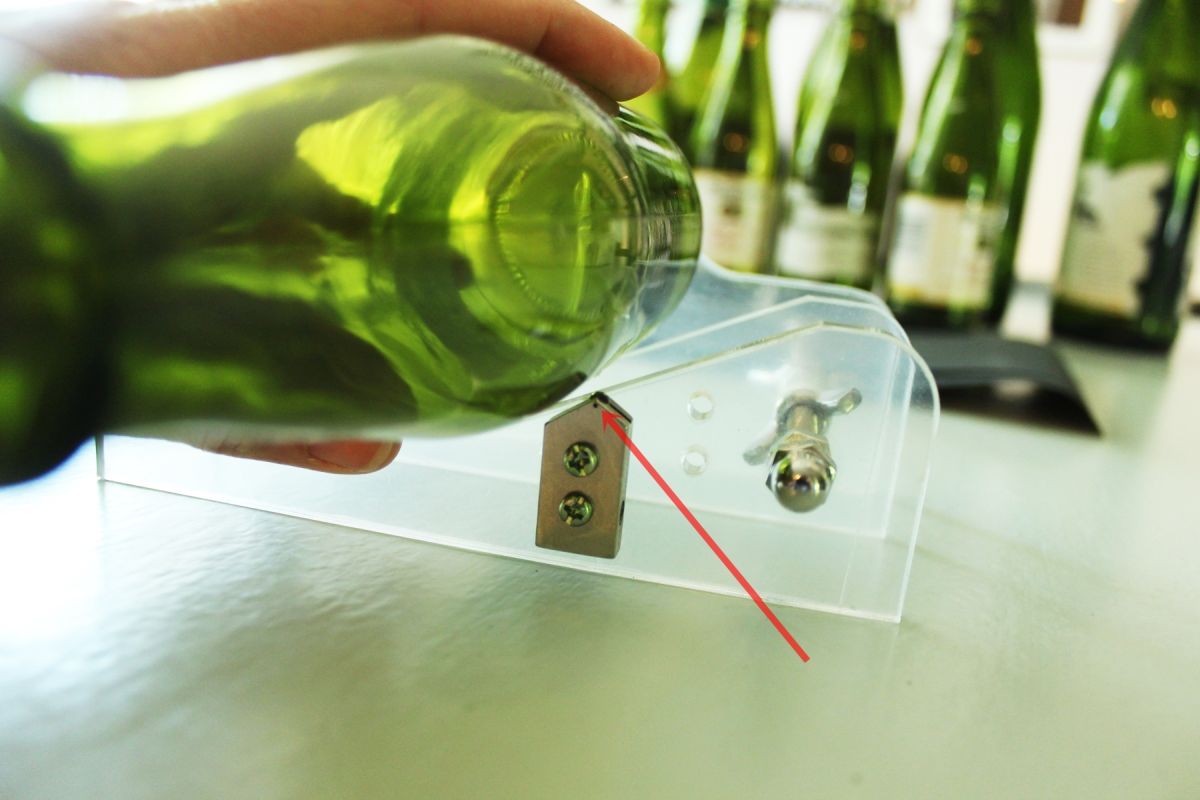
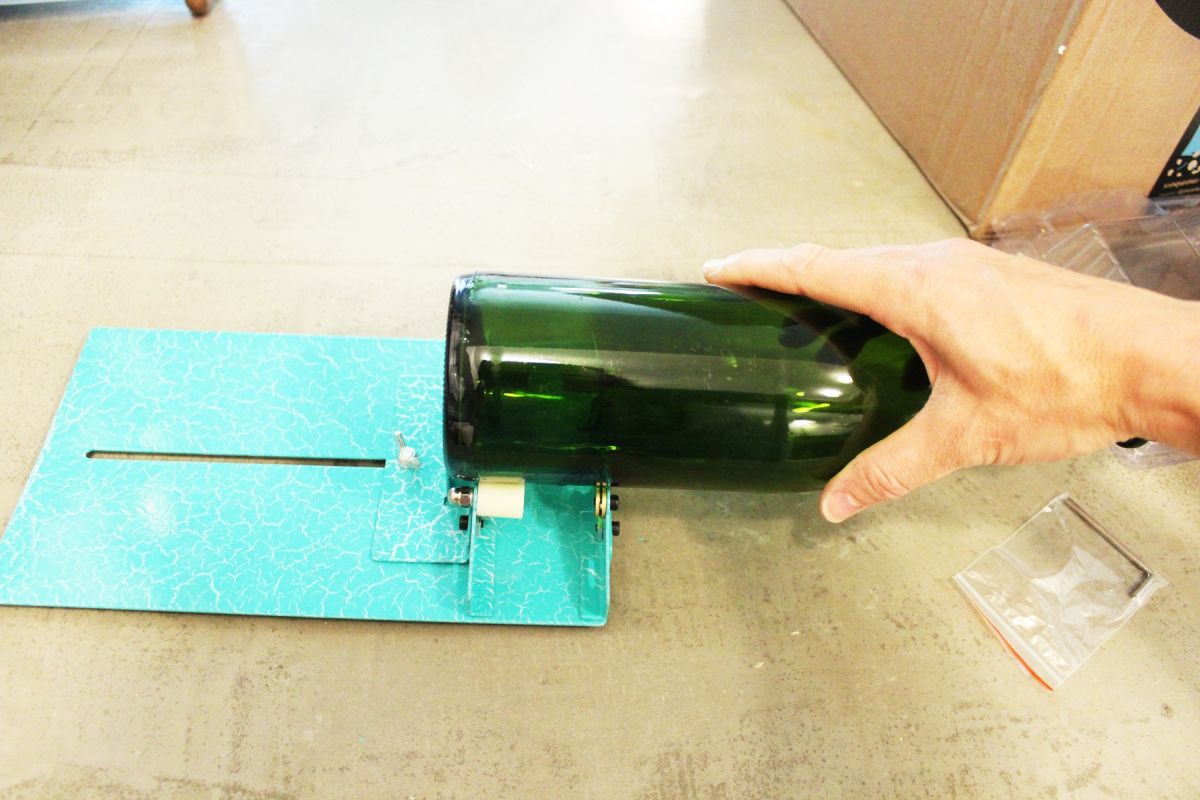
Place your bottle on the bottle cutter. If the scoring blade doesn’t touch the glass, you’ll need to adjust that next.
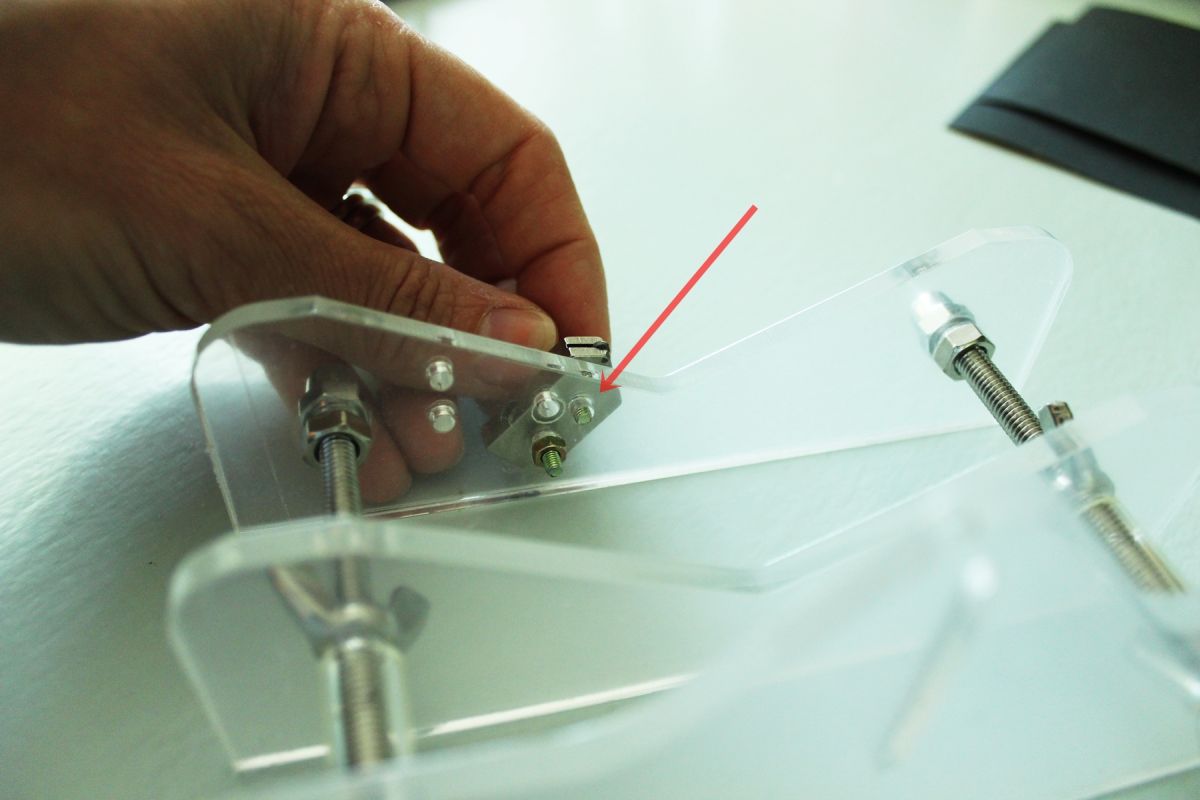
Adjusting the Lanmu scoring blade is pretty straightforward – loosen the screw that holds the blade in place, then drop it down to the next screw hole and replace the screw.
Tighten the screw back up with a screwdriver (provided in the kit).
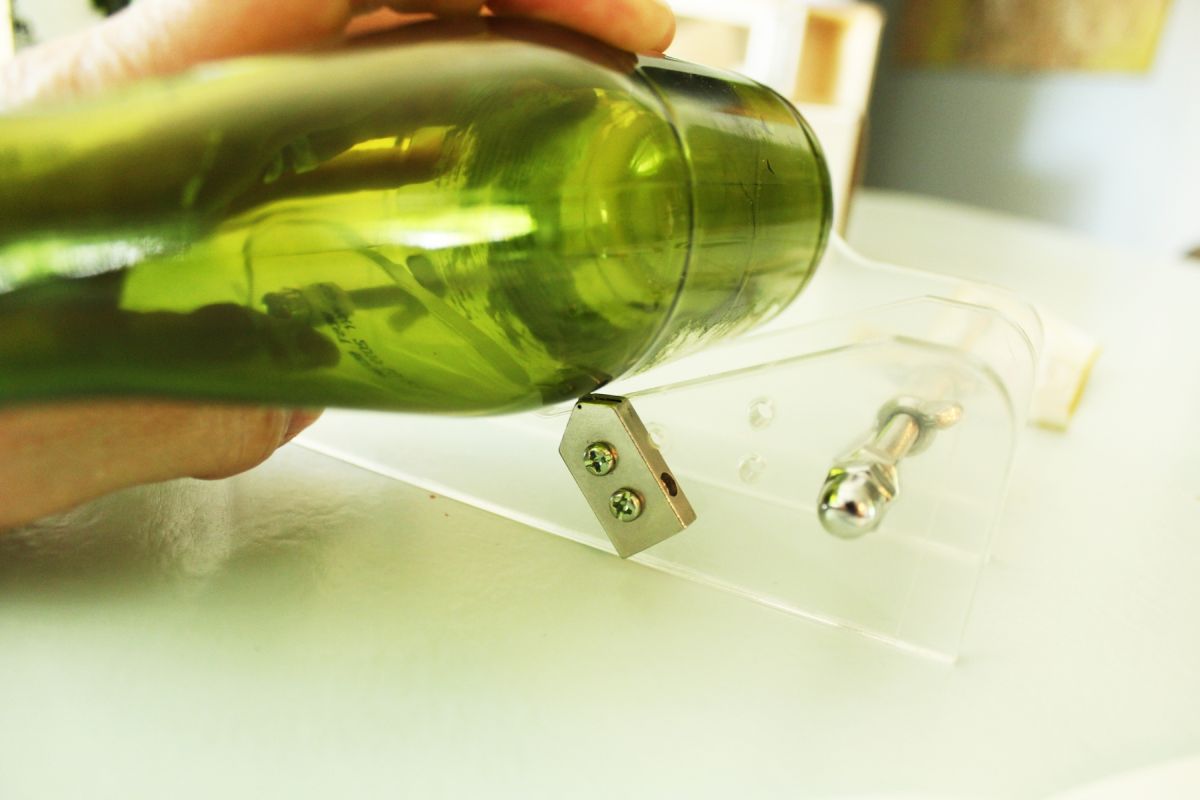
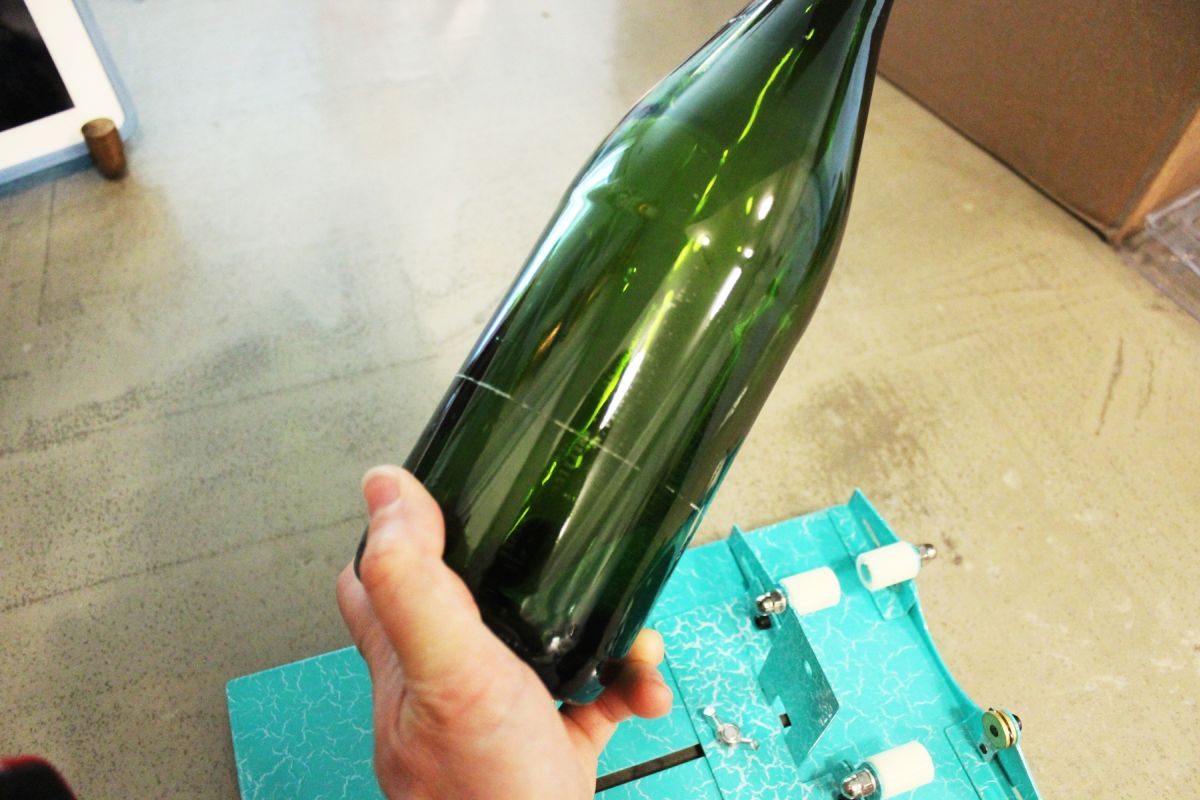
As you can see, the scoring blade now touches the glass, so your bottle is ready to be scored.
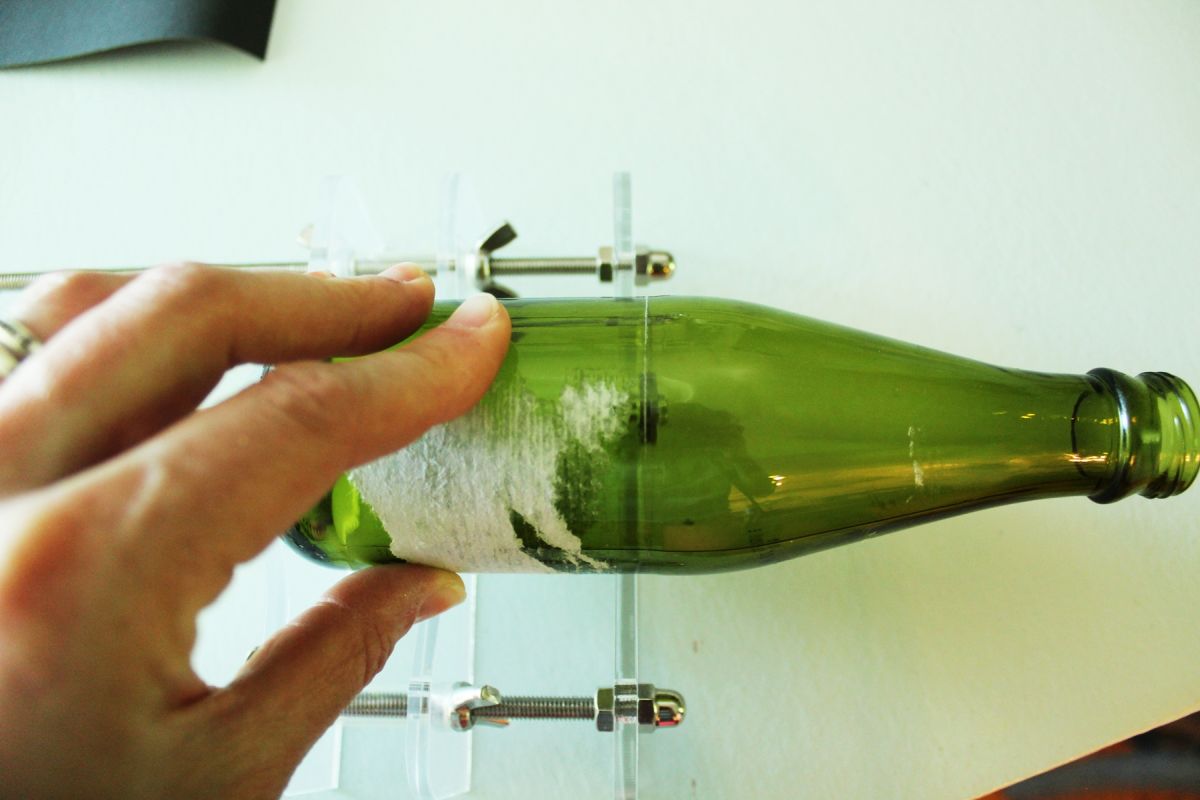
(Note: Because the score line hit above the paper and glue on this bottle, I didn’t scrub it clean prior to cutting here. I would recommend scrubbing any paper and glue off prior to scoring; I’ll show the best methods for that later in this tutorial.) Press gently but firmly down on the bottle, rotating it just once around to create a complete score.

In theory, a single score line (as in, one that is not repeated around and around the bottle) is likely to produce a cleaner break.
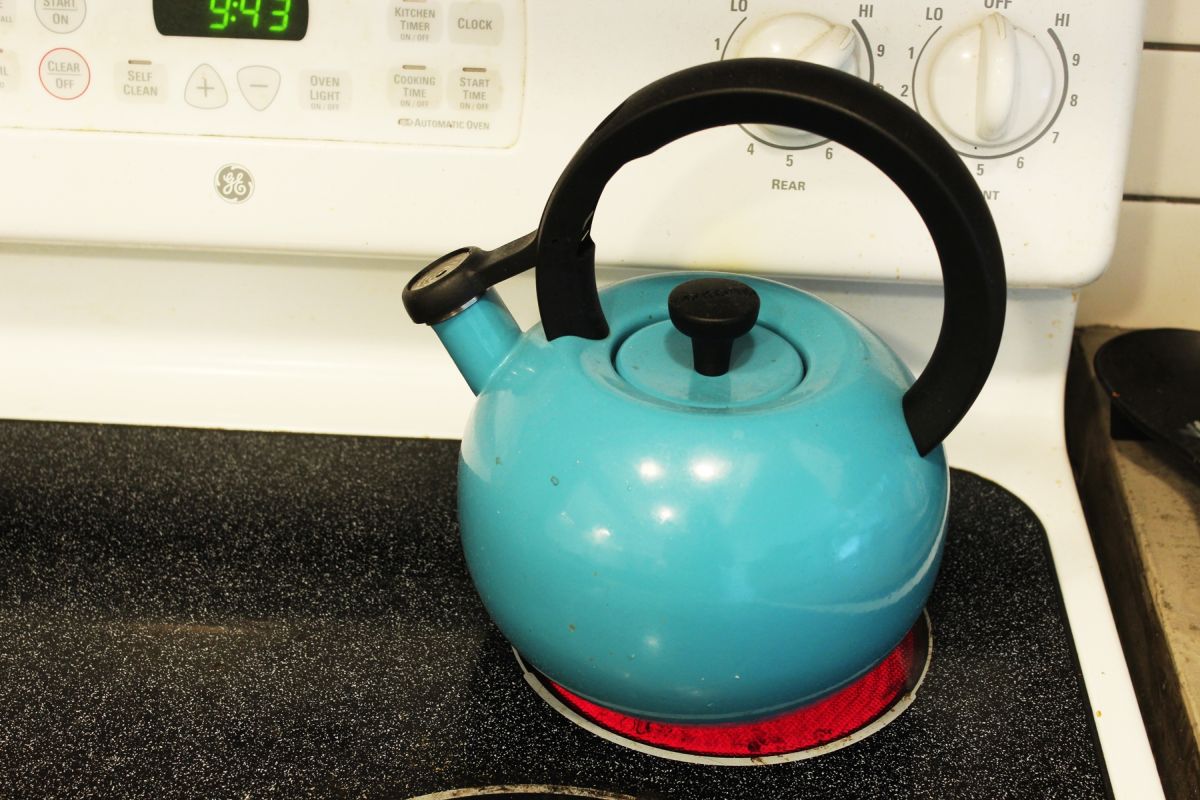
For all glass bottle cutter processes shown in this tutorial, I use the heating-and-cooling method. This involves heating water to just below its boiling point.
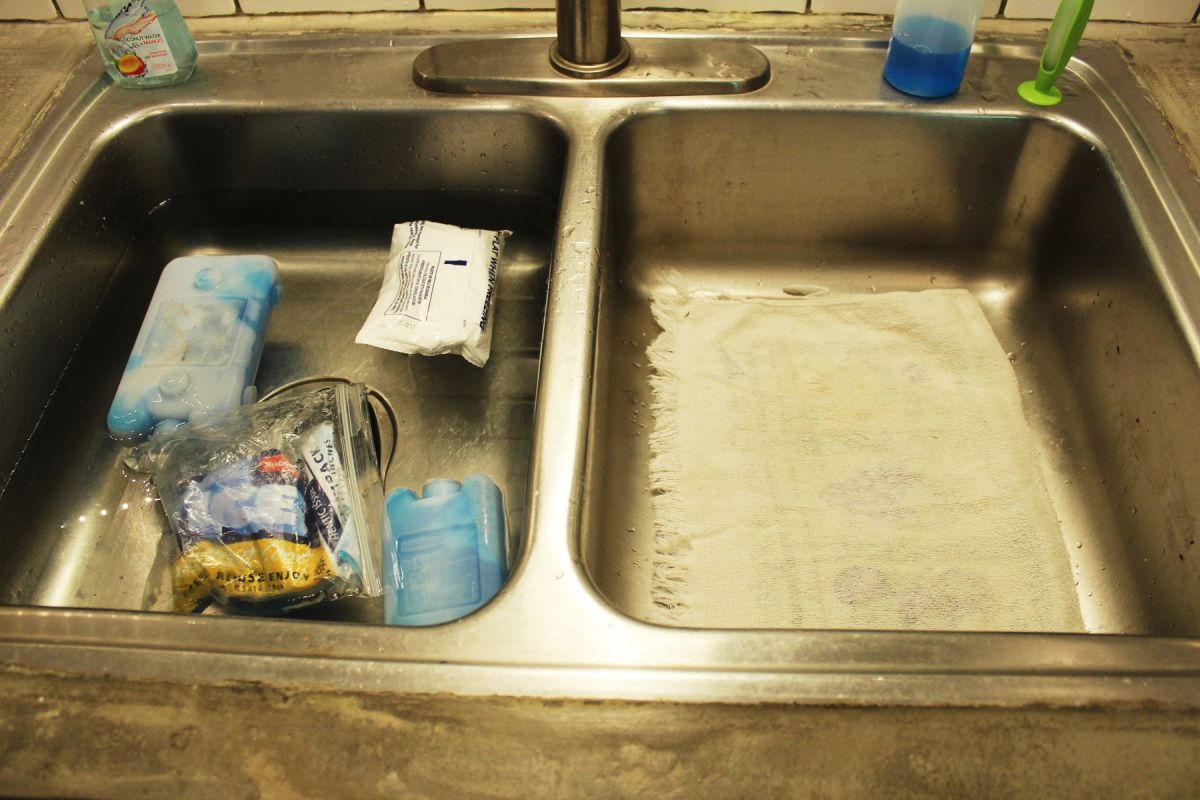
Prepare a large bowl or sink with ice cold water. I found that placing ice packs into the water kept it nice and cold, then I would dip a measuring cup into the sink water to pour over the score line. If you have the luxury of a double sink, place an old towel in the bottom of the second sink so the glass doesn’t break when it falls.
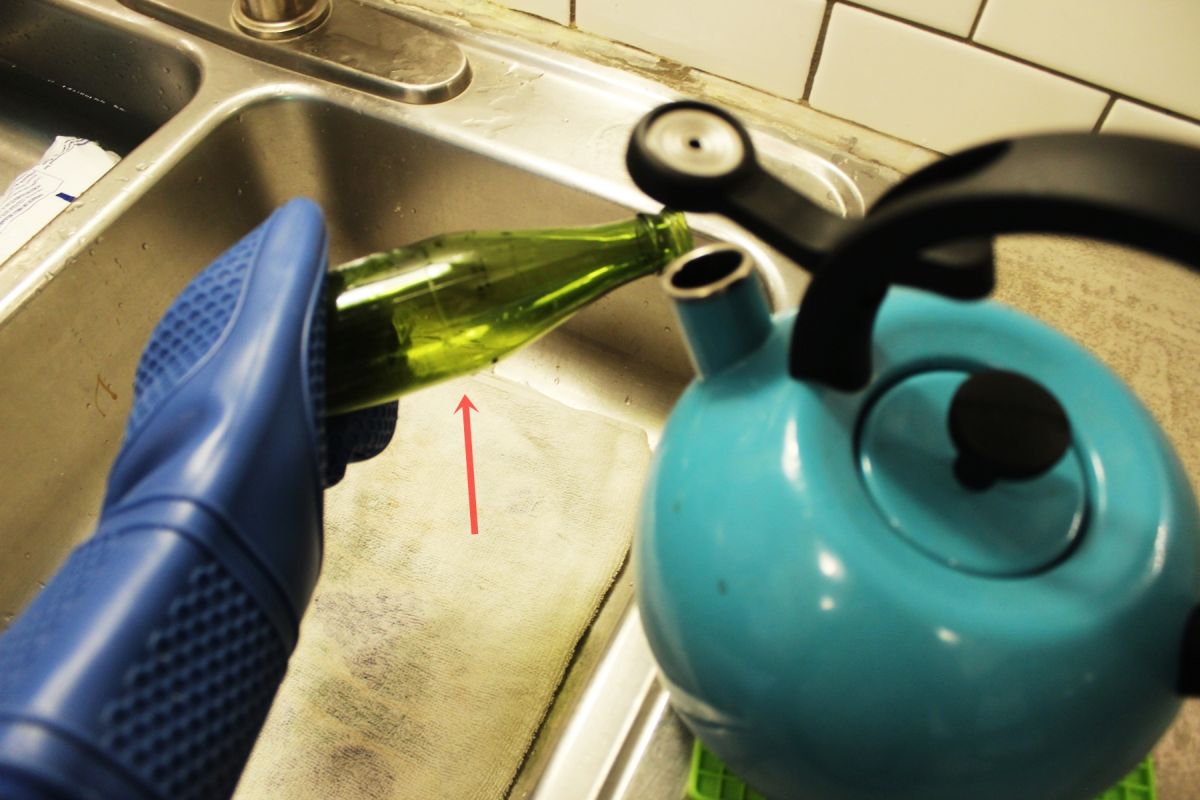
Rotating the bottle quickly and evenly (while wearing a silicone oven mitt, recommended), slowly pour a bit of hot water directly onto the score line.
Then quickly either place the bottle into the ice bath or pour ice water directly over the score line. Repeat this hot water/ice water back-and-forth until the glass breaks.
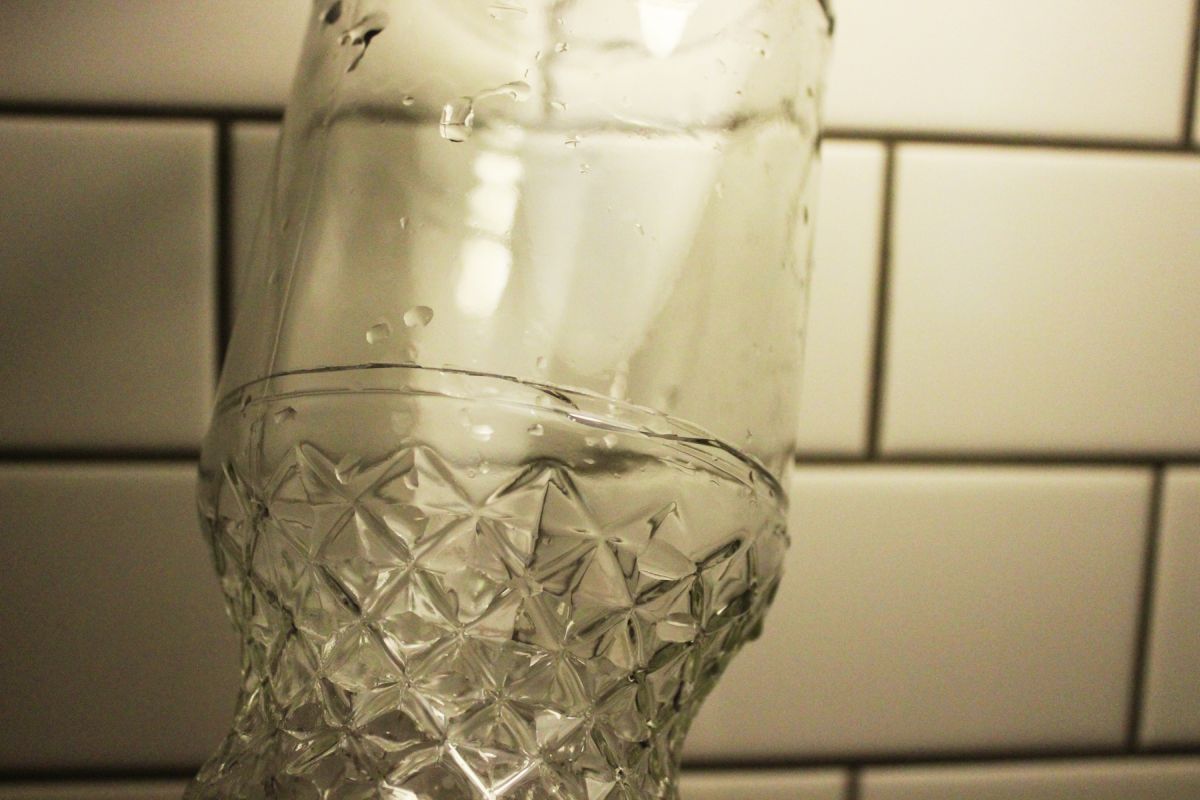
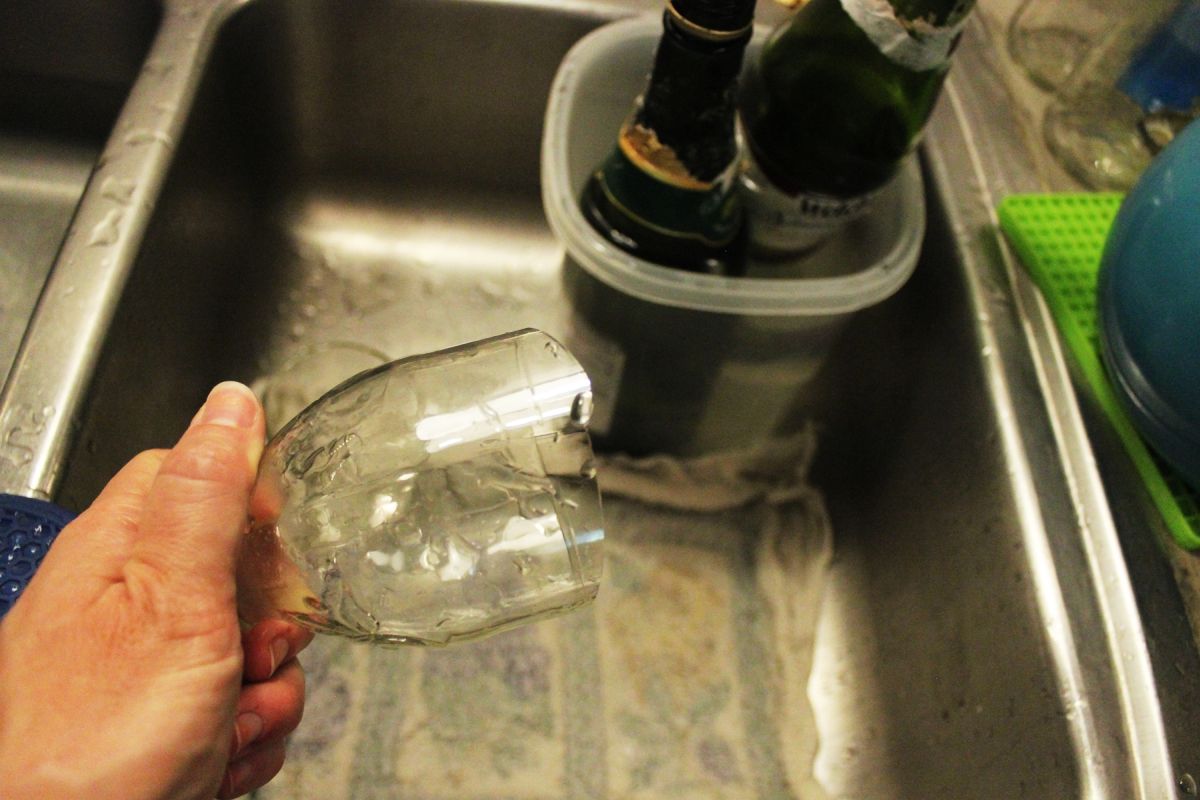
This glass broke fairly well, but not perfectly. I think we can sand that down a bit.
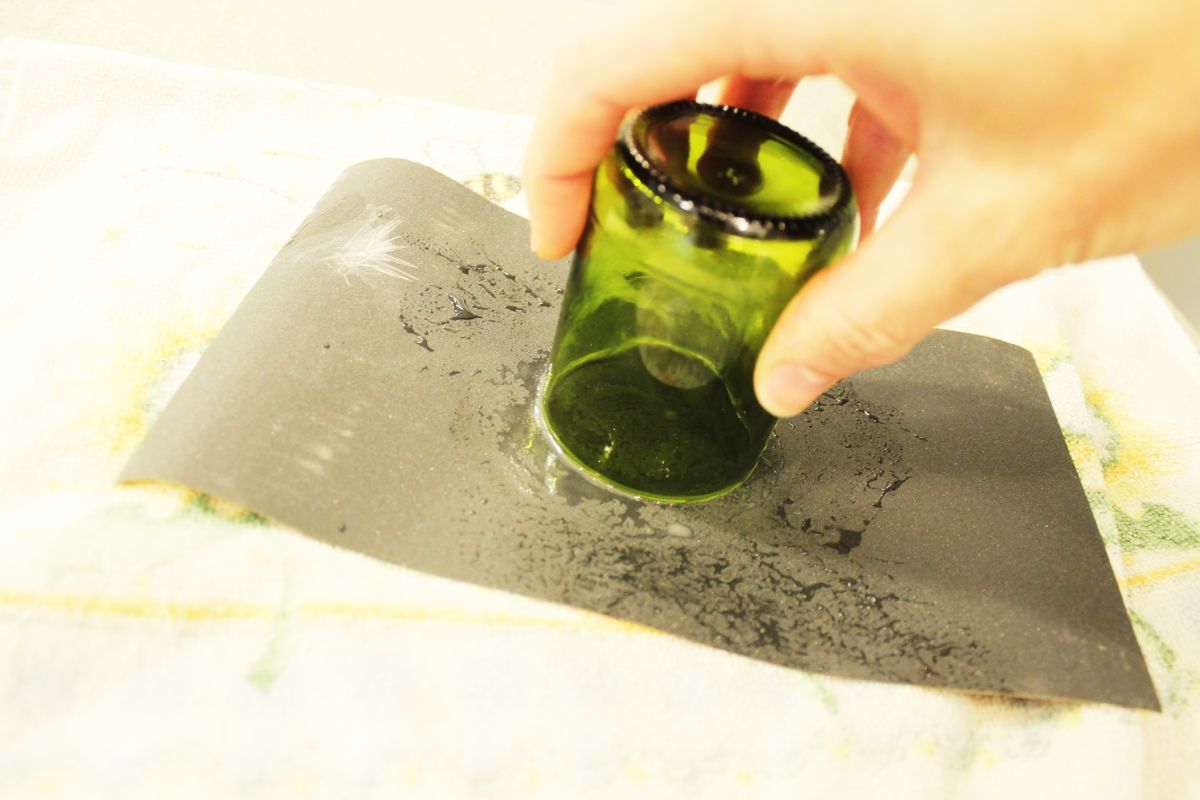
Lay out the emery paper that came with your Lanmu bottle cutter, and throw a few drops of water down on it. Place the cut line down on the paper, and begin sanding it smooth.

You can also use smaller bits of emery paper, dry, to shave off troublesome bits. Keep in mind that glass doesn’t sand all that easily; if your edge is too rough or wavy, it would be best to scrap that bottle and try again with a fresh one.
This bottle bottom looks pretty great after sanding down!
It became a glass flower vase. Nice!
Bottle Cutter 1: Lanmu – available here.
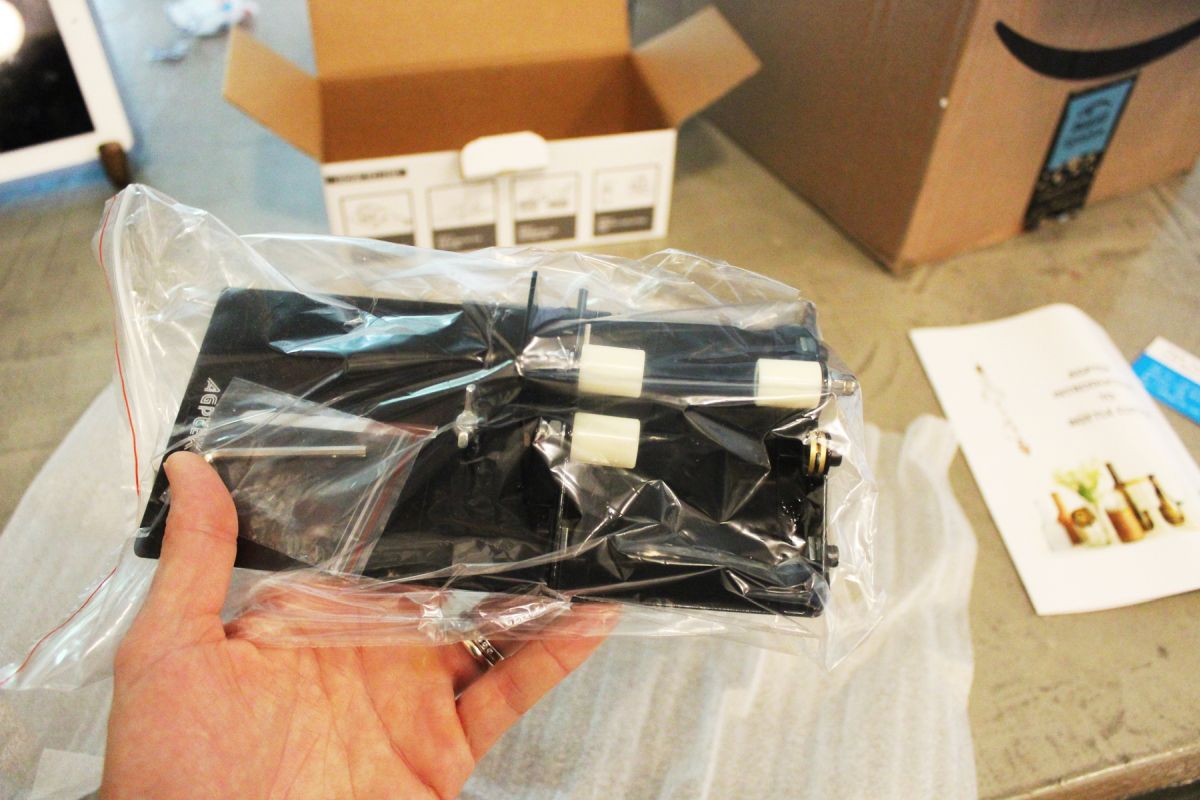
4. AGPtek Black Glass Bottle Cutter
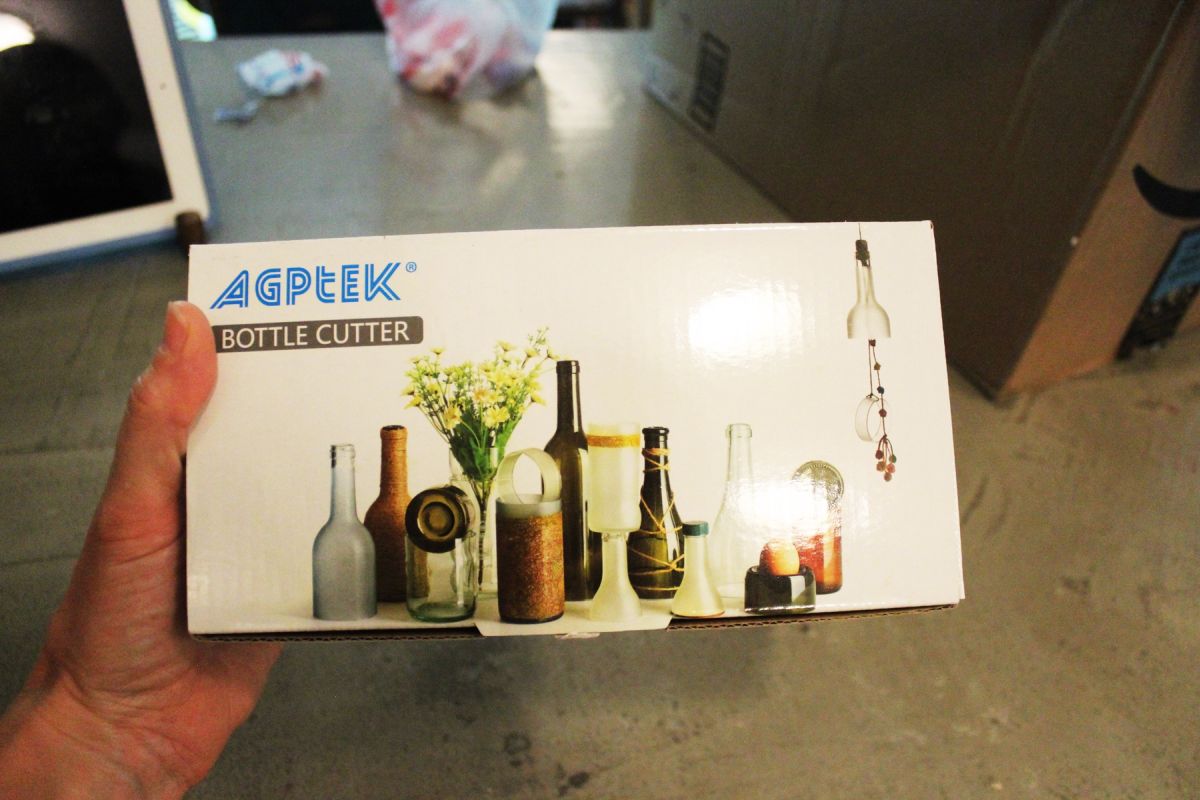
Bottle Cutter 3: AGP Tek – available here.
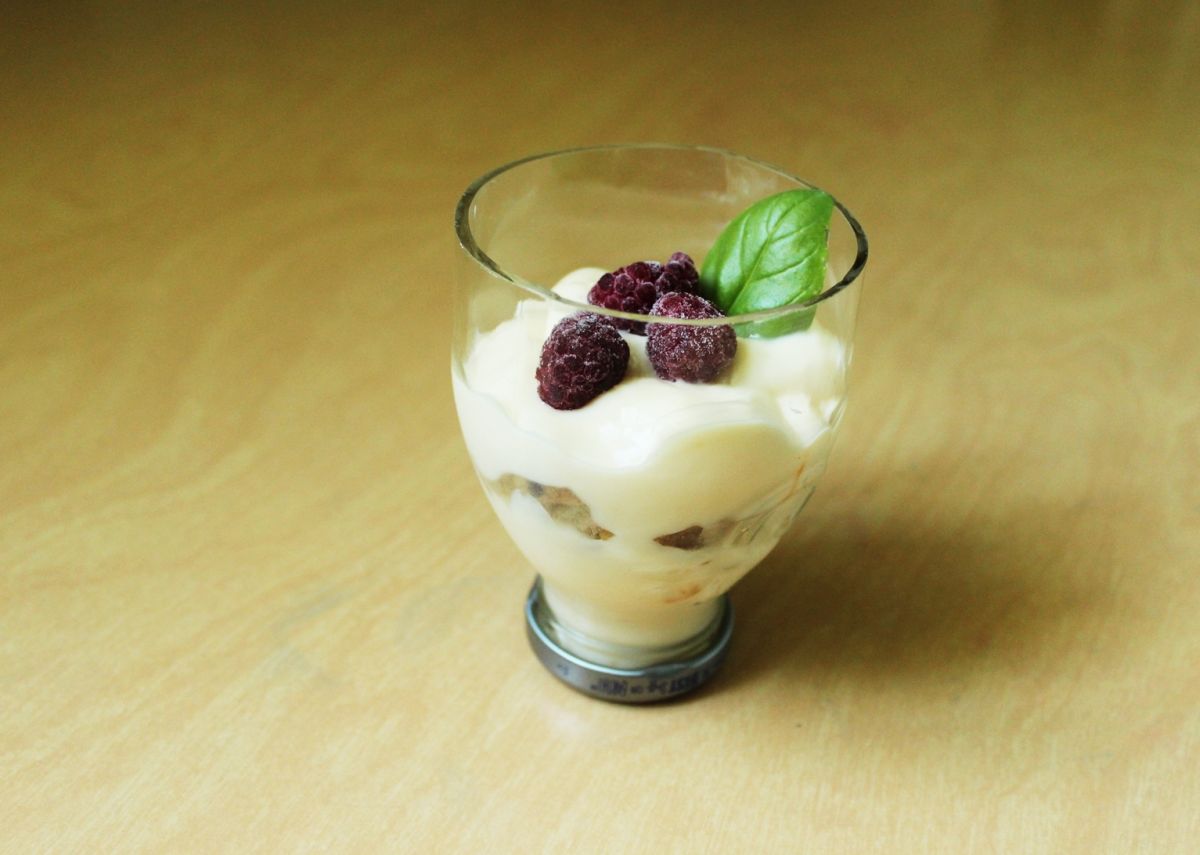
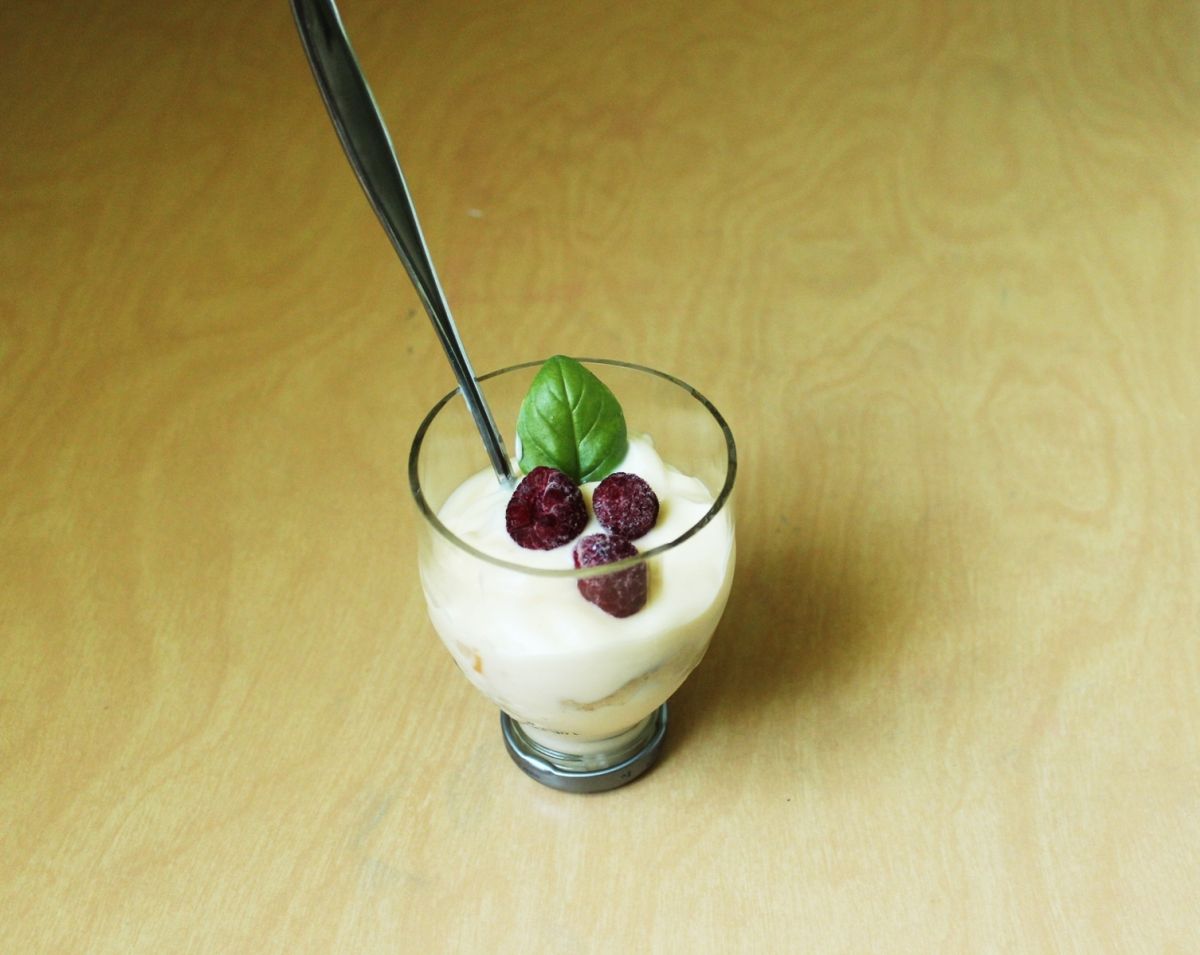
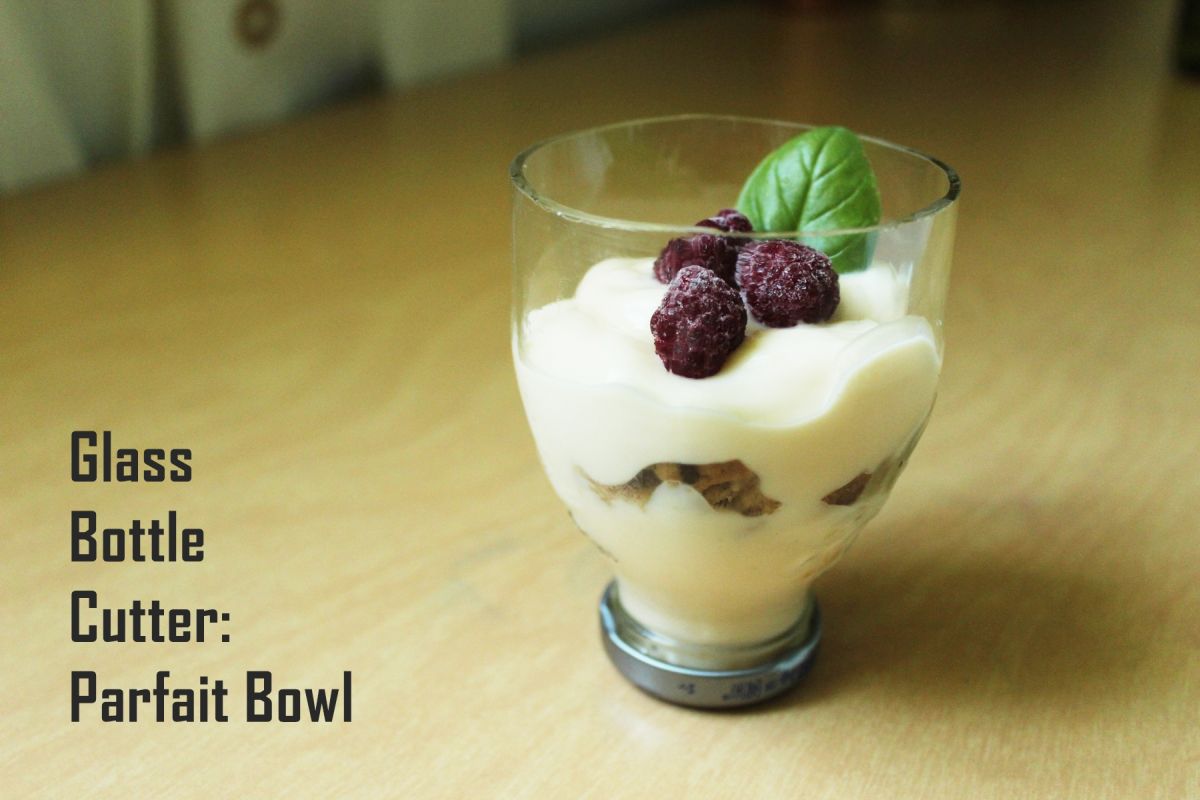
Such a cute little parfait bowl from the top of a Snapple bottle (with the lid screwed on tight).
This bottle cutter was identical – down to the last hex nut – to the Genround bottle cutter.
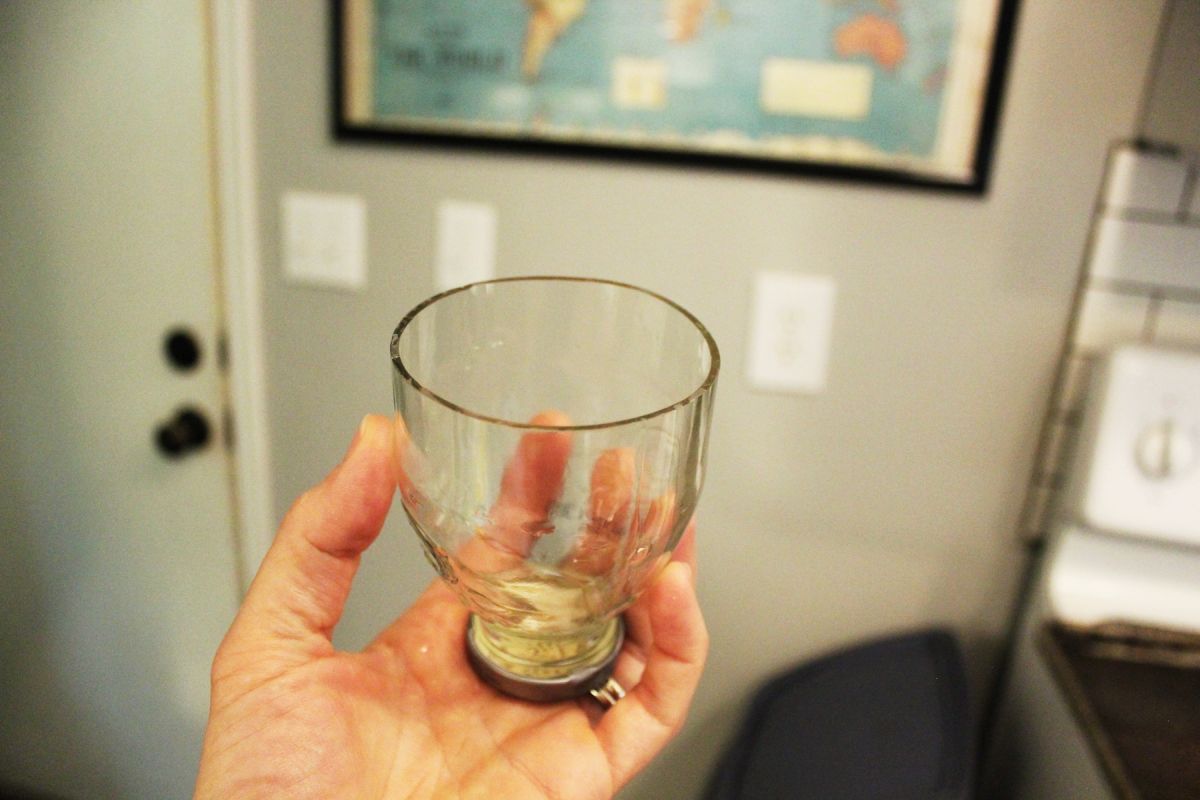
So, follow the instructions for Genround. Smooth out the cut edge very very carefully with your emery paper. Then, with the top half of your cut bottle, screw the lid back on very tight. You could apply some superglue if you want.
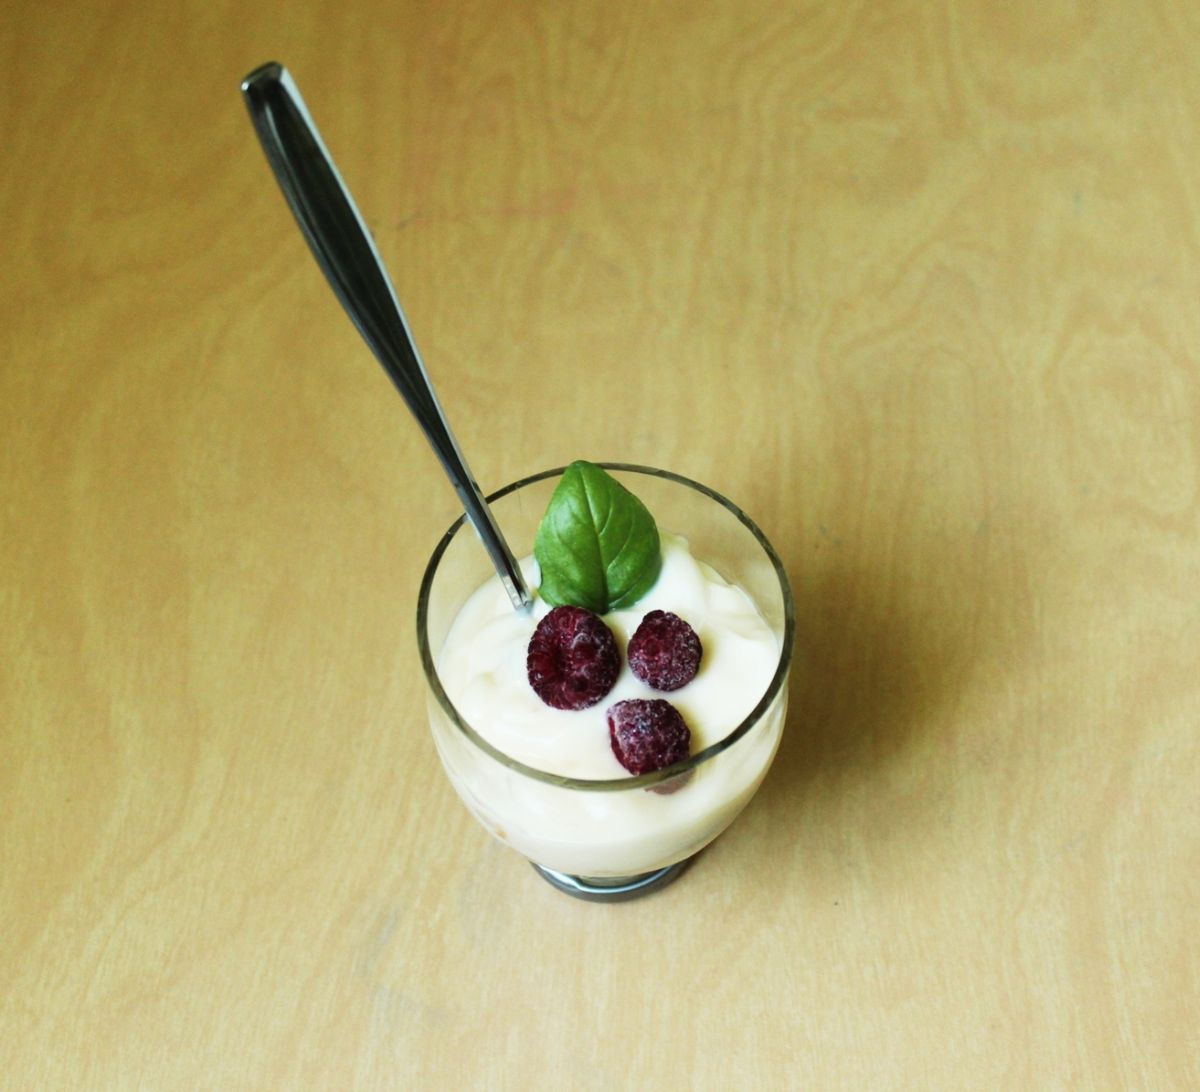
Wash with hot soapy water, then fill with the parfait, ice cream, or pudding treat of your choice. Enjoy!
Bottle Cutter 3: AGP Tek – available here.
Glass Bottle Cutting Projects
Here are the four glass bottle cutter projects.
I think each turned out so pretty in its own way.
There’s something charmingly sensual about a cut glass bottle.
It makes an everyday item seem that much more extraordinary.
Warning
It would be doing you all a great disservice if I didn’t admit that, when glass bottle cutting works it is awesome, but when it doesn’t it is quite frustrating. There were many many “outtakes” during the course of this tutorial.
For some reason, the score line didn’t hold, and the glass break went way off.
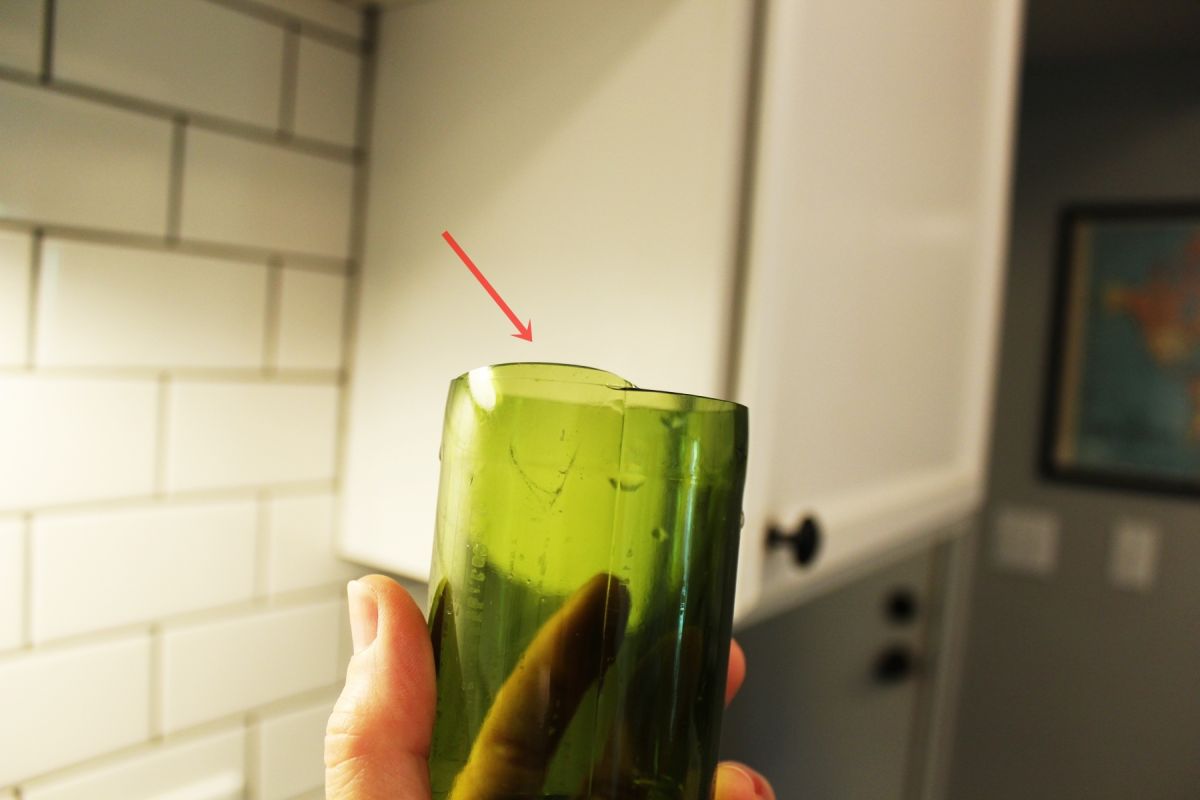
Occasionally the glass “mountained” and other times it “crevassed.”
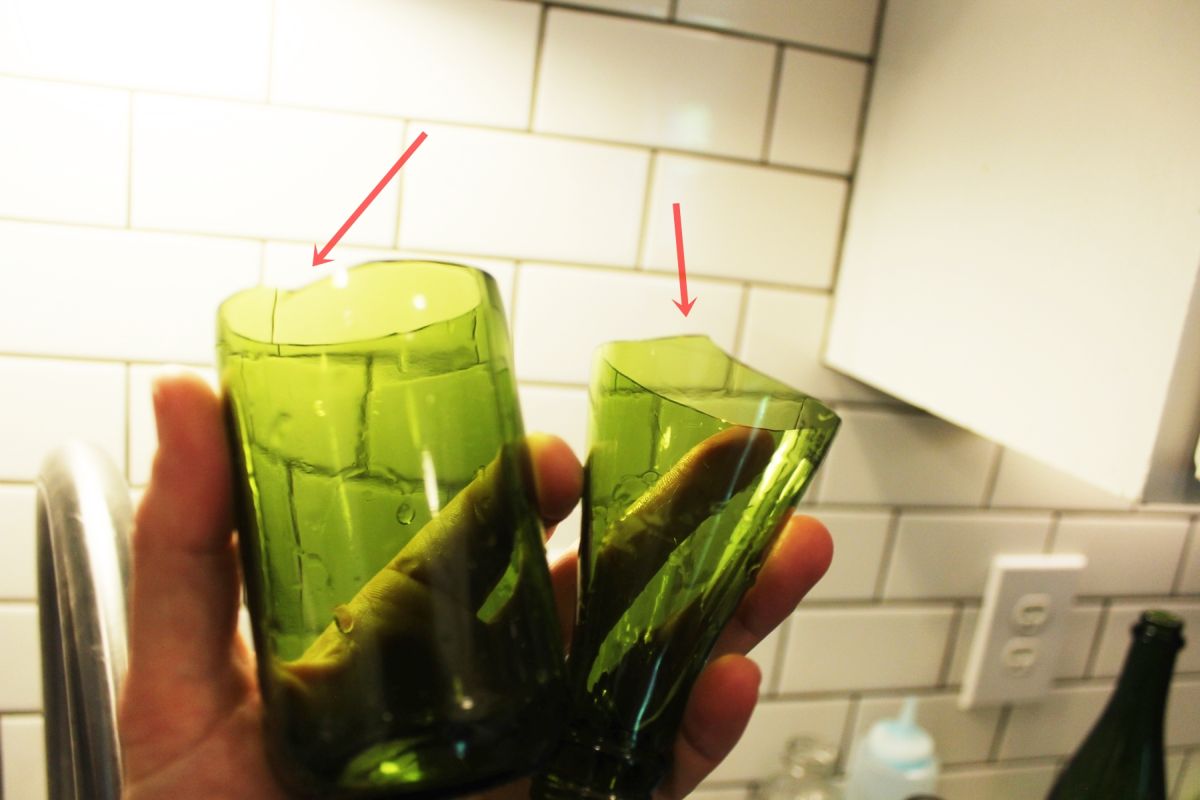
I recommend having more glass bottles than you actually need on-hand, because chances are you’re going to run into plenty of bloopers as you perfect this process.
Unfortunately, I couldn’t get any of these beautiful glass bottles to break well. I thought the tops would make such cute ice cream sundae / parfait bowls.
Once the glass has broken, whether it’s on the score line or not, I found it impossible to get it to break again. I tried the hot/cold method on a score line after a weird break line went way off course, but it didn’t break.Most of the time, the glass seemed like it would be broken perfectly but at the last minute would do something crazy over just one little section of the score line.
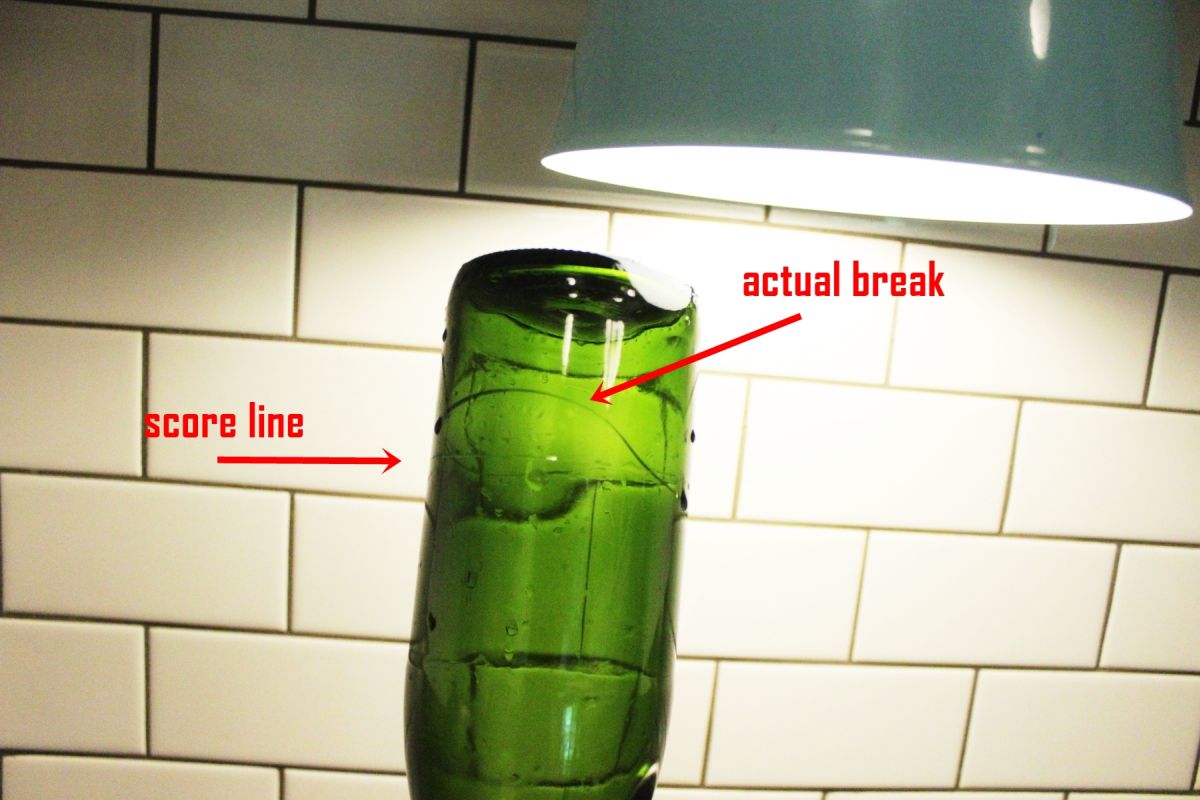
If you see a crack form during the hot/cold water method that doesn’t flow along your score line, you can go ahead and stop the process right there. It’s a goner.
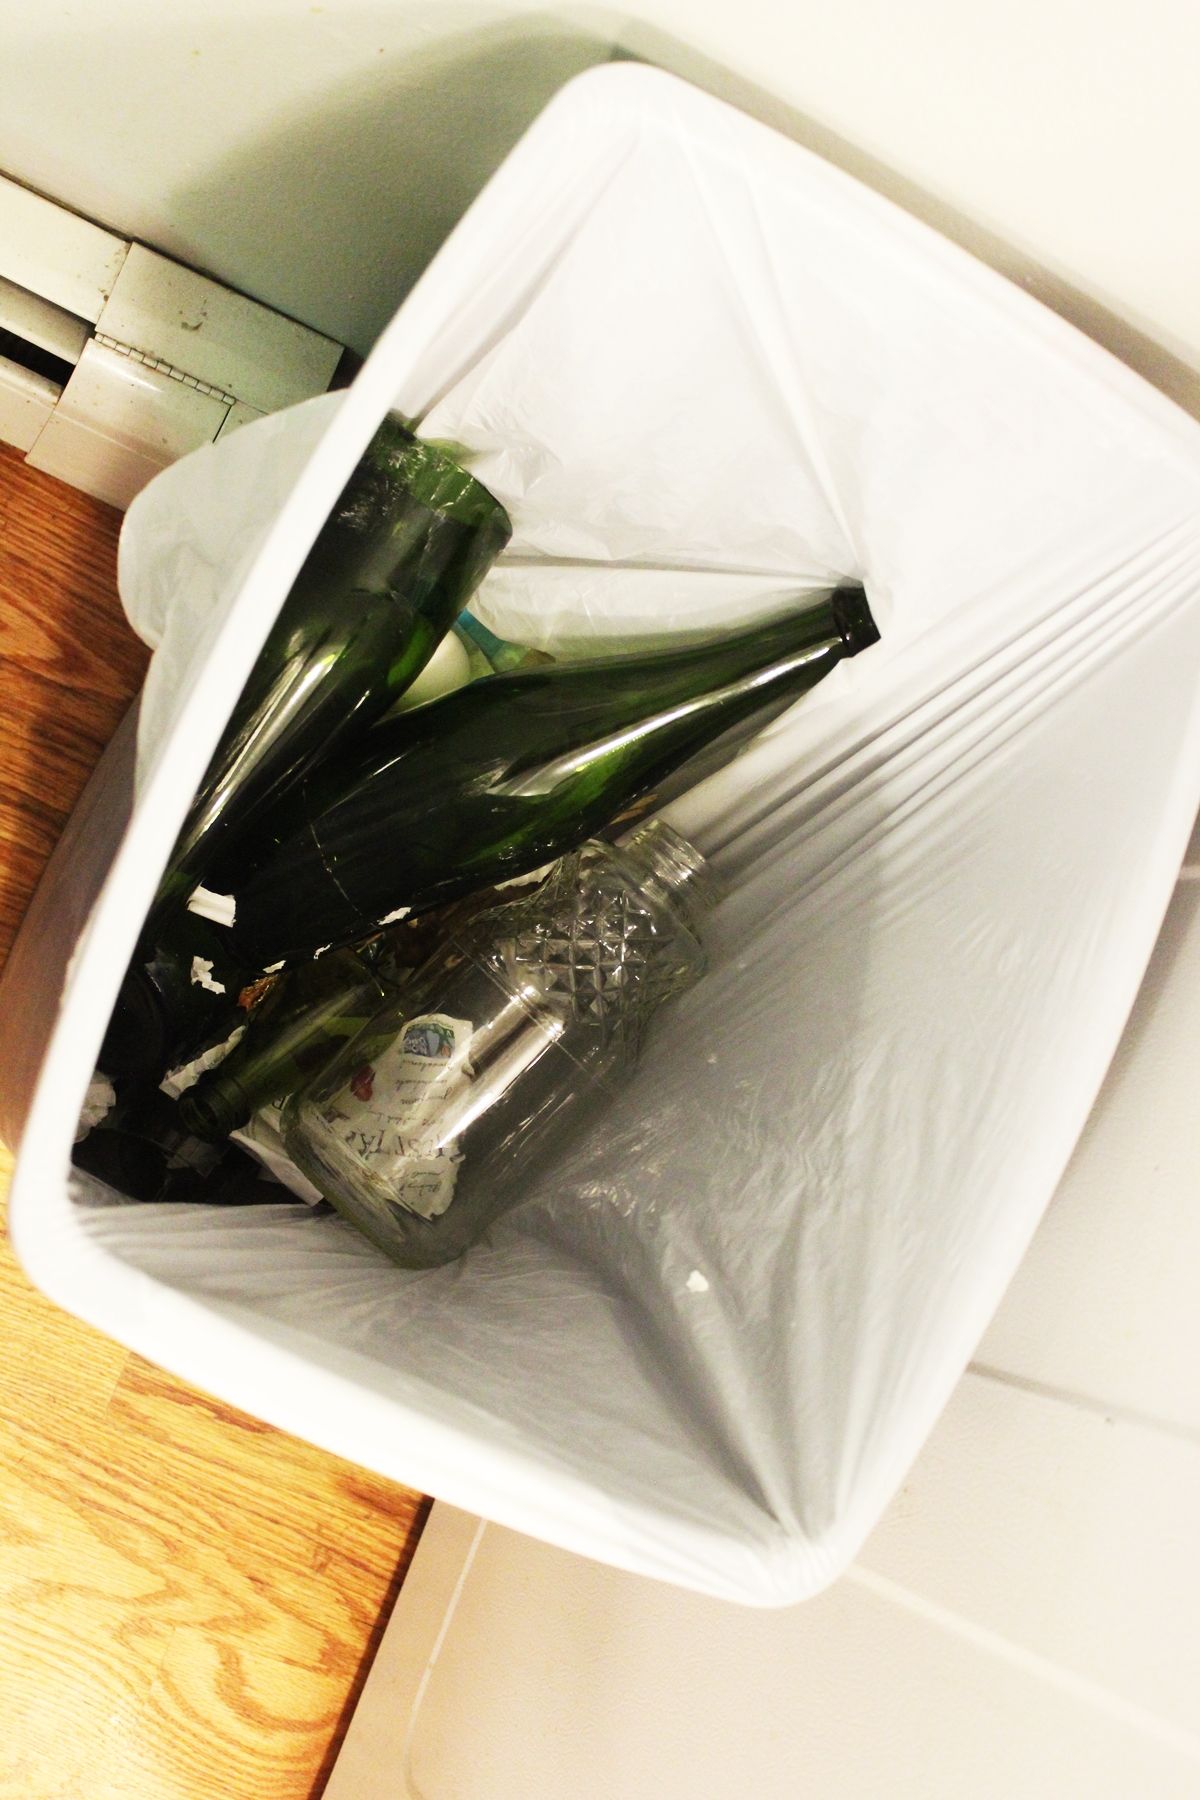
At least the goners are in good company…
Ultimately, my verdict is this: glass bottle cutting isn’t incredibly easy, it can be quite frustrating, but it can also be super rewarding when it works.
The post Glass Bottle Cutter: Basic Tutorial and Product Reviews appeared first on Home Decorating Trends – Homedit.